Why is My 3D Printer Printing in the Air?
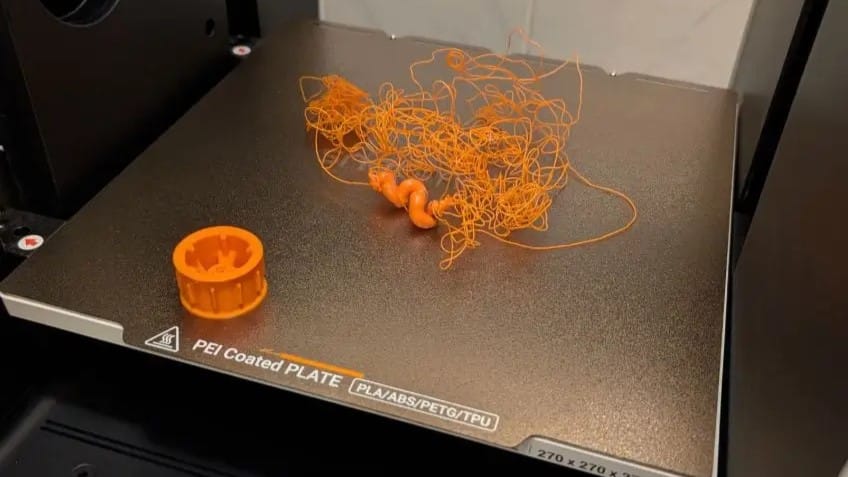
Picture this: you carefully set up a massive 14-hour print project, double-check your initial layers, and head to bed feeling incredibly productive. You wake up the next morning, grab your coffee, and eagerly walk over to your workspace to see your newly minted masterpiece. Instead, you are greeted by a total nightmare. Your printer’s toolhead is happily dancing around in mid-air, while the heat bed is either completely empty or covered in a tragic, tangled pile of plastic spaghetti.
If you find yourself staring at your machine in disbelief, frantically typing "why is my 3d printer printing in the air" into Google, take a deep breath. You are not alone! We have all been there. It is practically a rite of passage in the 3D printing and maker community.
Before you throw the whole machine out the window in frustration, let's break down exactly what is happening under the hood. Generally speaking, "air printing" falls into two distinct categories: either the machine is moving, but absolutely no plastic is coming out of the nozzle (often called "ghost printing" or "dry extrusion"), or the plastic is extruding, but it's dropping into the abyss because there is absolutely nothing underneath to catch it.
In this comprehensive guide, we will act as your trusty troubleshooting buddy to help you diagnose the root cause and fix it for good. (And hey, if your printer is doing other weird things too, be sure to bookmark our 3D printing troubleshooting guide for later!)
Why Your 3D Printer Prints in the Air: Slicer & Model Issues
Sometimes, the hardware of your 3D printer is perfectly fine, but your slicing software was given a physically impossible task. Think of 3D printing like laying bricks to build a house—you cannot just lay a brick in thin air without a solid foundation underneath it. Slicers are incredibly obedient pieces of software; if your digital model tells them to print in mid-air, they will not question it, they will simply try to do it.
Overhang Problems: The 45-Degree Rule Explained
One of the most common reasons for a spaghetti monster is a design that asks too much of gravity. If your model features severe overhangs (angles steeper than 45 degrees relative to the vertical) or attempts long bridges between two distant points without support, gravity is going to win every single time. The freshly extruded, molten filament will just droop down and fall onto the bed, creating a messy bird's nest.
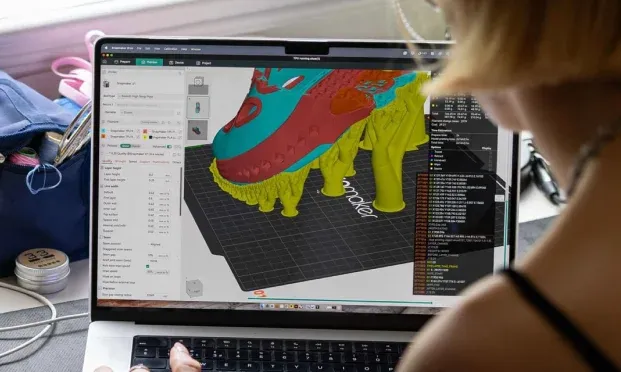
The Smart Fix: Always generate support structures for steep overhangs in your slicer settings. More importantly, get into the habit of using the "Layer View" or "Preview" slider in your slicer before hitting the print button. Scroll through the layers one by one. If you see lines of plastic floating in the digital void with nothing underneath them, you absolutely need to add supports or reorient your model.
Floating Models: Why Your STL Isn’t Touching the Build Plate
Sometimes the problem lies deep within the 3D model itself, especially if you downloaded an open-source file from community websites. A model might appear to be resting perfectly flat on the digital build plate, but due to a microscopic modeling error (often called non-manifold geometry), it might actually be hovering 0.1 mm above the surface. The printer will basically print the first few layers as invisible air. When it finally reaches the model's actual starting Z-height, it happily extrudes plastic right into the empty space.
The Smart Fix: Don't trust your eyes alone. Always use the "Drop to Build Plate" or "Lay Flat" function in your slicing software. This forces the lowest point of the model to be mathematically flush against the virtual print surface, eliminating any hidden gaps.
No Filament Coming Out? Causes of “Ghost Printing”
If your printer is meticulously moving through all the correct motions but the nozzle is completely dry, you are experiencing "ghost printing". The motherboard thinks it is extruding perfectly, but your filament path is throwing a silent strike.
Filament Feeding Issues: Tangled Spools and Grinding Gears
Think of a brand-new spool of 3D printer filament like the wired earbuds you used to keep in your pocket—if you aren't careful, they naturally want to cross over and tangle. If your filament gets cross-wound and stuck tight on the spool, the extruder motor simply cannot pull it.
When this happens, you will often hear a rhythmic "clicking" or "thumping" sound. The extruder gear will just grind against the stationary plastic, carving a little divot into the filament until the gear loses all of its grip. The machine's standard sensors don't know this happened, so it happily keeps moving up the Z-axis, printing nothing but air.
(Pro tip: If your filament has become old and brittle from absorbing room humidity, it can actually snap off completely inside the feeding tube. The machine keeps running, but there is no plastic reaching the hotend. To avoid this, learn how to store your filament properly and prevent moisture.)
Heat Creep in 3D Printing: Why Filament Gets Stuck
Another major mechanical culprit is heat creep. If your hotend cooling fan is underperforming or your room is simply too hot, the heat from the nozzle block travels upward into the "cold zone" of the extruder. This causes the filament to swell, soften, and melt way before it is supposed to, creating a massive, immovable traffic jam inside the narrow metal throat. The solid plastic behind the jam can't push through, resulting in zero extrusion at the nozzle.
The Smart Fix: If your nozzle is completely jammed and the gears are clicking, grab a cup of coffee and calmly follow our 3D printer nozzle cleaning guide. However, if the material is still coming out, just very thinly and inconsistently, you are actually dealing with a different issue entirely—check out our guide on troubleshooting under-extrusion instead.
Z-Offset & Bed Leveling Issues: Printing in the Air After the First Layer
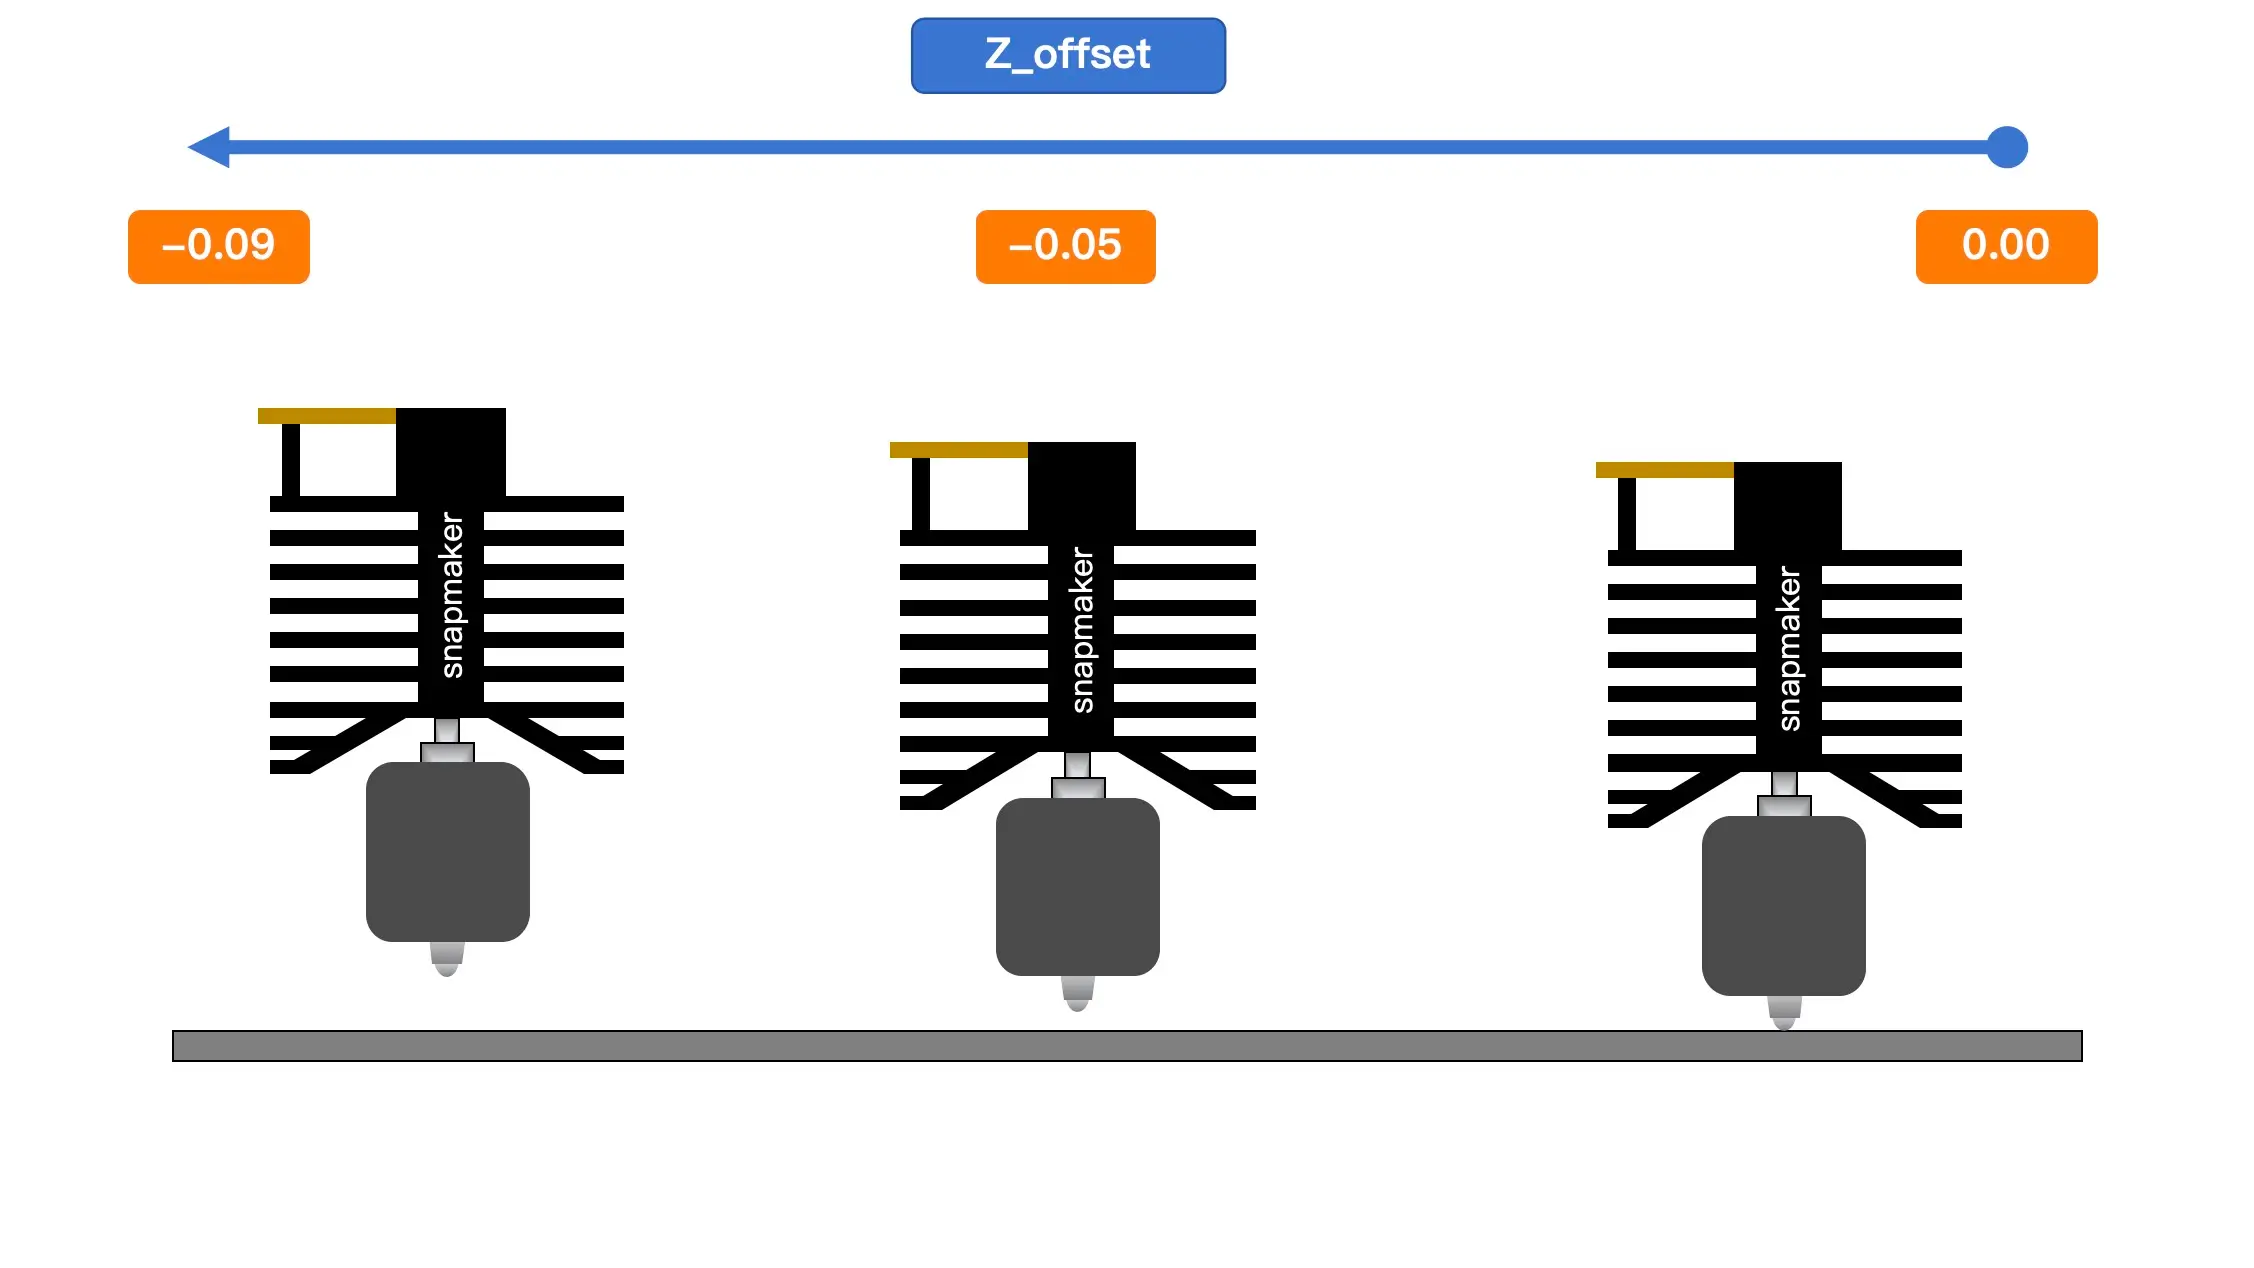
Sometimes, a frustrating air print is caused by a violent physical event that happened right at the very beginning of the printing process. If your Z-offset calibration is configured incorrectly (meaning the printer thinks the bed is lower than it actually is), the nozzle might dive-bomb and crash forcefully into the print bed during the initial homing sequence.
When a heavy impact like this occurs, the downward force can physically compress the bed's leveling springs or shift the Z-axis lead screws, pushing the entire print surface down by a few millimeters. When the printer moves on to print layer two, it thinks it is at the correct, calculated height, but the physical bed has been pushed far away! Consequently, every single layer from that point forward is extruded completely in the air.
The Smart Fix: If you hear a grinding crash at the start of a print, you need to recalibrate your machine immediately. Dive into our guides on what to do when the nozzle is too close to the bed and how to properly level your 3D printer bed to get your foundation solid again.
(Side note: If your printer prints perfectly fine for hours and suddenly shifts completely to the left or right, extruding into the air beside the model, you are dealing with a mechanical layer shift. Here is our dedicated 3D printer layer shift troubleshooting guide.)
A Smarter Way to Reduce Air Printing Issues
While learning to troubleshoot mechanical and slicing issues is part of the 3D printing journey, many newer machines are reducing how often these problems occur in the first place. If you find yourself constantly checking first layers or dealing with failed overnight prints, it may be worth looking at systems designed with more built-in safeguards.
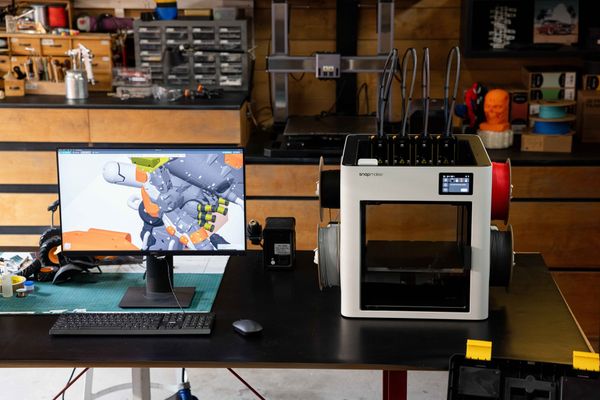
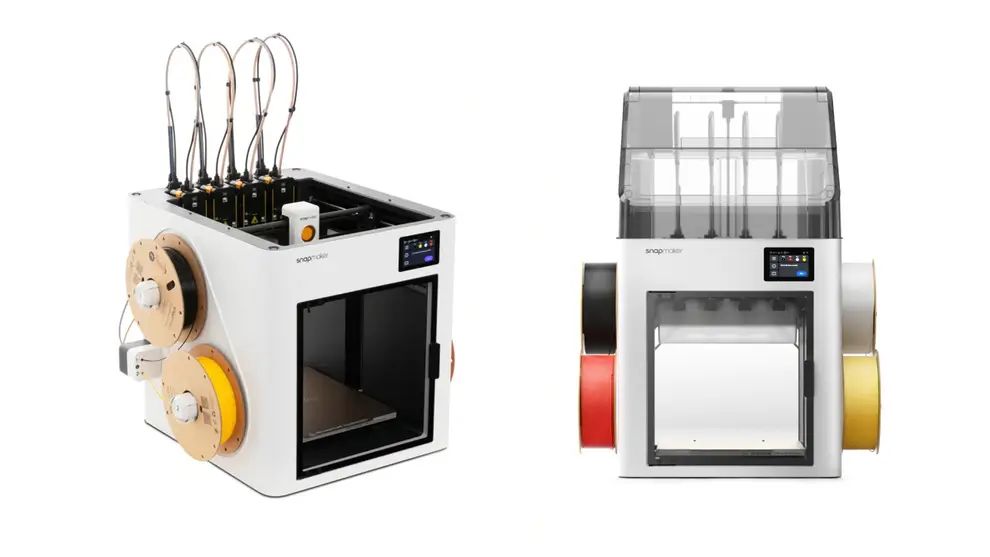
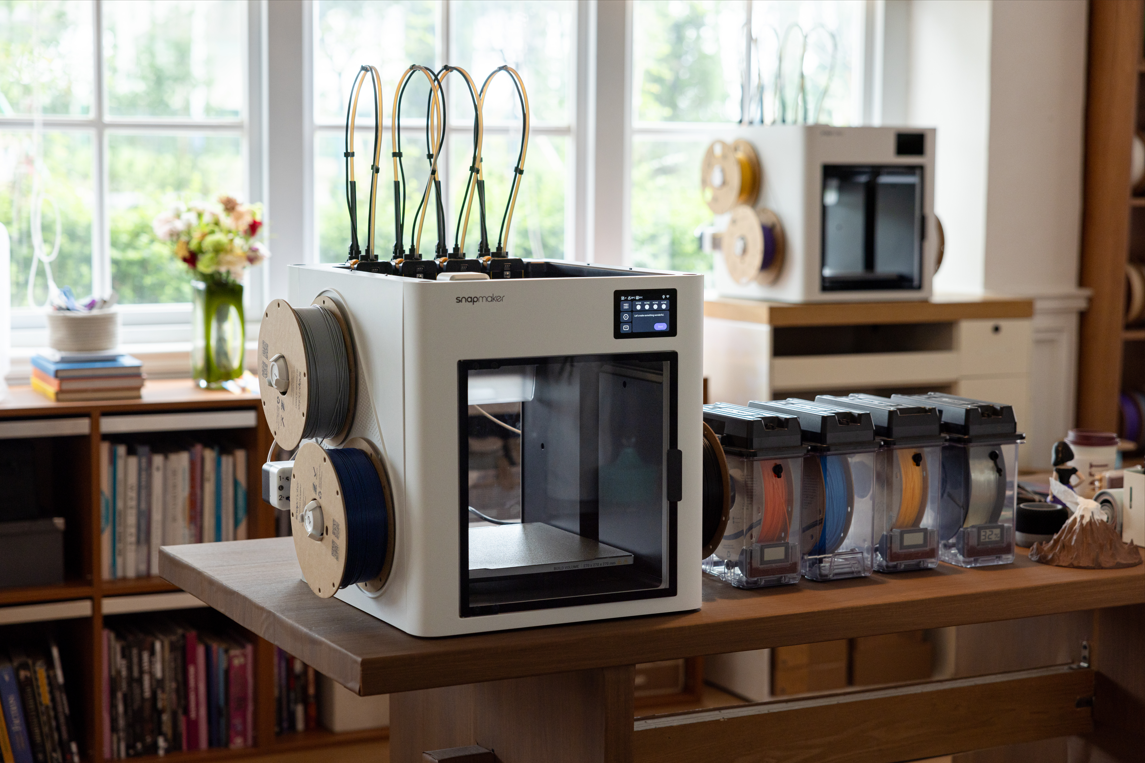
One example is the Snapmaker U1 3D printer, which focuses on minimizing common causes behind “air printing” rather than just helping you fix them afterward.
Filament Flow Monitoring
One common issue behind air printing is that most desktop printers have no way to confirm whether filament is actually being extruded. If a clog, tangle, or grinding issue occurs, the machine typically continues printing in mid-air.
Systems like the U1 introduce filament flow monitoring, which tracks resistance and extrusion behavior during a print. If something goes wrong—such as a blockage or feeding issue—the print can pause automatically rather than continue unnoticed.
Smarter Filament Management
Running out of filament mid-print is another overlooked cause of “printing in the air,” especially during long jobs. Multi-spool management systems with automatic switchover can help prevent this by continuing the print with a backup spool when the primary one runs out.
Features such as material recognition (e.g., RFID-based systems) can also reduce setup errors by automatically matching the correct material profile.
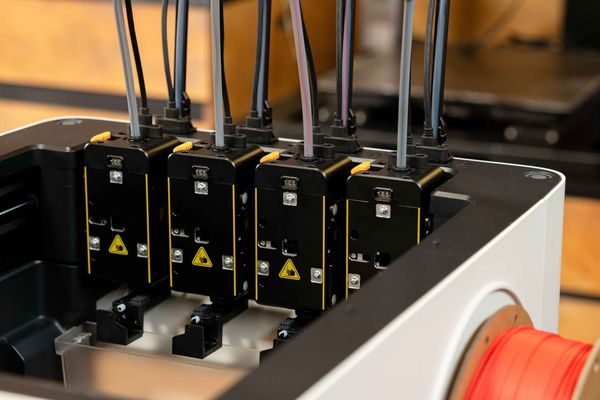
Reducing Clog Risks in Multi-Color Printing
Frequent filament swapping—especially in multi-color prints—is a known cause of clogs and heat creep. Traditional single-nozzle setups repeatedly push and retract filament, increasing the chance of jams over time.
Tool-changing systems with independent hotends offer an alternative approach. Instead of constant filament swapping, each material is handled by its own nozzle, which helps reduce contamination, heat buildup, and flow interruptions during complex prints.
U1 Owner's Corner: Fixing Error Code 0002-0523-0003-0038
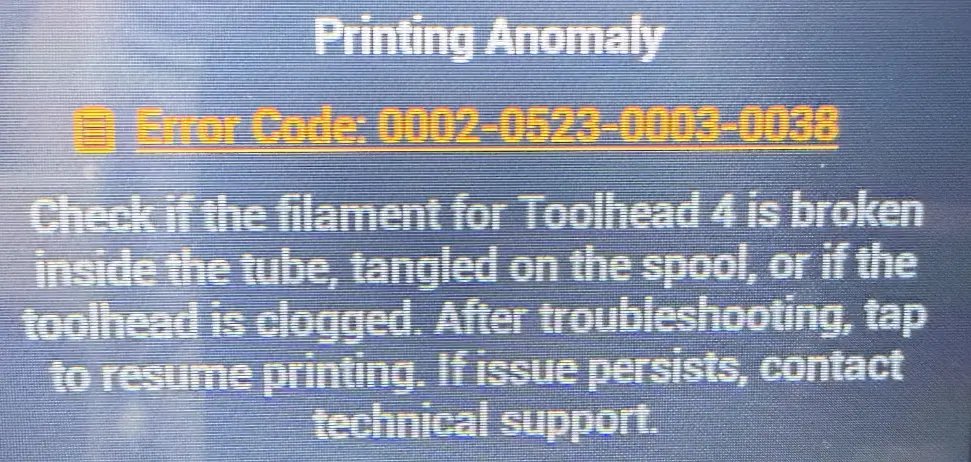
If you are already a proud U1 owner, you might occasionally see a long string of numbers flash on your touchscreen: Printing Anomaly 0002-0523-0003-0038. First of all, don't worry! This isn't a malfunction; this is the U1’s Air Printing Detection actively intervening to save your print from disaster.
Here is how to quickly clear the error and get back to making. For a deeper dive, you can always head over to the official U1 printing anomaly troubleshooting wiki.
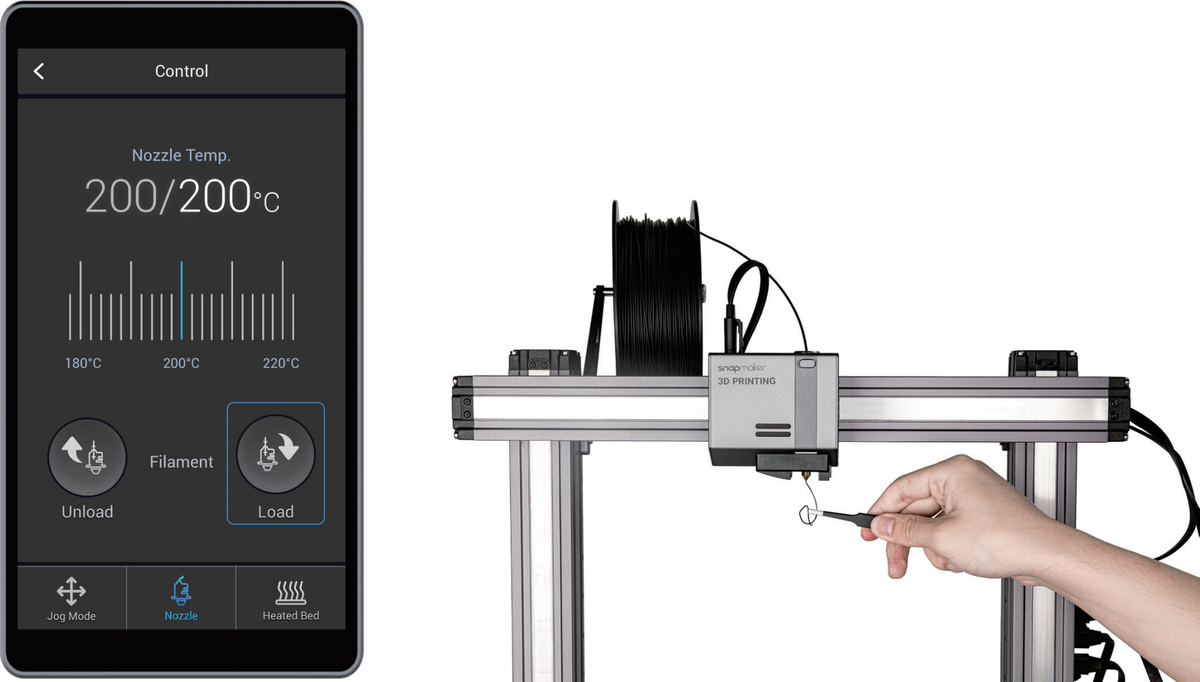
- Check for Tangling: Look at the spool that was currently feeding. If the filament is crossed over itself, gently untangle it to relieve the tension so the feeder can pull it smoothly.
- Check for Clogs: Tap "Continue" on the screen and watch the nozzle closely. If the extruder gears turn but absolutely nothing extrudes, you have a clog in that specific toolhead. Run a quick cleaning cycle.
- Inspect the PTFE Tube: Did your filament snap? Check the translucent filament tube for broken pieces of brittle filament. If you see any, pull them out to clear the path.
- The "Feeder Swap" Trick: If everything looks perfectly fine but the error persists, here is a neat diagnostic trick: swap your left and right filament feeders. If the error code moves to the other side along with the feeder, you know exactly which hardware part is acting up, making it super easy to communicate with our support team for a quick replacement.
Pro Tip: Sometimes, exceptionally soft and flexible filaments (like certain TPUs) can stretch and trigger false alarms in the sensor. Ensure your U1 firmware is updated to at least version 1.1.0, and if needed, you can temporarily lower the Air Printing Detection sensitivity to "Low" in your touchscreen print preferences to get that specific job done.
Happy (and Grounded) Printing!
Dealing with an air-printing 3D printer is undeniably annoying. It tests your patience and wastes your material. However, by understanding the mechanics of your slicing software, maintaining a clear and untangled filament path, and ensuring your bed is perfectly calibrated, you can keep your toolhead firmly grounded where it belongs.
And when you are finally ready to upgrade to a stress-free, "smart friend" kind of workflow, the Snapmaker U1 will be waiting to do all the heavy lifting and monitoring for you.
Happy printing, and may all your first layers stick flawlessly!