How to make PCBs with the Laser Module of the Snapmaker 3-in-1 3D Printers
When we work on our DIY projects, electronic circuit modules may be needed. However, we probably cannot get the module we need in the market. Therefore, we need to build the circuit with a breadboard. PCB is another option that is more compact and good-looking. If you are looking for a way to build
When we work on our DIY projects, electronic circuit modules may be needed. However, we probably cannot get the module we need in the market. Therefore, we need to build the circuit with a breadboard. PCB is another option that is more compact and good-looking. If you are looking for a way to build your own PCBs, this guide can help you.
What we made
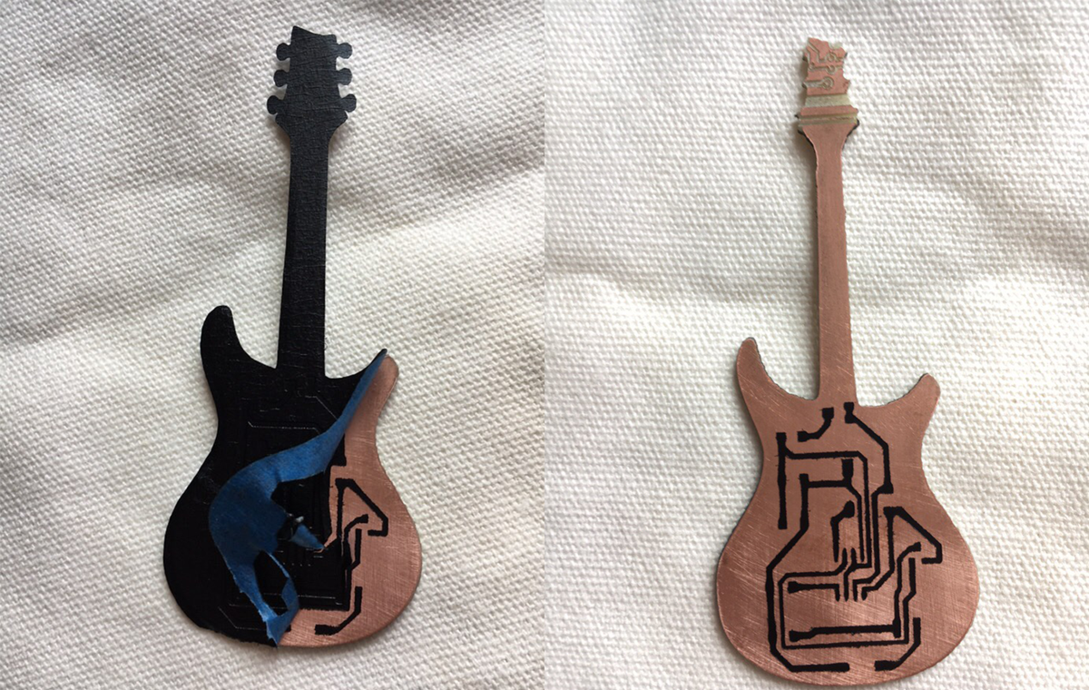
To show you how to make PCBs using the Snapmaker Laser Module, we made a mini electronic musical instrument for example. This instrument is similar to a guitar. The knob in the middle can alter the resistance of the resistor in the circuit, thus changing the sound of the acoustic generator.
Eventually, it can get inflection as musical instruments do.
How we made it
The appearance of the guitar is easy to make with the Snapmaker 3-in-1 3D Printer. Basswood can not only enhance the complete texture of the guitar, but also be engraved with decorations. That’s why we used it to make the top cover of the guitar. We 3D printed the complicated rear cover with filament in wood color.
Now, let’s see how the PCB was made.
0. Prepare the file
Please make sure you transform the PCB photoetching file so that Snapmakerjs could identify it. Because Snapmakerjs can generate G-code from an SVG file, you can export your design as a TOPlayer photoetching file, and then transform it to an SVG file using Inkscape.
Tips: 0.6 mm line width is preferred for effect.
1. Cut the PCB outline with the CNC Module
Tips: Please select Flat End Mill for cutting.
2. Attach masking tapeon the carved PCB.
3. Engrave the prepared circuit with the laser module.
Tips: Please select blue 3M masking tape.
Recommended Parameters:
Snapmaker 1600mW Laser Cutting Module
80% Power, 220 mm/min for Work Speed
The color of the masking tape makes animpact on light absorption, thus it influences the work speed.
If the cut doesn’t live up to your expectation, please reduce the speed or increase the laser power.
4. Tear off the masking tape from the PCB.
5. Spray paint on the circuit for protection.
6. Tear off the masking tape to uncover the part that needs to corrode.
7. Corrode PCB with corrosive liquid.
Tips: The erosion time may vary based on many conditions. The copper foil should be corroded thoroughly.
8. Take out the PCB with a tweezer and wash the corrosive liquid with water.
You are suggested to operate with rubber gloves on for protection.
9. Sand the paint with 1000 grits waterproof abrasive paper.
10. Test the continuity of the circuit.
Tips: Please test it with the continuity test mode of a multimeter. If there is any problem, you can correct the circuit with solder or a scraper.
11. Solder all the electronic components.
12. Assemble the guitar and test its functions.
Done!
All the parts in this project were made by the Snapmaker Original. You can also make bigger "guitars" with the Snapmaker 2.0 A350. Click here to learn more.
What do you think of this guide? If you use the Snapmaker to make PCBs, what will you use it for? Please comment under this blog and let us know!
Much love,
The Snapmaker Team

