Best Glue for PLA: Guide to Bonding 3D Prints
Gluing PLA 3D prints often leads to common frustrations: weak joints, messy residue, and failed assemblies. Choosing the right adhesive is the difference between a brittle disaster and a permanent bond. In this guide, we break down the best glues for PLA and the exact workflow to use them.
The Quick Answer (TL;DR):
- Use Cyanoacrylate (CA) Super Glue Gel for fast, everyday projects and small models.
- Use a Two-Part Epoxy when you need maximum strength for functional or load-bearing parts.
- Consider a solvent-based adhesive for structural assemblies where you want parts to fuse into one solid piece.
Read on for step-by-step preparation and pro tips to achieve clean, durable bonds.
What Glue Works Best for PLA?
When working with PLA, selecting the right adhesive comes down to the specific requirements of your project. Here are the top practical options based on performance and application.
Feature | CA Glue (Super Glue) | Two-Part Epoxy (Adhesive) | 3D Gloop! (Solvent-Based) | Gorilla Glue (Original Polyurethane) |
How it holds (Mechanism) | Polymerization. Acts like an incredibly strong tape to stick surfaces together. | Chemical resin bond. Cures into a hard, rigid plastic layer that mechanically locks parts. | Solvent-welding. Melts the plastic to fuse the mating pieces into one single solid part. | Moisture-activated. Expands into foam to lock pieces together. |
Strength | Medium to Strong. High working strength, but the joint can be brittle and snap if dropped. | Maximum Strength. Extreme structural durability. Can be sanded, drilled, or painted. | Extremely Strong. The fused joint becomes as strong as the print itself. | Strong for wood, bad for plastic. Peels off easily and pushes joints apart. |
Cure Time & Drying Speed | 5–90 sec hold (Instant with activator spray); 24 hr full cure. | 5–30 min handling/working time; 12–24 hr full cure. | 15–30 sec tack; 15–30 min clamp; 6–24 hr full cure. | 1–2 hr clamp; 24 hr full cure. |
Ease of Use | Very Easy. Squeeze, press, and hold. | Messy. Requires precise mixing of resin/hardener and applying with a tool. | Medium. Needs a brush, careful application, and good airflow (smelly). | Hard. Requires water mist, foams up out of the seam, and makes a huge mess. |
Best Overall: Cyanoacrylate (CA) Gel
For most PLA projects, a gel-type cyanoacrylate (CA), or super glue, is the most reliable and efficient choice. Formulations like Loctite Super Glue Gel Control are excellent examples. The gel's viscosity is a key advantage; it won't run down your print, offering superior control for precise application and even providing minor gap-filling capabilities.
- Pros: Strong bond, thick consistency for easy control, widely available.
- Cons: The bond can be brittle; the fast curing time leaves less room for error.
- Good to Know: CA glue can sometimes leave a white, chalky residue on a print called "frosting" or "blooming." This is caused by fumes curing in the air. To prevent this, always work in a well-ventilated area. This simple trick effectively avoids ugly surface marks. Recommended reading: How to Set Up a Workshop.
Pro Tip: Speed Up Your Work with CA Activator
For large assemblies or to improve workflow, consider using a CA activator (or accelerator). It’s a spray that, when applied to a joint, cures the CA glue in seconds, eliminating the need to hold parts together while they set.
Best for Maximum Strength: Two-Part Epoxy
To answer the common question, "What is the strongest way to join 3D prints?", the clear winner for long-term durability is a two-part epoxy. For functional parts that must withstand mechanical stress, its material properties create a more durable bond than any CA glue.
Epoxy works by mixing a resin and a hardener. This initiates a chemical reaction that results in an extremely tough, rigid bond that adheres perfectly to PLA. Once fully cured, epoxy can be easily sanded, drilled, and painted, making it the ideal choice for projects requiring a flawless, professional finish.
- Pros: Extremely strong and durable, excellent for filling gaps, can be post-processed.
- Cons: Requires mixing, can be messy to work with, and has a longer full curing time (often up to 24 hours).
Best for Welding: Solvent-Based Adhesives
Instead of just sticking two surfaces together, solvent-based adhesives (like 3D Gloop! or acrylic cements) chemically melt the PLA. As the solvent evaporates, the two pieces fuse into a single solid part. This creates an incredibly strong, structural bond, though it requires a well-ventilated workspace and careful application.
Best Popular Brand: Gorilla Glue
Yes, but choosing the right type is critical. Gorilla Super Glue Gel is a reliable choice that fits the "Best Overall" category.
However, the original expanding brown Gorilla Glue should be avoided for joining parts. Its polyurethane formula foams as it cures, which can push parts apart and create a weak, messy seam.
How to Glue 3D Prints Together
Many beginners confuse glue stick with assembly adhesive, here is the clear distinction.
Before starting, remember we are discussing bonding adhesives. A glue stick is used exclusively for bed adhesion—to help prints stick to the build plate—and is not suitable for joining finished parts.
Once you have a proper bonding glue like a CA gel or epoxy, follow these steps.
Step 1: Prepare Your Surfaces
Proper surface preparation is the single most important factor for achieving maximum bond strength.
- Sand the surfaces you intend to join using 150-200 grit sandpaper. The goal is to scuff the surface and remove any sheen, creating a microscopic texture that the glue can mechanically lock into.
- Clean the surfaces with a lint-free cloth and Isopropyl Alcohol (IPA) to remove any sanding dust and oils from your fingers. Let it dry completely.
Step 2: Test the Fit
Always dry-fit your parts together before applying any glue. This ensures they align perfectly and reveals any small printing defects you may need to trim with a hobby knife.
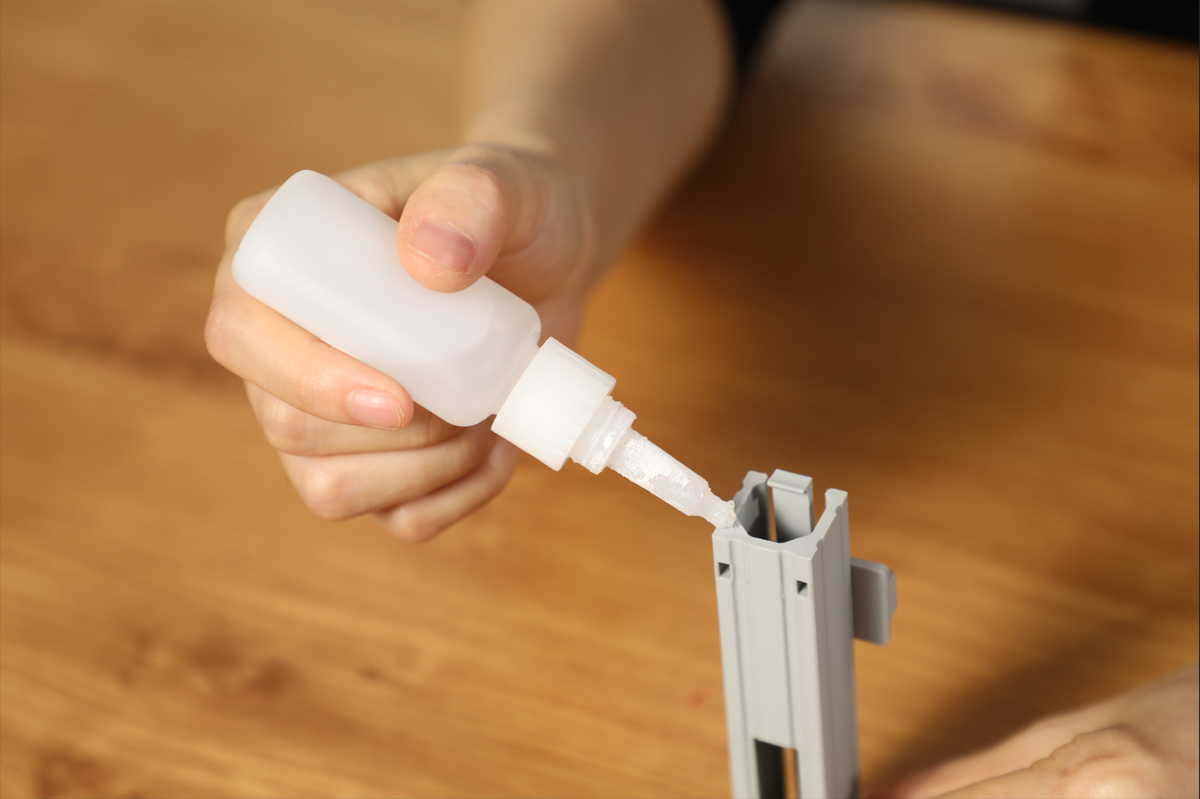
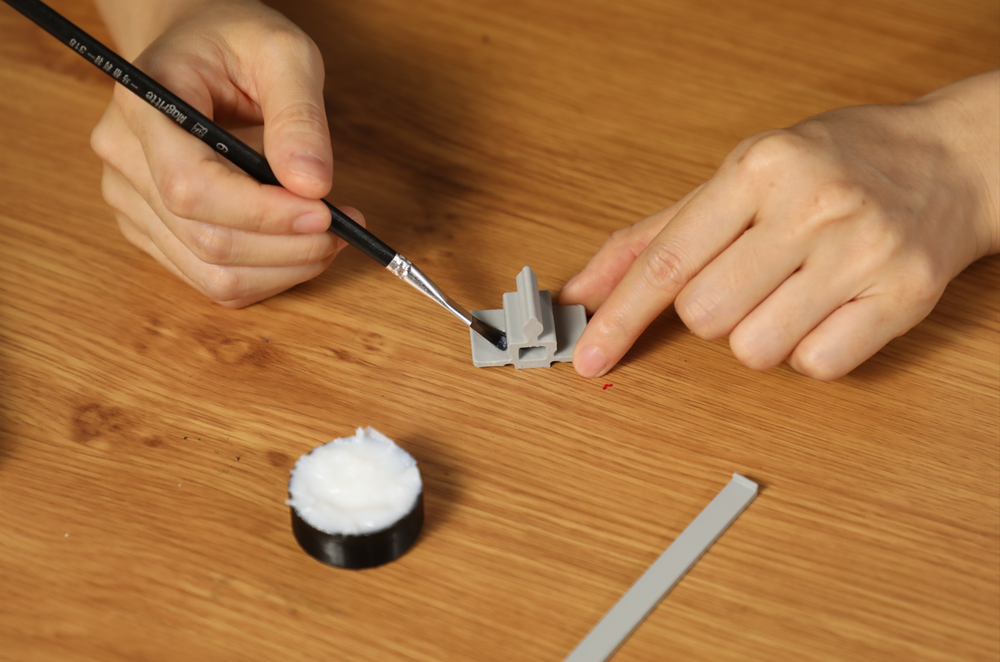
Step 3: Apply the Glue and Assemble
A common beginner-level mistake is using too much adhesive. For a stronger bond, apply a thin, even layer. For maximum precision, dispense a small amount of glue onto a scrap surface and use a toothpick to apply it to your part. Press the parts together firmly and steadily.
Step 4: Clamp and Cure
The parts must be held securely without movement while the bond cures.
- For parts with regular geometry, use spring clamps.
- For complex shapes, painter's tape pulled tightly across the seam or rubber bands are effective clamping solutions.
- Be aware of the full cure time (often 8-24 hours) required for the adhesive to reach maximum strength. Do not put any stress on the part until this period has passed.
Step 5: Verify the Bond (Testing)
Once the full curing time has passed, it’s crucial to verify the integrity of your joint before putting the part to use.
- Visual Inspection: Examine the seam closely. It should be tight and consistent. If you see significant gaps, you may need to fill them with a CA glue and baking soda mixture or sand them flush.
- The Stress Test: For functional parts, apply gentle but firm pressure against the direction of the expected load. The part should flex as a single solid unit without any clicking sounds or movement at the joint.

Pro Tip: Destructive Testing. If you are printing a critical, load-bearing assembly, print two small scrap pieces using the same PLA and infill settings. Glue them together using your chosen method and try to physically break them apart. If the glue joint holds but the PLA plastic breaks around it, you have achieved maximum bond strength.
Pro Tips for Bulletproof 3D Print Bonds
To ensure the strongest possible assemblies, it is essential to look beyond basic gluing and avoid common pitfalls like trying to "weld" standard PLA with acetone—a method that is highly unreliable since pure PLA is remarkably resistant to it. Instead, stick to proven adhesives and supercharge your CA glue joints by sprinkling a little baking soda onto the still-wet seam; this acts as a rapid catalyst and filler, instantly curing into a sandable, rock-hard reinforcement. However, the ultimate secret to unbreakable prints happens before you even slice the model. By designing small holes into the mating faces in your CAD software, you can insert short pieces of raw filament or metal rods to act as alignment pins during assembly. These pins bear the brunt of the physical shear stress and lock the pieces in perfect alignment, allowing your glue to function as an incredibly powerful securing agent rather than bearing the entire load alone.
Beyond PLA: Glues for Other Filaments

Different plastics react differently to chemicals. If you print with materials other than PLA, your adhesive strategy needs to shift:
- ABS: Standard super glues work, but the absolute best method is an Acetone Slurry (ABS Juice). Because ABS dissolves easily in acetone, you can brush pure acetone (or a mix of acetone and scrap ABS) onto the joints to chemically weld them together, much like 3D Gloop does for PLA.
- PETG & TPU: These materials are notoriously chemically resistant. Solvents and smoothing agents won't melt them. Your best bet for bonding PETG or TPU is a high-quality CA Glue or a flexible Polyurethane adhesive (like E6000 for TPU) that can bend with the material.
3D Print Bonding: Assembly Glue vs. Bed Adhesion
Don't confuse assembly glue with bed adhesion helpers. Assembly glues (like CA gel, epoxy, or 3D Gloop!) create permanent structural bonds used exclusively after printing to join separate parts. Conversely, bed adhesives (like glue sticks or hairspray) are temporary, water-soluble solutions applied to the build plate before printing just to help the first layer stick.
Using a regular glue stick to assemble parts will cause your model to snap under the slightest pressure. If your prints are warping or detaching mid-print instead, check out our guide on Ways to Fix 3D Print Not Sticking to Bed to lock down your settings.
For complex multi-part builds, swapping tips with experienced makers on the Snapmaker Forum is the fastest way to get frontline, practical advice. You can also consult the official technical guides on the Snapmaker Wiki for exact machine profiles, or explore the Snapmaker blog website itself, which is packed with a massive collection of high-quality guides and creative ideas.
Conclusion
Success with gluing PLA comes down to two things: choosing the right adhesive for the job and executing the proper technique.
- For most projects, a CA gel offers the best combination of speed and strength.
- For maximum durability on functional parts, use a two-part epoxy.
By pairing the right material with a disciplined workflow, you can achieve strong, clean, and professional bonds for all your 3D printing projects.
FAQs on Glue for 3D Prints
Which one should a beginner buy?
If you are just starting out with 3D printing, buy CA Glue (Super Glue) first. It is cheap, sold everywhere, dries instantly, and is more than strong enough for basic models, toys, and display pieces. Only upgrade to 3D Gloop if your prints keep breaking at the seams.
Why "3D Gloop" is Special?
Normal glues (like CA glue or Gorilla glue) just sit between two pieces of plastic like a layer of tape. If you drop the model, the glue layer often cracks.
3D Gloop is actually a chemical solvent. When you brush it onto a plastic print (like PLA or ABS), it temporarily turns the plastic surface into liquid mud. When you press two pieces together, their melted plastics mix. Once the chemical evaporates, the two pieces literally become one single solid piece of plastic.
Can PLA be glued with superglue?
Yes. Superglue acts like a highly durable layer of tape between two plastic pieces and is the most popular choice for PLA. For instant results, pair it with a CA activator spray. Just be aware that superglue joints can be brittle if the model is dropped.
Is Gorilla Glue or E6000 safe on PLA?
Yes, but choose carefully. Gorilla Super Glue Gel is excellent for PLA, but avoid the original brown Gorilla Glue—it expands into a messy foam that pushes parts apart. E6000 is also safe, but it cures flexibly; it's better for gluing PLA to fabric than for making rigid plastic-to-plastic assemblies.
Can I use acetone to glue PLA like I do with ABS?
No. While pure acetone is perfect for melting and chemically welding ABS prints together, standard PLA is highly resistant to it. To physically melt and fuse PLA parts into one single solid piece, you must use a specialized solvent like 3D Gloop! or acrylic cement.