The Ultimate Guide to 3D Printing Post-Processing: Methods, Materials, and Safety

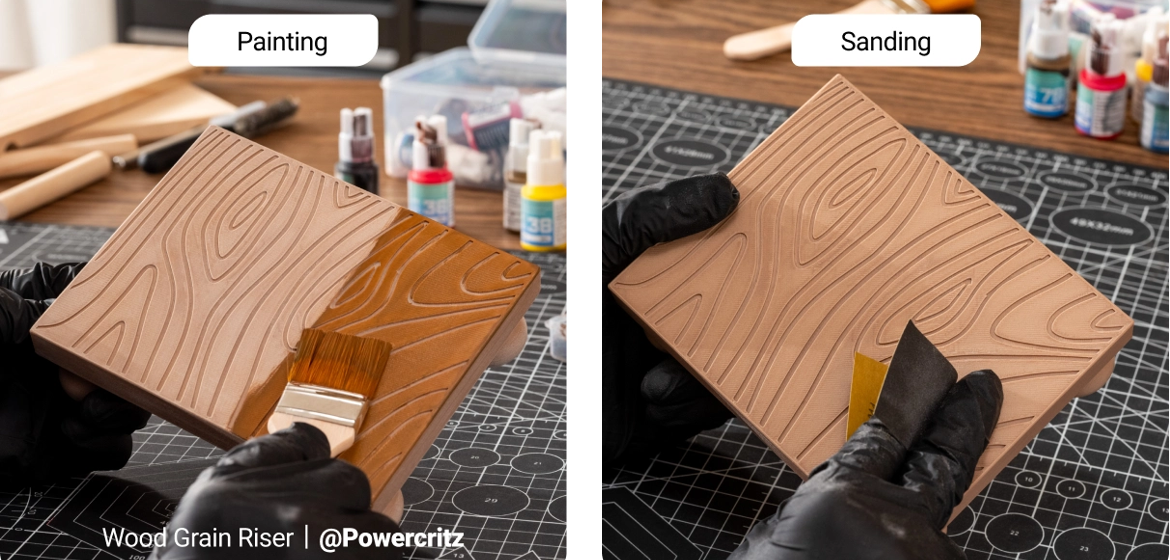
Let’s be honest: peeling a fresh print off the build plate is incredibly satisfying, but it’s rarely the finish line. Fresh off the printer, parts often suffer from visible layer lines, rough support scars, or lack the mechanical strength required for functional, real-world applications.
Bridging the gap between a raw 3D print and a professional-grade, injection-molded-quality part requires a solid grasp of 3D printing post-processing. Whether you're an engineer needing tight dimensional tolerances or a maker crafting cosplay armor, this ultimate guide covers the workflows, materials, tools, and crucial safety protocols you need to level up your manufacturing game.
3D Printing Post-Processing at a Glance
- Core Goals: Remove support marks, hide layer lines, increase mechanical strength, waterproof prints, and achieve professional aesthetics.
- Typical Workflow: Print → Support Removal → Sanding → Painting → Coating → Final Inspection
- Estimated Time: 10 minutes (basic cleanup) to several hours (mirror-finish polishing).
- Difficulty: Beginner to Advanced.
Why Post-Processing Matters
Post-processing isn’t just about making things look pretty—it fundamentally alters the physical properties of your prints.
- Smoother Finish: Eliminates Z-axis layer lines, resulting in an injection-molded appearance.
- Stronger Parts: Thermal treatments lock polymer chains into place, increasing overall tensile strength and Heat Deflection Temperature (HDT).
- Dimensional Accuracy: Precision sanding and gap filling ensure perfect mechanical fit for multi-part assemblies.
- Specialized Finishes: Seals porous surfaces for fluid handling, or applies conductive layers for electronics.
Quick Start: Typical 3D Printing Post-Processing Workflow
While specific steps vary by material and technology, a professional post-processing workflow generally follows this reliable sequence:
- Support Removal
- Cleaning/Washing
- Deburring
- Gap Filling
- Wet Sanding
- Chemical Smoothing (Optional)
- Thermal Annealing (Optional)
- Primer
- Painting
- Protective Coating
- Inspection
What is 3D Printing Post-Processing?
In the additive manufacturing industry (governed by standards like ISO/ASTM 52900), post-processing refers to any operation performed on a printed part after it is removed from the machine.
It encompasses a massive ecosystem of techniques: mechanical preparation (like sanding and deburring), chemical alterations (like solvent vapor smoothing), thermal treatments (like annealing and UV curing), and aesthetic finishes. It is the essential science of turning a rough, fused prototype into a highly functional end-use product.
Post-Processing Starts Before You Print
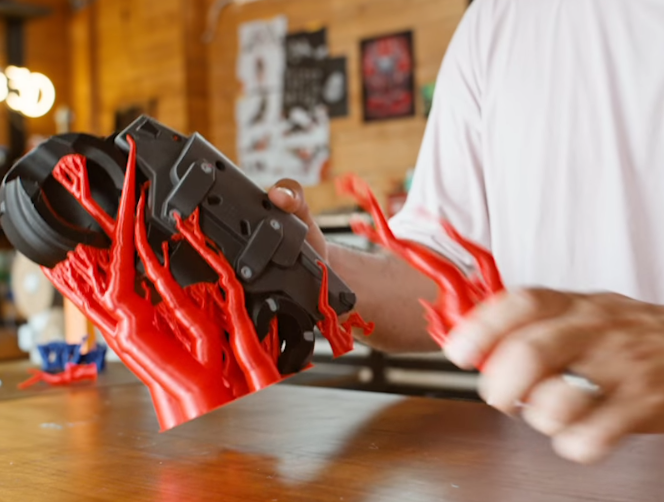
The best post-processing hack? Don't do it unless you have to. A highly optimized print requires a fraction of the finishing work.
Advanced slicers—including Snapmaker Luban and other modern slicing software—allow finer control over orientation, support placement, and layer height. Angling a part so that supports generate only on non-critical, hidden faces saves hours of manual labor.
Because smoother surfaces naturally require less sanding, filling, and finishing, improving print quality before a job starts often eliminates hours of tedious work later. Additionally, properly configured tree supports reduce contact points, making cleanup faster while leaving significantly fewer visible support scars on complex overhangs.
How to Choose the Right Post-Processing Method
Feeling overwhelmed by the options? Let your end goal dictate your method:
- If your goal is hiding layer lines on a budget: Stick to mechanical wet sanding and a good automotive filler primer.
- If your goal is a glossy, injection-molded look (using ABS/ASA): Vapor smoothing is your best bet.
- If your goal is maximum heat resistance for functional parts: Opt for thermal annealing in a controlled oven.
- If your goal is a premium, metallic finish: Explore advanced epoxy coatings or real metal plating.
Best Tools for 3D Printing Post-Processing
A craftsman is only as good as their tools. Before diving into the techniques, ensure your workbench is equipped with the essentials:
- Flush Cutters & Needle-Nose Pliers: For precision support snipping.
- Deburring Tool: Features a swivel blade perfect for stripping away "elephant foot" on the first layer.
- Automotive Wet/Dry Sandpaper: A multi-pack ranging from 220-grit to 3000-grit.
- Rotary Tool (Dremel): Used on low RPMs for rapid material removal or buffing.
- PPE (Personal Protective Equipment): Nitrile gloves, safety goggles, and a P100 respirator mask.
Core Post-Processing Techniques (Step-by-Step)
Here is how to execute the industry's most common post-processing workflows safely and effectively.
Step 1. Support Removal & Dissolving
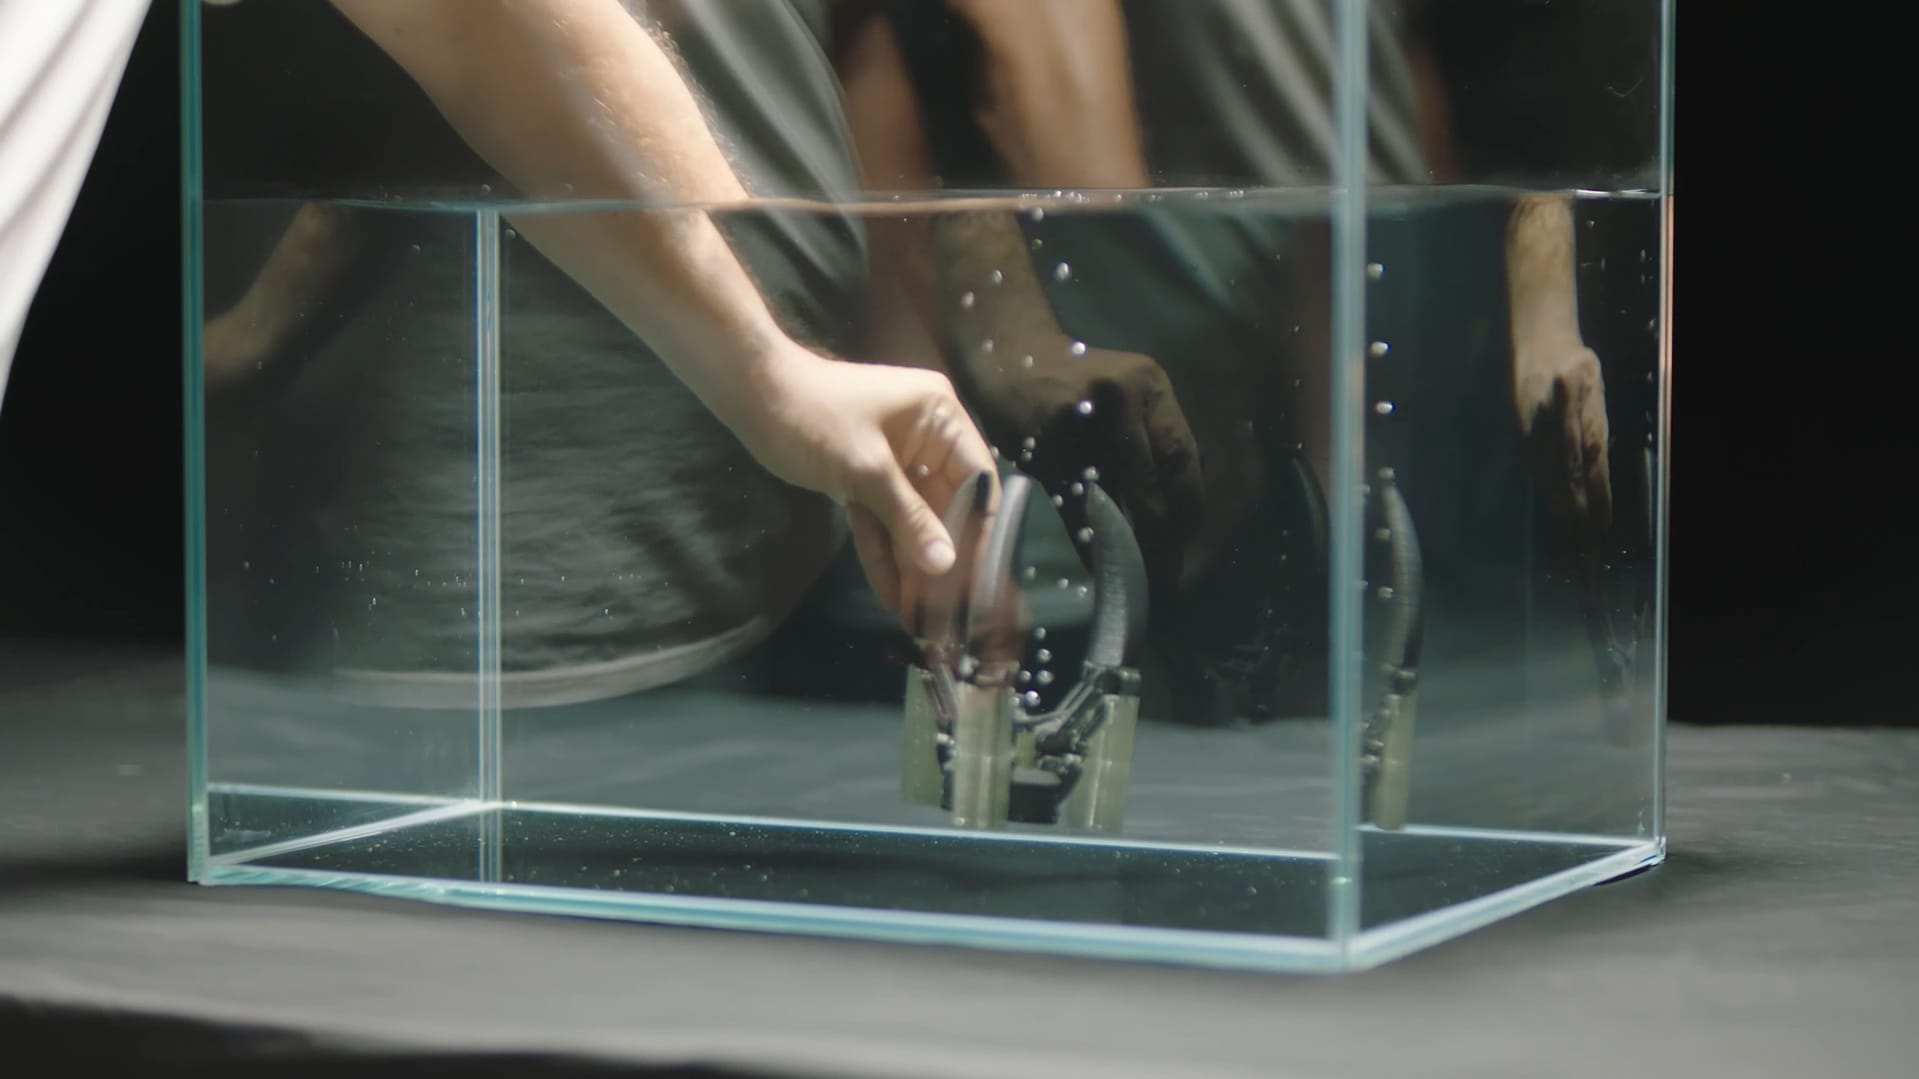
For standard setups, use flush cutters to carefully break away supports. Delicate overhangs often benefit from slower, staged support removal rather than forcing large sections off at once, which can tear the primary wall.
Step 2. Cleaning and Washing
For Resin (SLA/DLP) users, this is mandatory. Prints must be washed in Isopropyl Alcohol (IPA) to strip away uncured liquid resin before UV curing.
Safety Tip: Uncured resin is a potent skin sensitizer. Always wear nitrile gloves (not latex, which degrades in IPA) and safety goggles when handling green resin parts and wash stations.
Step 3. Deburring and Gap Filling
Use a deburring tool to quickly trim sharp brims. If you are joining multiple printed parts together, use cyanoacrylate (superglue) mixed with baking soda or automotive body putty to fill the seams, curing them solid before sanding them flush.
Step 4. Wet Sanding
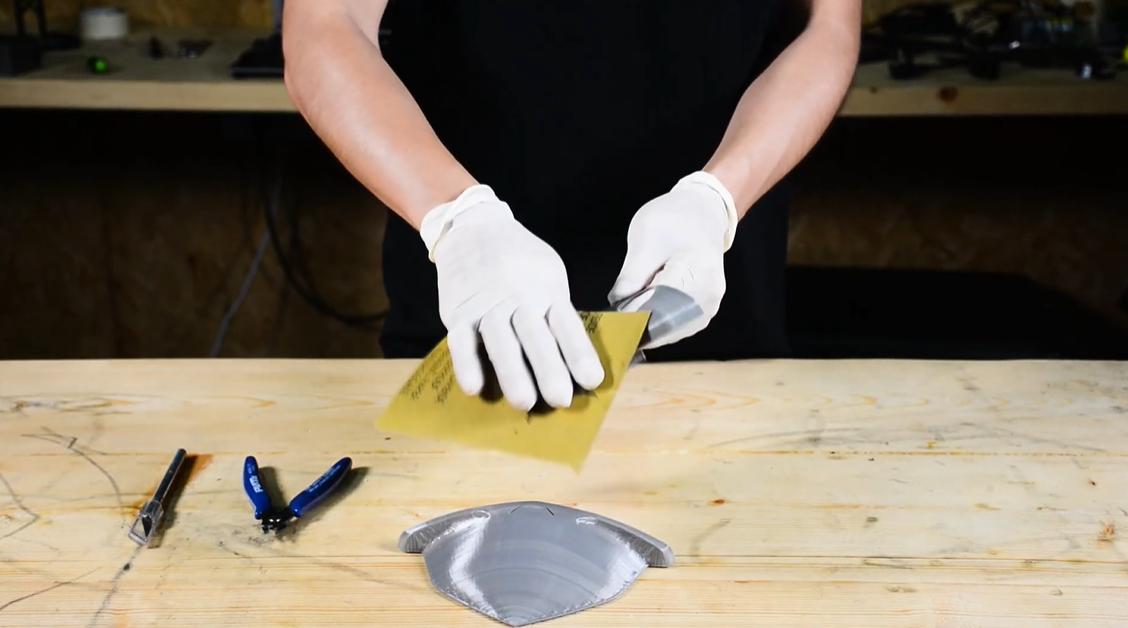
Mechanical abrasion is the backbone of post-processing. However, dry sanding thermoplastics like PLA generates friction heat, turning the plastic into a gummy mess that ruins your part. Always wet sand. Use water mixed with a drop of dish soap to lubricate the surface. Sanding and smoothing 3D prints typically progresses from coarse grits (220) for shaping to finer grits (1000+) for surface refinement.
Safety Tip: If you are sanding Carbon Fiber (CF) or Glass Fiber (GF) reinforced filaments, wet sanding is strictly mandatory. Inhaling microscopic, fractured composite fibers poses serious long-term respiratory risks.
Step 5. Chemical & Vapor Smoothing
Exposing prints to solvent vapor slightly melts and reflows the outer polymer chains, erasing layer lines entirely. Acetone smoothing is the gold standard for ABS and ASA.
Safety Tip: Be highly skeptical of tutorials suggesting Dichloromethane (DCM) or THF to smooth PETG or PLA. These are highly aggressive, toxic, and suspected carcinogenic chemicals that require laboratory fume hoods.
Solvent Compatibility Table
Material | Safe/Effective Solvent | Solvents to Avoid |
PLA | Ethyl Acetate (Slow, requires caution) | Acetone (Turns rubbery), DCM (Highly toxic) |
ABS / ASA | Acetone | N/A |
PETG | None recommended for home use | DCM, THF |
HIPS (Support) | D-Limonene (Dissolves completely) | Acetone |
Step 6. Thermal Annealing
Annealing involves baking a thermoplastic part in an oven just above its glass transition temperature (Tg). This allows the polymer chains to reorganize into a semi-crystalline state, massively boosting its strength. Parts will experience slight volumetric shrinkage (typically 2-5%), so you must scale your model in the slicer beforehand to compensate.
Step 7. Priming and Painting
Paint hates bare plastic. Spray your sanded part with an automotive filler primer (usually polyurethane-based) to act as a micro-filler. Once dry and lightly sanded, you can apply acrylics via airbrush or hand-painting.
Step 8. Protective Coatings & Advanced Finishes
Want to skip sanding altogether? Brush on a two-part epoxy resin (like XTC-3D). It self-levels, fills layer lines, and cures into a hard, glossy shell. Because it seals micro-porosity, epoxy coating is an excellent way to make a 3D print watertight. For next-level aesthetics and conductivity, electroplating adds a genuine metallic surface rather than simply imitating one with paint.
Post-Processing by Material (Compatibility Matrix)
Not all materials react the same way to heat, friction, and chemicals. Use this matrix to guide your strategy:
Material | Sanding | Vapor Smooth | Annealing | Painting | Difficulty |
PLA | ★★★★★ (Wet only) | ★☆☆☆☆ | ★★★★★ | ★★★★★ | ★★☆☆☆ |
ABS / ASA | ★★★★★ | ★★★★★ (Acetone) | ★★★☆☆ | ★★★★☆ | ★☆☆☆☆ |
PETG | ★★★☆☆ | ★☆☆☆☆ (Toxic) | ★★★★☆ | ★★☆☆☆ | ★★★☆☆ |
TPU | ★☆☆☆☆ | ★☆☆☆☆ | ★☆☆☆☆ | ★☆☆☆☆ | ★★★★★ |
Nylon (PA) | ★★★★☆ | ★★☆☆☆ | ★★★★★ | ★★★★☆ (Dye) | ★★★☆☆ |
Resin (Standard) | ★★★★☆ | ★☆☆☆☆ | ★☆☆☆☆ | ★★★★★ | ★★☆☆☆ |
CF Polymers | ★★★☆☆ (Wet only) | ★☆☆☆☆ | ★★★★★ | ★★★☆☆ | ★★★★☆ |
Which Workflow Applies to Your Printer?
The exact sequence of post-processing steps you need to take depends entirely on the technology that produced your part. What works beautifully for a filament-based print will completely ruin a resin model. Here is how the finishing process breaks down across the four major additive manufacturing families:
FDM (Fused Deposition Modeling)
FDM is the undisputed king of desktop manufacturing, but it inherently suffers from visible Z-axis layer lines, anisotropic structural weakness, and stubborn support scars. A standard workflow to overcome these hurdles begins with mechanical support removal and progresses through wet sanding to level the surface. Once the prominent ridges are knocked down, makers usually fill any remaining gaps, lay down a thick coat of filler primer, and finish with acrylic or enamel paint.
Resin (SLA / DLP / MSLA)
Vat photopolymerization excels at capturing extreme micro-details, but fresh prints emerge from the printer saturated in toxic liquid and prone to tacky surfaces if mishandled. The strict, non-negotiable workflow requires a thorough two-stage IPA wash followed by complete air-drying before the part ever touches a UV curing chamber. Only after the polymer matrix is fully cross-linked should you clip away the delicate supports, apply a thin primer, and begin painting.
SLS / MJF (Powder Bed)
Powder bed systems produce incredibly tough, complex geometries without the need for traditional support structures, but the parts emerge with a highly porous, matte texture and trapped powder deep inside internal channels. The primary post-processing focus here is physical depowdering and abrasive media blasting to remove the semi-sintered surface armor. From there, industrial users often utilize automated chemical vapor smoothing to seal the surface, or dunk the parts in hot fabric dye for uniform coloring.
Metal AM (PBF-LB / SLM)
Metal additive manufacturing requires the most extreme, expensive, and time-consuming post-processing ecosystem—often accounting for more than half the total cost of a part. Because parts are welded to thick titanium or steel build plates under massive thermal stress, they must first undergo vacuum stress relief in a furnace. Only then can they be safely severed from the plate using Wire EDM, consolidated via Hot Isostatic Pressing (HIP) to remove internal micro-porosity, and finally CNC machined to meet critical engineering tolerances.
Safety Protocols and PPE Checklist
Do not treat 3D printing chemicals casually. Equip your workspace with the appropriate Personal Protective Equipment (PPE) based on your exact task.
Task / Hazard | PPE Required |
Handling Uncured Resin | Nitrile Gloves (Not Latex), Splash Goggles |
Sanding CF/GF Composites | P100 / N95 Particulate Respirator, Wet Sanding Setup |
Chemical Smoothing (Acetone) | Organic Vapor Respirator, Well-ventilated area |
Using Aggressive Solvents (THF/DCM) | Fume Hood (Strictly required), Chem-resistant Gloves |
Quick Reference Cheat Sheets
Bookmark these tables for your next project.
Table 1: Material Cheat Sheet
Material | Best Smoothing Method | Annealing Temp Range | Paint Adhesion |
PLA | Wet Sanding + Epoxy | 60°C - 70°C | Excellent (with primer) |
ABS / ASA | Acetone Vapor | 90°C - 100°C | Excellent |
PETG | Wet Sanding | 70°C - 90°C | Poor (needs adhesion promoter) |
Nylon | Wet Sanding / Dyeing | 130°C - 150°C | Moderate |
Table 2: Goal Cheat Sheet
Goal | Best Method |
Smooth Finish | Wet Sanding & Automotive Filler Primer |
Strong Parts | Thermal Annealing |
Waterproof | 2-Part Epoxy Resin Coating |
Metallic Look | Electroplating |
Eliminating the Post-Processing Bottleneck with Snapmaker
The most universally despised aspect of post-processing is dealing with support removal. Manually tearing away same-material supports takes hours, leaves ugly scars, and often breaks delicate geometries.
The industry solution to this is multi-material printing. By utilizing an advanced tool-changing machine like the Snapmaker U1, you can completely eliminate manual support removal from your workflow. The U1’s dual-extrusion capabilities allow you to print your primary model in PLA or ABS, while simultaneously printing dense support interface layers using soluble materials like PVA or HIPS.
Once the print finishes, you simply drop the part into a water or D-Limonene bath. The supports dissolve entirely on their own, leaving flawless overhangs, perfectly clean internal channels, and zero surface scarring—drastically reducing your post-processing time to near zero.
Frequently Asked Questions (FAQs)
Can you skip post-processing?
Yes. If your print is a purely functional internal bracket where aesthetics don't matter, or if you are using matte/carbon-fiber filled filaments that naturally hide layer lines straight off the build plate, you can skip post-processing entirely.
What is the easiest filament to finish?
ABS and ASA are widely considered the easiest to post-process. They are softer to sand than PLA (without gumming up as quickly) and react beautifully to acetone vapor, allowing you to achieve a glossy finish with very little manual labor.
How much time does post-processing take compared to printing?
Depending on the desired finish, post-processing can take anywhere from 10% of the print time (for basic support removal) to double or triple the print time if you are aiming for a mirror-finish polish and multi-layered paint job.
Does chemical smoothing weaken FDM parts?
Yes, slightly. Because solvents dissolve the outer layer of the polymer to smooth it, the process can degrade the structural integrity of the outer perimeter. For purely functional, load-bearing parts, mechanical sanding is structurally safer.
Do I strictly need to prime a 3D print before painting?
Strictly? No. But if you want the paint to actually stick and not chip off within a week, yes. Primer creates a chemically receptive micro-texture that allows acrylics and enamels to bond durably to the plastic.
Is 3D printing composite dust dangerous to inhale?
Absolutely. Sanding or machining Carbon Fiber (CF) or Glass Fiber (GF) filaments releases microscopic, respirable fibers. If inhaled, these bio-persistent fibers can lodge deep in lung tissue. Always wet-sand and wear a P100 respirator.
Which filament requires the least post-processing?
Matte PLA and Carbon Fiber-filled PLA (CF-PLA) require the least post-processing. Their light-absorbing properties and textured surfaces naturally camouflage Z-axis layer lines, making them look excellent straight off the printer.
Is chemical smoothing better than sanding?
It depends on your geometry. Chemical smoothing is "better" (faster and less labor-intensive) for organic shapes and curved models. However, for mechanical parts with sharp corners and tight dimensional tolerances, vapor smoothing will round off those sharp edges and ruin your tolerances, making sanding the better choice.
Can you combine annealing and painting?
Yes, but order matters. You must anneal the part first. Thermal annealing warps and shrinks the plastic slightly; if you paint it first, the paint will crack and flake off in the oven. Anneal, allow to cool, sand, prime, and then paint.
What's the fastest way to finish a cosplay prop?
For large cosplay armor, the fastest method is using a motorized random orbital sander (on low speed to prevent melting), followed by a thick coat of high-build automotive filler primer, and finishing with a 2-part epoxy resin (like XTC-3D) to quickly gloss over remaining layer lines before spray painting.