3D Printing Troubleshooting: How to Fix Common Print Problems
It can be incredibly frustrating when a 12-hour print fails at hour 11, leaving you with a bird’s nest of plastic spaghetti or a model that looks like it melted. If you are standing over your 3D printer wondering what went wrong, take a deep breath.
Print failures are a normal part of the 3D printing learning curve. Even the most perfectly calibrated machines run into stringing, warping, and clogged nozzles. Fortunately, the technology is evolving to catch these issues faster—modern setups with built-in AI cameras, like the anomaly detection system on the Snapmaker U1, can actively spot spaghetti prints or workspace obstructions and alert your phone before a whole spool is wasted.
However, whether you are running a brand-new CoreXY machine or a budget bed-slinger, knowing how to manually diagnose and fix the most common 3D printing problems is essential. Here is exactly how to do it.
First Layer Problems: Why Prints Fail Before They Start
If your first layer fails, the rest of the print is guaranteed to fail. A perfect first layer is the absolute foundation of troubleshooting first layer problems.
How to Fix Poor Bed Adhesion (Prints Not Sticking)
When the extruded plastic refuses to stick to the build plate and drags behind the nozzle, you must address why your print is not sticking to the bed.
- Adjust the Z-Offset: Your nozzle is likely too far from the bed. The plastic needs to be slightly "squished" onto the build plate. Lower your Z-offset in small increments (0.05mm) until the first layer lines are flat, not round.
- Level the Bed: An uneven bed means the nozzle is too close in some spots and too far in others. While manually leveling your 3D printer bed is a good skill, modern devices utilize automatic mesh bed leveling (like the smart calibration on the U1) to map the surface and dynamically adjust the Z-height, ensuring a flat, grippy first layer automatically.
- Clean the Build Surface: Fingerprints leave behind oils that prevent plastic from adhering. Knowing how to properly clean your 3D printer bed with 90%+ Isopropyl Alcohol before every print is crucial.
- Use a Brim or Raft: If you are printing a model with a very small footprint, choosing a skirt, brim, or raft in your slicer will give the print a wider surface area to grip the bed.
Elephant's Foot: What Causes It and How to Stop It
If the very bottom layers of your print bulge outward, wider than the rest of the model, you are experiencing "Elephant’s Foot."
- Lower the Bed Temperature: This is caused by the weight of the model pressing down on bottom layers that haven't fully cooled and solidified. Lower your bed temperature by 5°C to help the plastic set faster.
- Adjust Initial Layer Settings: In your slicer, look for a setting called "Initial Layer Horizontal Expansion" (or similar) and set it to a negative value (e.g., -0.2mm) to compensate for the bulge.
Mid-Print Failures: Solving Visual Defects
If your first layer goes down perfectly but the print starts looking messy halfway through, you likely need to adjust your slicer settings or printer mechanics.
How to Fix Stringing, Oozing, and Multi-Color Purge Waste
Stringing looks like fine spiderwebs of plastic crossing the empty spaces of your model. It happens when plastic oozes out of the nozzle while it travels between print areas. This is especially problematic if you are trying to 3D print in multiple colors through a single nozzle, which also requires massive "purge towers" that waste perfectly good filament.
- Enable and Tune Retraction: Retraction pulls the filament slightly backward into the nozzle during travel moves to relieve pressure. Increase your retraction distance and speed in your slicer.
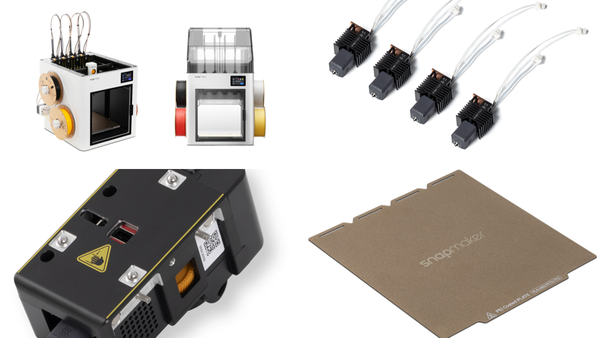
- Utilize Multi-Toolhead Systems: If stringing and the incredible waste generated by purging in 3D printing are driving you crazy, hardware solutions are the most effective fix. Investing in a tool changer 3D printer like the U1 with its SnapSwap™ system gives you four preloaded, pre-heated toolheads. Instead of forcing new filament through the same nozzle and purging the old color, the machine simply swaps to a new toolhead in about 5 seconds, drastically cutting down on oozing artifacts and reducing filament waste by up to 80%.
Layer Shifting and Ghosting: Causes and Solutions
Layer shifting occurs when the printer head loses its exact position, causing the top half of a print to be misaligned with the bottom half. Ghosting in 3D printing looks like faint, repeating ripples on the surface of your print, usually around sharp corners.
- Tighten Your Belts: If layers are shifting completely, this is almost always a mechanical issue. The rubber belts driving your axes should be taut like a guitar string.
- Leverage Vibration Compensation: Ghosting is caused by the physical vibrations of the print head changing direction rapidly. Printers built for high speeds (like the 500mm/s CoreXY system on the U1) use Vibration Compensation (Input Shaping). This uses an accelerometer sensor to pre-process movement commands and cancel out resonant frequencies, preventing surface ripples even at extreme speeds.
Under-Extrusion vs. Over-Extrusion
- Under-Extrusion leaves gaps between layers and makes the print weak. To fix 3D printer under-extrusion, check for a partially clogged nozzle, or increase your flow rate in your slicer.
- Over-Extrusion results in drooping layers and blobs, particularly in corners where the print head slows down. Advanced firmware features, like the fine-tuned extrusion (Pressure Advance) found in the U1's calibration, anticipate these flow delays and tweak extrusion timing based on motion changes, ensuring crisp, consistent details without blobs.
Structural and Finish Issues
How to Prevent Warping (Especially in Corners)
3D print warping happens when the plastic shrinks as it cools, pulling the corners of the print off the bed. This is highly common with ABS and occasionally happens with large PLA prints.
- Eliminate Drafts: A sudden breeze from an open window or AC vent will cool the plastic too rapidly.
- Control the Ambient Environment: Maintaining a consistent ambient temperature is the best defense against warping. Deciding between an enclosed vs open 3D printer is a major factor here, as utilizing an enclosure keeps the air around the print warm and allows the model to cool evenly.
Hardware Maintenance & Best Practices
Preventative FDM 3D printer maintenance saves you from endless troubleshooting down the road.
How to Tell if a 3D Printer Nozzle is Clogged
A clogged nozzle will present as severe under-extrusion, clicking sounds from the extruder motor, or filament curling up and sticking to the nozzle instead of dropping straight down.
The Fix: Heat the nozzle to your printing temperature and learn how to properly clean a 3D printer nozzle. Use the fine metal needle that came with your printer to clear the tip. If that fails, perform a "Cold Pull" by heating the nozzle, inserting cleaning filament, letting it cool partially, and yanking it out to pull the debris free.
The Importance of Dry Filament (Moisture Issues)
If you hear popping or crackling sounds coming from your nozzle, or if your print is suddenly stringing worse than ever, your filament has absorbed moisture from the air. Wet filament boils inside the hotend, creating steam bubbles that ruin the print.
The Fix: Always learn how to store your 3D printer filament and prevent moisture. Keep it in airtight containers. Better yet, invest in a dedicated filament dryer. Devices like the SnapDryer (co-developed by PolyMaker) allow you to bake the moisture out of your materials and store the spools in modular, moisture-proof sealed docks while you print.
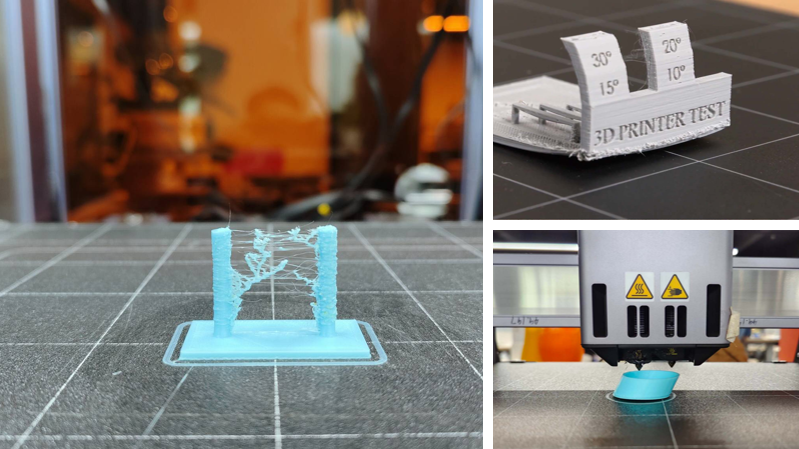
What is the 45-Degree Rule for 3D Printing?
The 45-degree rule for 3D printing states that a 3D printer can safely print overhangs (parts of the model that stick out into thin air) up to an angle of 45 degrees without requiring printed support structures.
If your model has overhangs greater than 45 degrees, the plastic will droop and sag because it is printing in mid-air. Always check your slicer preview and enable "Supports" (or use tree supports) for steep overhangs.
FAQ on Common 3D Printing Problems
What are four common issues with 3D prints and how can you troubleshoot them?
The four most common 3D printing issues are poor bed adhesion, stringing, warping, and under-extrusion. You can troubleshoot bed adhesion by utilizing automatic mesh bed leveling or adjusting your Z-offset. Stringing is fixed by tuning retraction settings or using a multi-toolhead system to avoid purging. Warping is solved by blocking drafts or using an enclosure. Under-extrusion is fixed by clearing nozzle clogs.
Why are my 3D prints suddenly failing?
If a 3D printer that used to print perfectly is suddenly failing, the most common culprits are wet filament that has absorbed humidity over time, an unlevel bed that has shifted from vibrations, or a worn-out brass nozzle that needs to be replaced.
How do you fix a 3D print that keeps stringing?
To fix stringing, first increase your slicer's retraction distance and retraction speed. If stringing persists, lower your hot end printing temperature by 5°C to 10°C to prevent the plastic from oozing during travel moves. Keeping your filament completely dry also drastically reduces stringing.