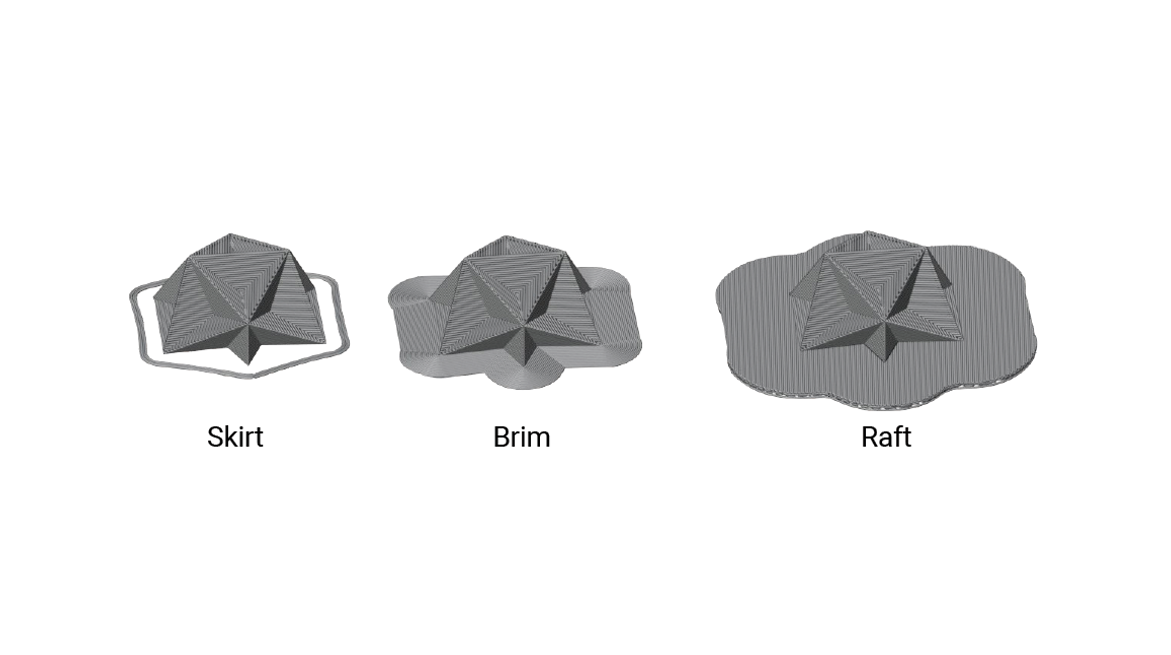
Skirt, Brim, or Raft? Your Ultimate First Layer Choice
Every perfect print begins with one thing: a strong first layer. It’s the unshakeable foundation on which your model rests. If that layer slips, lifts, or warps even slightly, hours of printing go straight into the bin. Most print fails? They start right here, on the bed.
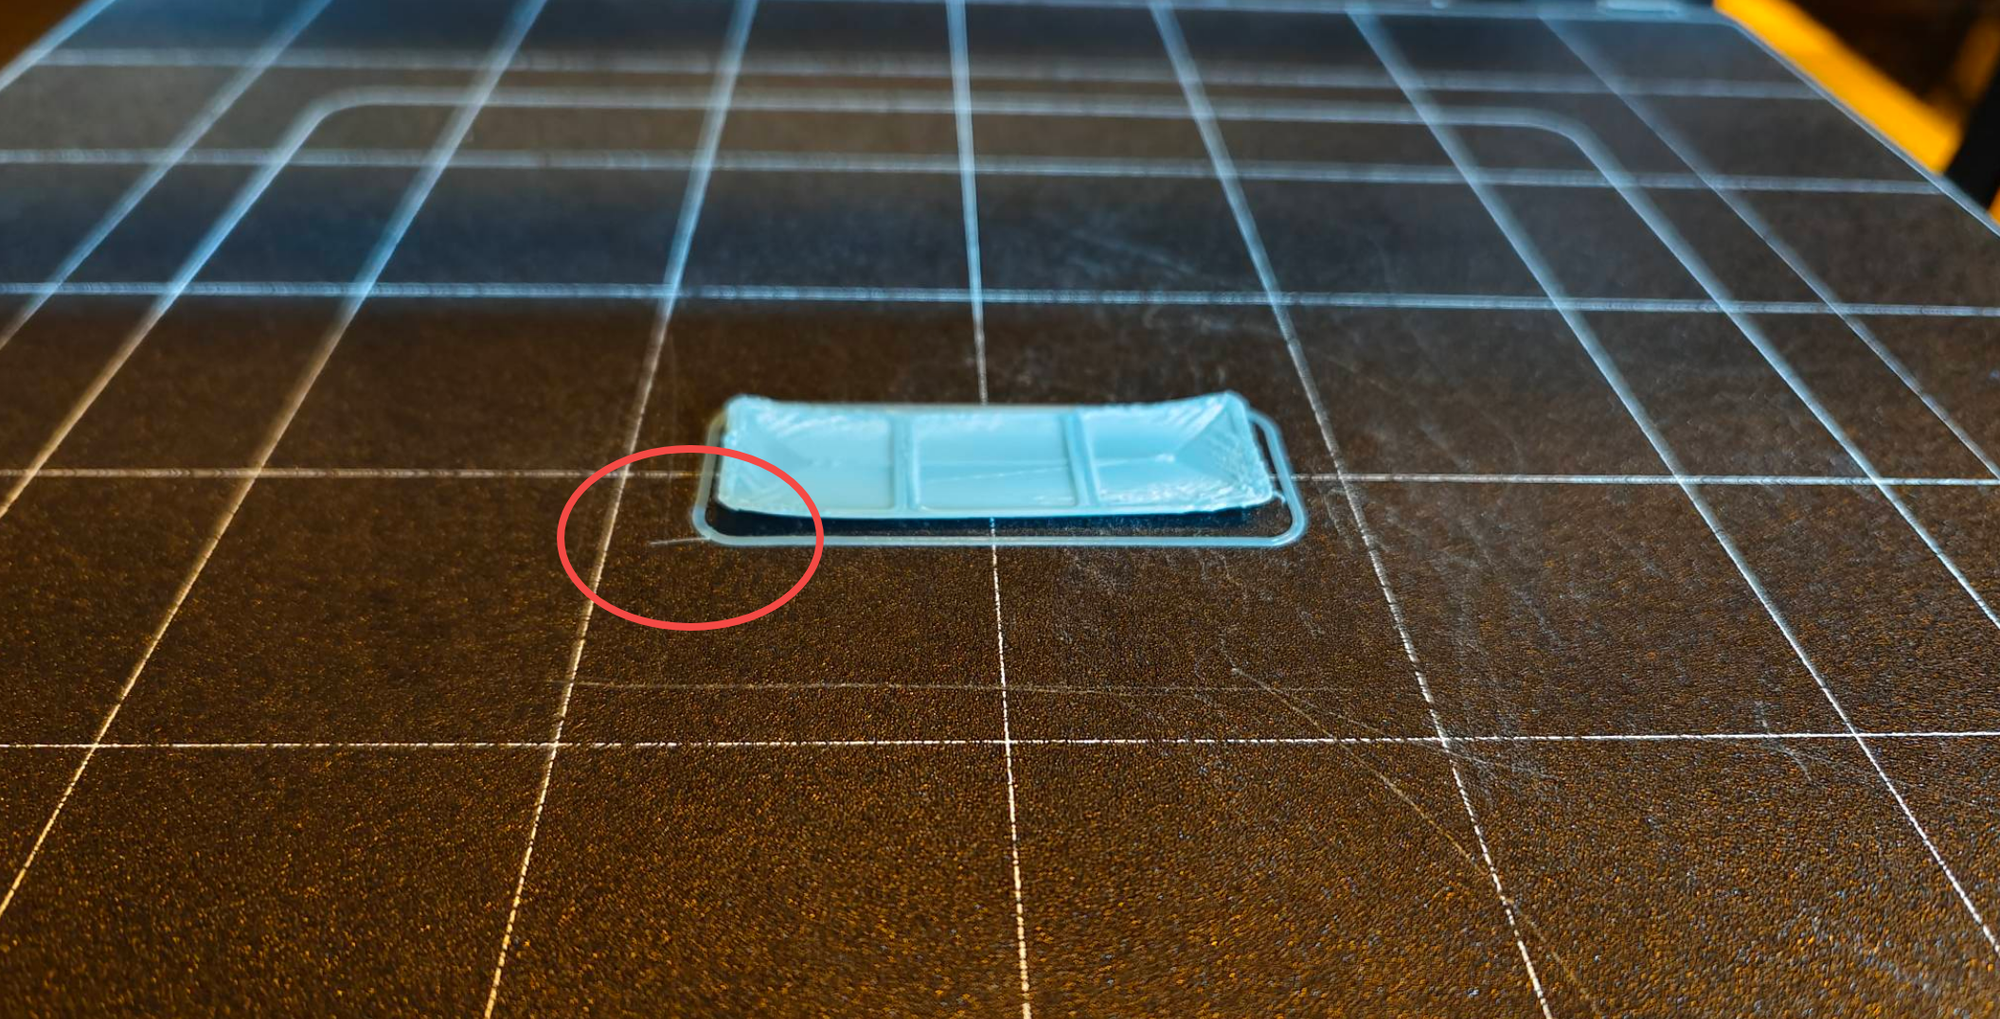
When your corners curl up, that’s warping. When the whole print drifts mid-way, that’s detachment. And both can drive you nuts. That’s where three quiet heroes step in: the Skirt, the Brim, and the Raft. Each one has its own way of keeping that first layer flat, grippy, and ready to go. Let’s break down skirt vs. brim vs. raft to find your best fit.
What Does a Skirt Do in 3D Printing?
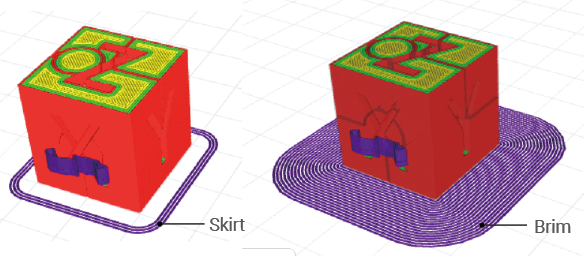
Think of a Skirt as your warm-up lap. It’s a few neat outlines printed around your model, never touching it. Looks minimal because it is. The Skirt doesn’t hold your print down; it helps you prep for a perfect start.
Primary Purpose (The Dual Function):
- Nozzle Priming: The Skirt clears the path. It purges leftover filament, stabilizes flow, and ensures the nozzle is pushing smooth, even material before the real thing begins. Especially handy after a filament swap or long idle time.
- Bed Leveling Sanity Check: Those first few loops tell you everything. If the lines look too thin, your nozzle’s too close. If they’re wobbly or not sticking, you’re too far. With the Skirt, you get a short window to tweak your Z-offset or leveling before wasting the actual print.
When to Use a Skirt in Your 3D Prints:
- It’s the default, go-to for almost everything.
- Perfect for PLA and other easy materials.
- Great for prints with broad, stable bases that don’t need extra adhesion.
Light on material, quick to print, and always useful for that first-line check. Think of it as your print’s pre-flight checklist; short, but critical.
What Is a Brim in 3D Printing?
A Brim is like your print’s safety belt. It’s a thin, single-layer extension that spreads out from the model’s base, attached directly to the edges, like the brim of a hat. Not just for looks. It keeps your print from peeling up as it cools.
Primary Purpose (The Balanced Solution):
- Increased Surface Area: The 3D printing Brim adds extra grip. It doesn’t use much filament but dramatically increases the contact area between your print and the bed.
- Warping Resistance: For materials like ABS or Nylon that love to curl, the Brim acts as an anchor. It keeps those corners pinned down as the layers above cool and contract.
When to Use Brim in Your 3D Prints:
- Great for tall or thin models that risk tipping over.
- A must for warp-prone materials like ABS, PC, or PETG.
When you want stronger adhesion than a Skirt but don’t want to spend time sanding off a Raft’s texture.
Slicing Deep Dive:
In your slicer, look for “Brim Line Count.” Add more lines for more hold. Five or six lines usually do the trick for medium parts; go higher for ABS or Nylon.
Brims pull their weight, are easy to peel, have clean edges, and have a strong hold. When done right, it feels like your print just “clicks” into place.
For more methods on the clean removal of slices (e.g., using a sharp utility knife or flat-nose pliers) and how to minimize residual residue, read our related blog post.
What Is a Raft in 3D Printing?
Now, when all else fails, when the print refuses to stay down, that’s when you call in the Raft. It’s a multi-layered, lattice-like base that prints underneath your model. The model itself sits on top of the 3D printing Raft, not directly on the bed.
Primary Purpose (The Nuclear Option):
- Bed Correction: Your 3D printer beds can develop tiny variations over time. A Raft fixes that by building its own level surface first.
- Maximum Adhesion: Nothing beats it. If your model needs to stay glued no matter what, a Raft has your back.
- Isolation: Because the model never touches the bed, temperature changes or small scratches don’t affect it. You get a smooth, even bottom every time.
When to Use Raft in Your 3D Prints:
- For high-warp materials like Polycarbonate, Nylon, or large ABS prints.
- For complex models with delicate or uneven first layers.
- When your bed’s not in perfect shape and you still need a flawless finish.
Slicing Deep Dive:
Check your “Raft Air Gap.” That tiny space between the Raft and your print controls how easily they separate. Smaller gap = stronger hold. Bigger gap = easier removal. Start with 0.2–0.3 mm and adjust based on results.
Rafts take more time and filament, but can save huge projects from failure. They’re your print insurance policy, costly, but worth it when the stakes are high.
Quick Reference Table: Choose Your Weapon
Conclusion
Mastering Skirt, Brim, and Raft means fewer fails and smoother prints. Each one serves its moment: Skirt for a clean start, Brim for steady footing, 3D printing Raft skirt for absolute reliability.
Try them out in your slicer, tweak the line counts or air gaps, and see how much better your first layers stick. Use a wide Brim for ABS. A simple Skirt for sturdy PLA. A Raft for the real troublemakers.
Now go forth and build with confidence. And if you’re curious to explore more about Snapmaker’s 3D printing systems, materials, and slicing tips, we’ve got a whole world waiting for you.