How to Clean a Clogged 3D Printer Nozzle (Quick & Deep Fixes)
A clogged nozzle can mess up a print pretty quickly, even if the rest of the printer is doing fine. Most blockages start as tiny buildups you don’t notice at first, and then they keep growing until the filament barely comes out.
In this guide, we’re walking through the usual checks people do regarding how to clean 3D printer nozzle, starting with the easy stuff and ending with the deeper cleaning steps if things are really stuck. These are the same steps most hobby users follow, and they work for pretty much any basic FDM printer.
Diagnosing 3D Printer Nozzle Clog: Types and Root Causes
When a printer stops extruding correctly, people often assume it’s the same type of clog every time. In reality, there are a few different ways material can get stuck, and knowing which one you have makes the job easier.
External vs. Internal Clogs: Symptoms and Assessment
External buildup is the easiest to notice. Melted filament sticks to the tip and sometimes drags along the print, leaving marks or blobs. You may also hear small pops or see lines that look rough or dirty, which are classic signs of 3D printing first layer problems..
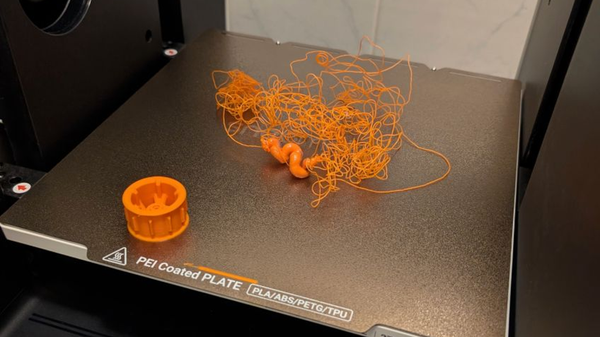
Internal clogs come in two forms. A partial clog still lets some filament pass, but the line becomes thin, uneven, or stops for a moment and comes back. A full clog stops all flow. That usually means hard plastic or burnt residue is blocking the inner bore of the nozzle.
Material-Specific Clog Mechanisms
PLA clogs often come from heat creep. PLA softens early, so if the top of the hot end gets warm, it can jam before reaching the melt zone. This can happen more in enclosed printers. Lowering the bed temperature by 5–10 °C sometimes helps.
PETG is very sticky and often leaves residue on the nozzle. If it burns, it can build up and cause clogs.
ABS needs steady heat. If the temps swing too much, ABS can thicken in the middle of the path and block the nozzle.
Abrasive filaments don’t exactly clog the nozzle, but wear it out. Over time, the hole gets bigger, and the print looks fuzzy. For these materials, hardened steel nozzles are better.
What Should You Avoid to Prevent Clogs
Aggressive retraction is a common cause of jamming. Long or fast retractions pull warm filament into cooler zones where it hardens. Keeping retraction short, around 0.6 mm, and moderate speed helps.
Dry filament is also important. Moist filament sizzles inside the nozzle, causing gaps or stuck pieces that later block the flow.
Quick Fixes: In-Place Nozzle Cleaning
If the block is mild, you can usually unclog 3D printer nozzle without removing anything from the printer. These quick steps often solve partial clogs or residue on the outside.
External Cleaning: The Brass Brush and IPA Wipe
Heat the nozzle to 200 °C, then scrub gently with a brass brush. Wipe with a cloth and some alcohol, being careful of the heat. This is a staple of general FDM 3D printer maintenance.
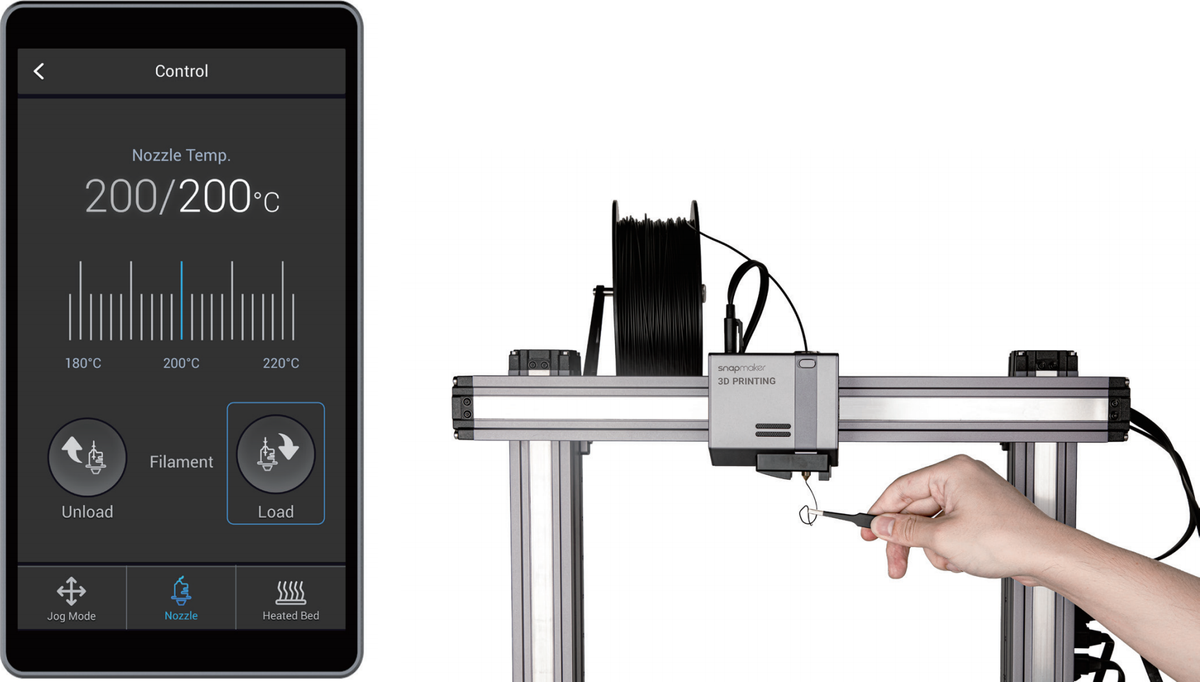
Internal Cleaning: The Cleaning Needle Technique
Heat the nozzle slightly above printing temp (around 250 °C) and use a needle that fits the nozzle. Push it upward through the nozzle tip to loosen anything stuck inside. Don’t push downward because that can pack the debris in tighter. This method works best for small, fresh clogs.
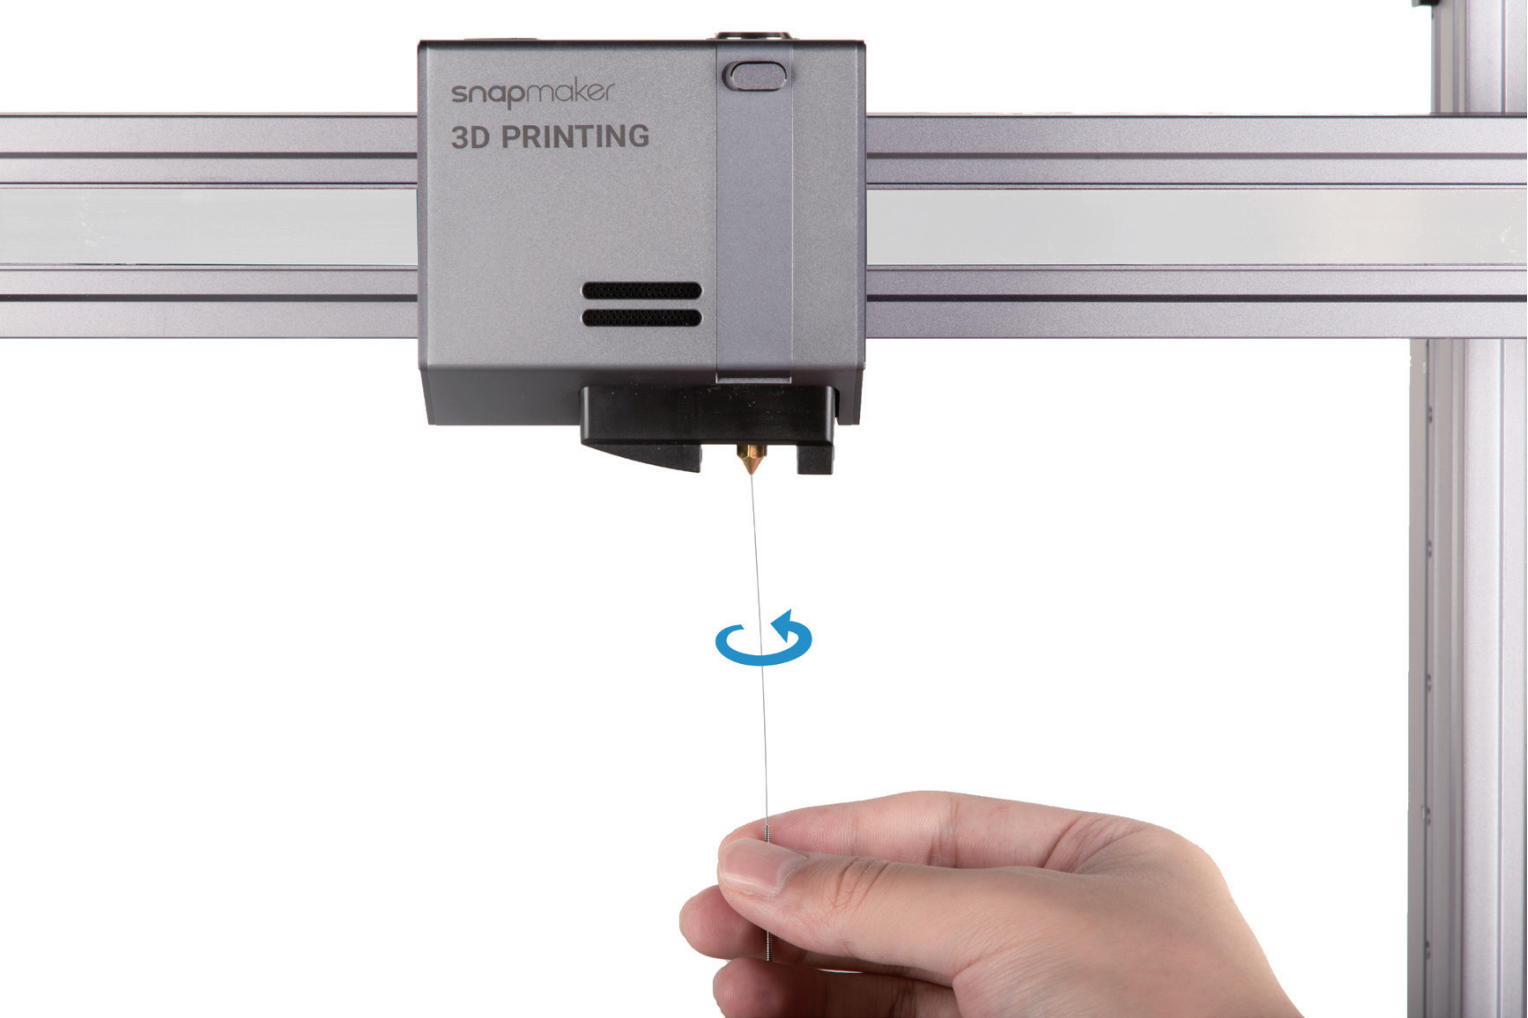
The Atomic Pull (Cold Pull) Method: Deep Cleaning Internal Debris
If brushing and needle cleaning don’t work, try a cold pull to clean the entire hot end.
Choosing the Right Filament
Nylon works well because it grips debris without breaking. There are also cleaning filaments made for this task. PLA can be used, but it tends to snap if it cools too much, so it’s not ideal.
Step-by-Step Cold Pull Guide
- Remove the filament currently in the printer.
- Heat the nozzle to the melting point of your cleaning filament, around 250–260 °C.
- Feed the cleaning filament until it comes out smoothly.
- Keep slight downward pressure and start lowering the temperature.
- Let it cool to around 90–110 °C.
- Pull the filament straight up in one steady motion.
- Check the end for burnt particles. Repeat if needed.
- Extreme Clogs: Disassembly, Chemical Soaking, and Thermal Burnout (200–250 words)
Extreme Clogs: Disassembly, Chemical Soaking, and Thermal Burnout
Some clogs are too deep or too burnt to clear with simpler steps. At that point, the nozzle or the whole hot end needs to be removed.
Safe Disassembly and Chemical Soaking
Make sure the hot end is fully cool before you try taking anything apart. If you’re dealing with ABS, you can soak the nozzle in acetone since ABS softens in it. PLA won’t dissolve in acetone, so that trick won’t help for PLA jams.
Thermal Burnout (The Torch Method)
If the plastic inside has gone rock-hard or burnt, you might have to use a small torch to clean it out. It’s not fancy, just something people do when nothing else works. Do it outside or at least near an open window. Grab the nozzle with pliers or a clamp and heat it until the old filament burns away. Once it cools down, you can poke out whatever ash is left with a toothpick or whatever small tool you have around.
U1 User Caution: Due to the Snapmaker U1's integrated hot end utilizing interference fit assembly, applying intense flame (thermal burnout method) is prohibited as it can cause the hot end components to detach and fail.
The Hot Tightening Procedure: Preventing Future Leaks
Leaking happens when the nozzle and heat break don’t meet tightly. Hot tightening fixes this.
- Screw in the nozzle by hand and back it off slightly.
- Screw the heat break in until it meets the nozzle.
- Heat the whole assembly to about 240 °C.
- Hold the heater block still with one wrench and tighten the nozzle with the other.
- After any reassembly, redo the Z Offset so the nozzle doesn’t hit the bed.
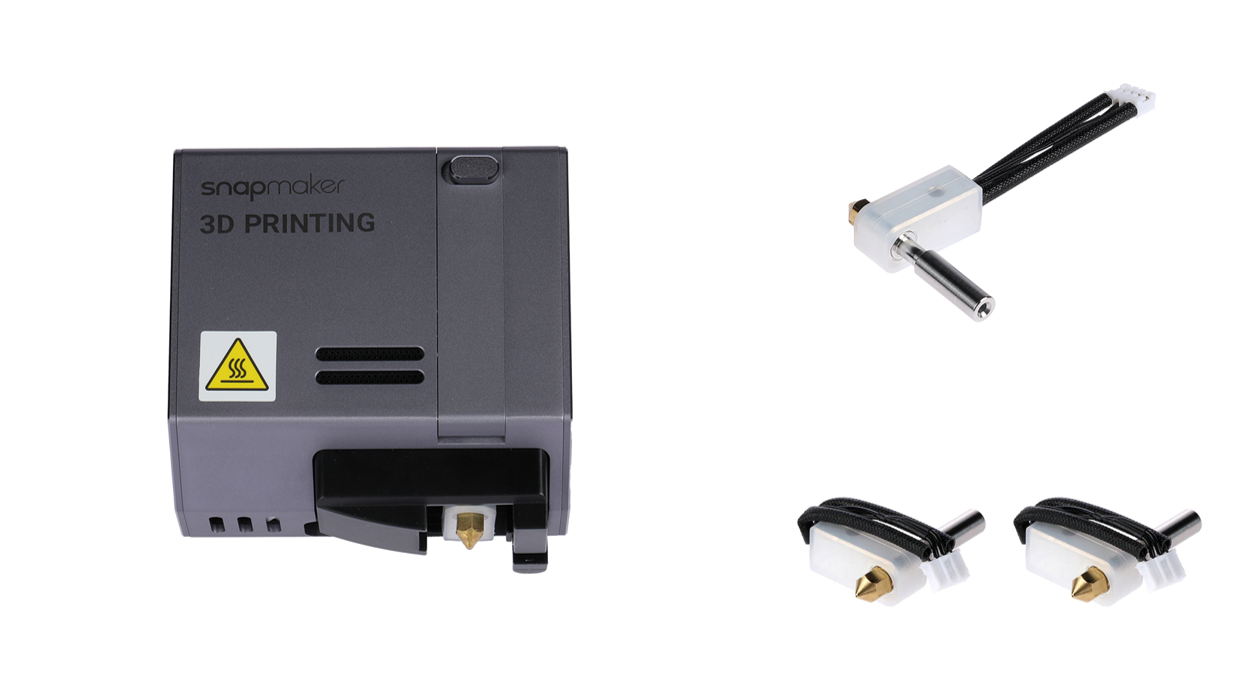
Snapmaker U1 User Spotlight: Specialized Maintenance and Features
The Snapmaker U1 is engineered for clog prevention, integrating several advanced features for minimal maintenance.
The hot end comes standard with a 0.4 mm stainless steel nozzle, providing high durability and wear resistance, and supporting temperatures up to 300 °C via its built-in ceramic heating element. The use of an integrated hot end component (joint-free) and a thermal isolation heat break actively prevents filament leakage and heat creep, which are common causes of clogs, especially with materials like PLA.
For ease of use, the U1 features an automatic nozzle-cleaning routine (using a wiper blade) and an automatic lift mechanism that parks idle toolheads away from the print surface. During multi-material printing, inactive toolheads are kept at 70 °C in standby to prevent filament degradation and charring while awaiting use.
Should a severe clog or wear occur, the U1’s integrated design allows easy replacement of the entire hot end module, minimizing downtime. Snapmaker even provides a spare hot end for quick swapping. For abrasive filaments, hardened-steel hot-end bundles in various sizes (0.2 mm, 0.4 mm, 0.6 mm, 0.8 mm) are available. For optimal results, ensure Dynamic Flow Calibration is run with a clean nozzle. For specific official guidance on troubleshooting U1 nozzle issues and quick fixes, users can consult the Snapmaker Wiki.
Conclusion
Most clogs can be avoided by keeping the filament dry and cleaning the clogged 3d printer nozzle regularly. If one happens, start with the easy fixes, then recalibrate afterward to keep prints smooth. Snapmaker offers tools and accessories that make maintenance easier when needed. Always finalize major maintenance with the crucial Hot Tightening seal and post-maintenance Z Offset calibration to ensure smooth, high-quality prints.
Should problems persist after attempting these comprehensive troubleshooting steps, we recommend contacting our official aftermarket support team for further assistance.