Guide to Precision Laser Engraving and Cutting
Precision laser engraving and cutting is the most in-demand technique when it comes to customization or intricate craftsmanship. It has become indispensable across several industries–art, manufacturing, design, etc. Precision laser engraving etches fine details on various materials with accuracy and precision. But what's the difference between accuracy and precision in this context?
Accuracy means your final piece matches the exact dimensions and placement specified in your design file. Precision refers to the repeatability of the process and the level of detail your machine can consistently achieve. A well-calibrated machine combined with the right techniques is crucial for mastering both.
Essential Machine Setup & Calibration
1. Power and Speed Settings
The Basics: Power controls the intensity of the laser beam, while speed controls the velocity of the laser head movement. High power and low speed result in deep cuts and dark marks; low power and high speed produce lighter effects. Detailed photo engraving may use high-speed but carefully controlled power.
Precision Tip: For deep cuts or sensitive materials, multiple faster passes at lower or moderate power often yield cleaner results with less charring (improving precision) than a single slow, high-power pass.
2. Focus (Z-Offset)
Focus is Paramount: Ensure the beam is sharply focused, typically at the material's top surface. Incorrect focus drastically reduces power density, resulting in a wider kerf (which affects accuracy), blurry engraving, and inconsistent results (reducing precision).
Consistency is Key: Use a reliable and repeatable focusing method every time. Check focus across different areas if working with large or slightly warped material.
Snapmaker Focus Solutions:
- Automatic Thickness Measurement (ATM): Snapmaker's ATM employs a red laser emitter and an in-built camera to measure the thickness of the material, thereby automatically calibrating the height of the laser for its optimum focusing. The method works best upon opaque, non-glossy materials that are not red or black in color.
- Calibration of Platform Height: The calibration is done to set the accurate distance between the laser module and work platform, a distance for maintaining the proper focal length. This distance should be as precise as one or two millimeters.
- Auto Mode: In Auto Mode, the height of the laser is auto-calibrated according to the focal length measured and the input thickness of the material.
- Manual Mode: Intended for materials of unknown thickness or if fine-tuning is required, Manual Mode allows users to change laser height manually.
3. Machine Calibration for Accuracy
Steps per Millimeter/Inch: Your machine must move the exact distance commanded. Cut a large, precisely measured shape (e.g., a 100 mm square) and verify its dimensions using calipers. Adjust step settings in your controller if needed. Incorrect steps lead to overall sizing errors.
Squareness: Ensure the X and Y axes are perfectly perpendicular to each other. Cut a large square and measure the diagonals – they should be equal. Adjust the gantry alignment if necessary to prevent skewed cuts.
Backlash Compensation: Check for mechanical 'slop' when changing direction. If circles do not close perfectly or corners are rounded unexpectedly, investigate and, if necessary, enable backlash compensation in your software.
Camera Calibration (Snapmaker): Snapmaker's laser modules come equipped with a wide-angle HD camera that captures images of the work area. Calibrating this camera ensures captured images accurately represent the work platform, aiding in the precise positioning of designs.
4. Kerf Compensation: The Key to Perfect Fits
Understand Kerf: The laser vaporizes material, leaving a gap, known as kerf. This must be accounted for if parts need to fit together accurately, such as inlays and box joints.
Measure & Compensate: Determine your kerf for specific material/settings by measuring a test cut precisely. Then, adjust your design (offset paths) or use software kerf settings to ensure final parts are dimensionally accurate.
5. Resolution (DPI/LPI)
Detail vs. Speed: Resolution (Dots Per Inch / Lines Per Inch) Affects Engraving Detail and Time. Here’s the laser engraving power and speed chart:
- Low DPI: E.g., 250-333: Generally best for wood and glass, to avoid overheating and chipping.
- Mid DPI: E.g., 333-600: Suitable for general acrylic materials, coated metals, and detailed wood.
- High DPI: E.g., 600-1000+: For fine detailing on anodized aluminum, selected plastics, and photo engraving.
Precision tips: A too-high DPI causes dot bleed, where the laser marks overlap unnaturally, thereby reducing the perceived sharpness or obscuring very fine details. Match DPI to your material and desired outcome.
6. Pulses per Inch (PPI) / Frequency (Hz)
Matching Modes: For raster engraving, match PPI closely to your DPI setting for consistent energy delivery.
Vector Cutting:
- High Frequencies (e.g., 5–20 kHz): Often better for plastics like acrylic, yielding smoother, flame-polished edges.
- Lower Frequencies (e.g., 500 Hz–5 kHz): These can be beneficial for wood, reducing charring along the cut edge. Experiment for best results.
7. Air Assist
Essential for Precision: Use strong, consistent air assist, especially for cutting. It removes debris, prevents flare-ups, staining, and lens contamination, and provides cleaner and sharper edges, increasing edge accuracy and cut precision. Adjust the pressure based on the material.
Software & Workflow Optimization
Choosing the Right Software
Software Selection: Choose software that works best with your machine and offers the necessary features.
Snapmaker Luban: For Snapmaker users, Luban is the recommended software for generating G-code files for laser operations. Ensure it's updated to the latest version to access all features and presets tailored for different materials and laser modules.
Setting Work Origin
Precise Origin Setting: Accurately define the starting point of the job on your material. Use jigs, calibrated red dot pointers, or camera systems for repeatable and accurate placement.
Camera Capture (Snapmaker): This feature overlays your design onto an image of the material captured by the built-in camera, allowing for precise visual placement of your design before starting the job.
Material Preparation for Better Results
Material Selection and Measurement
Clean and Flat Surfaces: Dust or oils cause uneven results. Ensure materials lie perfectly flat – warping severely affects focus and accuracy.
Material Thickness Measurement: Accurate measurement of your material's thickness is vital. Use tools like a vernier caliper to obtain precise measurements, which can then be manually input if automatic measurement is not suitable for your material.
Material Securing and Preparation
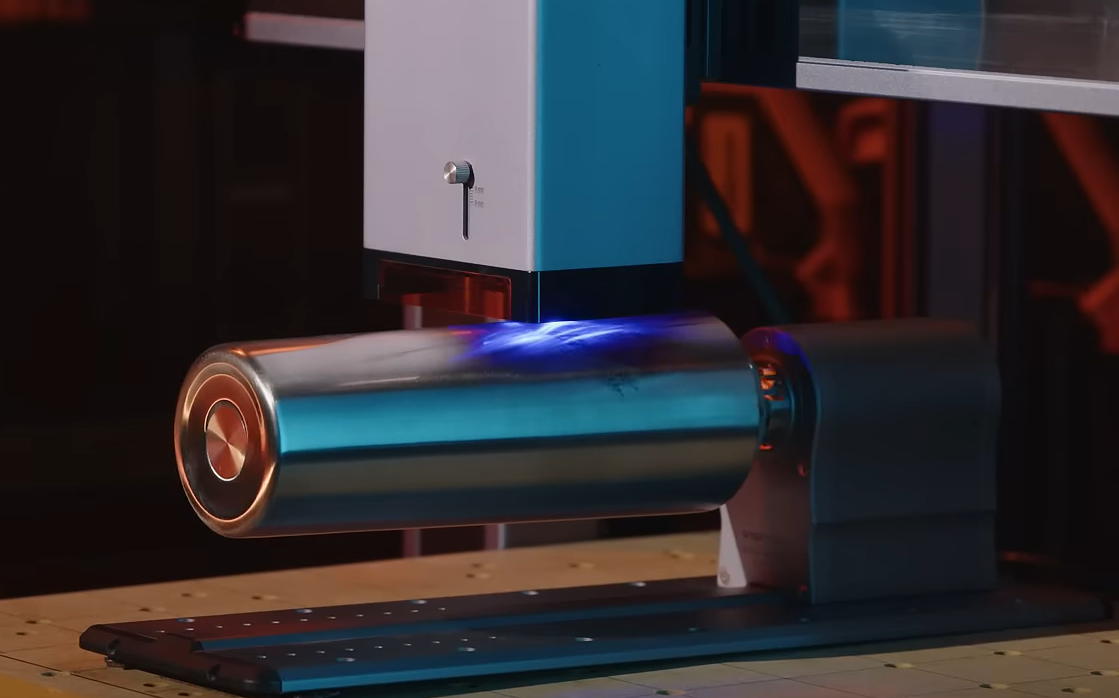
Secure the Material: Use honeycomb beds, clamps, weights, or jigs. Any material shift during the job destroys accuracy and precision. For cylindrical items, use a rotary attachment.
Snapmaker Solutions: Secure materials to the work platform using silicone plugs, masking tape, binder clips, or custom 3D-printed fasteners.
Surface Treatments:
- Masking: Apply laser masking tape to prevent smoke stains, also known as "halos," around engraved areas, especially on wood or paper. Peel after the job.
- Protective Layers (Acrylic): Leave the factory film on acrylic during cutting to protect surfaces from scratches and minor flashback.
- Light Pre-Treatment (Optional): Gently misting wood or leather with water can sometimes reduce charring.
- Dry, Stable Materials: Ensure materials are acclimated and dry to prevent warping or vapor pockets during processing.
Environmental Factors
- Temperature & Humidity: A stable temperature (ideally between 15-25°C / 59-77°F) and relative humidity (RH) of 40-70% help maintain laser power (precision) for cutting without warping of the material (accuracy).
- Ventilation: An efficient and clean exhaust system is non-negotiable in terms of safety, since it prevents the deposition of smoke residue on the optics or material that may interfere with precision.
- Clean Workspace: Minimize dust and debris that can contaminate optics or interfere with mechanics.
- Sturdy Ground and Power: Reduce vibrations on the engraving machine to have accurate engraving. Have a stable power supply and UPS for the controller to avoid voltage fluctuation-induced problems.
Essential Maintenance for Precision
- Optics Care (Lenses & Mirrors): Clean frequently using approved methods and materials. Dirty optics are the #1 cause of power loss, poor focus, inconsistent results, and potential component damage.
- Beam Alignment & Perpendicularity: Regularly check alignment. A centered beam ensures consistent power delivery. Ensure the beam hits the material at a 90-degree angle for straight cuts (for accuracy).
- Steel Rails: Check joint tension (taut but not overtight) and keep guide rails clean and lubricated for smooth, precise motion without binding or slop.
- Cooling System: Maintain the chiller at the correct temperature and ensure the water/coolant is clean for a stable laser tube temperature, which is vital for consistent power output and precision. Clean air-cooled fans.
- Air Assist and Exhaust: Clean the air assist nozzle and maintain the exhaust system (clear ducts, clean or replace filters) for consistent performance.
Pro Tip: Use a maintenance checklist and log to stay on schedule.
Final Checks Before Operation
- Material Placement: Ensure the material is positioned securely and held in place.
- Safety Protocols: On safety, all protocols must be considered, including wearing safety eyewear and confirming that the enclosure is properly assembled.
- Parameter Settings: Verify that the laser power, speed, and other settings are appropriate for the material and the desired result.
- Test Runs: Perform a test run on a scrap piece to verify settings before proceeding with the final material.
Common Mistakes to Avoid
- Skipping Focus Checks: Always refocus when changing material thickness or type.
- Guessing Settings: Always run small tests on scrap material first. Don't just check appearance; measure test cuts for dimensional accuracy if needed.
- Ignoring Kerf: Failing to account for kerf compensation when parts need to fit together.
- Dirty Optics: Leads to poor quality and can cause expensive damage.
- Inconsistent Origin Setting: Leads to inaccurately placed jobs.
- Neglecting Maintenance: Small issues (loose rail, dirty lens) escalate quickly.
- Poor File Prep: Overlapping vectors cause double burns; unclosed paths won't cut properly. Ensure your design file is clean and correct.
Conclusion
High accuracy and precision in laser engraving and cutting do not occur by magic, but rather by the skilled hands that know the difference; by meticulously calibrating the machine; by testing and further optimizing all settings; by preparing materials for work; by timely maintenance of their equipment; and finally, by working in the adequate environment.
By consistently applying these principles—whether you're using a Snapmaker or another laser system—you'll elevate the quality of your laser projects, minimize waste and frustration, and confidently produce cleaner, sharper, and dimensionally perfect results every time.