Ultimate Guide to Laser Engraving Stone
There is something uniquely captivating about an image or message etched into stone. It combines the timeless, elemental nature of the material with the precision of modern technology. From ancient petroglyphs to the elegant signage of today, engraved stone speaks to permanence and quality.
While it might seem like a craft reserved for industrial workshops, the reality is that laser technology has made creating beautiful, high-detail engravings on stone more accessible than ever. For makers, small business owners, and artists, it has unlocked a world of creative and commercial possibilities. This guide will demystify the entire process, taking you from the core science of how it works to the step-by-step techniques you need to produce professional-quality results on your own.
How Does Laser Engraving on Stone Actually Work?
Before you can master the technique, it helps to understand the science. A common misconception is that the laser is simply "burning" the surface of the stone. The actual process is far more sophisticated and interesting.
A Process of Thermal Shock, Not Heat
Laser engraving is a non-contact process. A highly focused beam of light delivers an immense amount of energy to a microscopic point on the stone. This energy is absorbed and converted to intense heat so quickly that the surface material doesn't just melt—it instantly vaporizes. Simultaneously, this extreme thermal shock creates a network of tiny, controlled fractures in the surrounding mineral structure.
This combination of vaporization and micro-fracturing is what physically creates the engraved mark. Because a physical tool never touches the stone, there is no tool wear, and the material isn't subjected to mechanical stress, significantly reducing the risk of accidental chipping or cracking.
How Surface Texture Creates Visual Contrast
So, why does an engraving on dark granite or slate appear bright white or gray? It's a simple yet brilliant optical illusion.
Think of a polished, dark stone as a calm, dark lake. Its smooth surface absorbs most of the light that hits it, which is why we perceive it as dark. When the laser engraves the surface, it transforms that smooth area into a rough, textured landscape of microscopic peaks and valleys. This new surface is like a windy, choppy lake—instead of absorbing light, it scatters it in every direction. Our eyes perceive this diffused, scattered light as a much lighter, matte color. The magic of laser engraving is in its ability to control this light scattering with incredible precision.
Choosing the Best Stone for Your Project
The success of your project is as dependent on the material you choose as it is on your machine. Stone is a natural product, and its geological properties will directly influence the final result.
Granite, Marble, and Slate
While many stones can be engraved, three stand out for their reliability and excellent results.
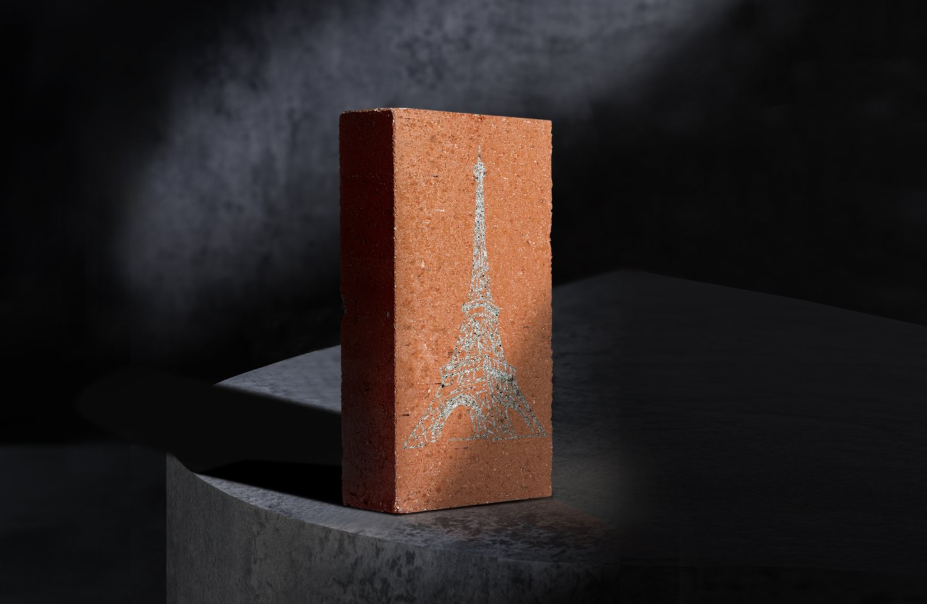
- Granite: The Durable Champion. As an incredibly hard and dense igneous rock, granite is the premier choice for projects requiring longevity, like outdoor memorials and architectural signs. Dark, polished granite is the gold standard for photo engraving, producing a brilliant, high-contrast white mark. Its toughness, however, means it requires higher laser power or slower speeds to engrave effectively.
- Marble: The Artist’s Choice. Composed primarily of fine-grained calcite, marble’s uniform structure is ideal for capturing intricate details and delicate text. It’s a softer stone that engraves quickly. Its main challenges are the natural veining, which can disrupt a design, and the low contrast on lighter-colored marbles, which often requires color filling to make the engraving stand out.
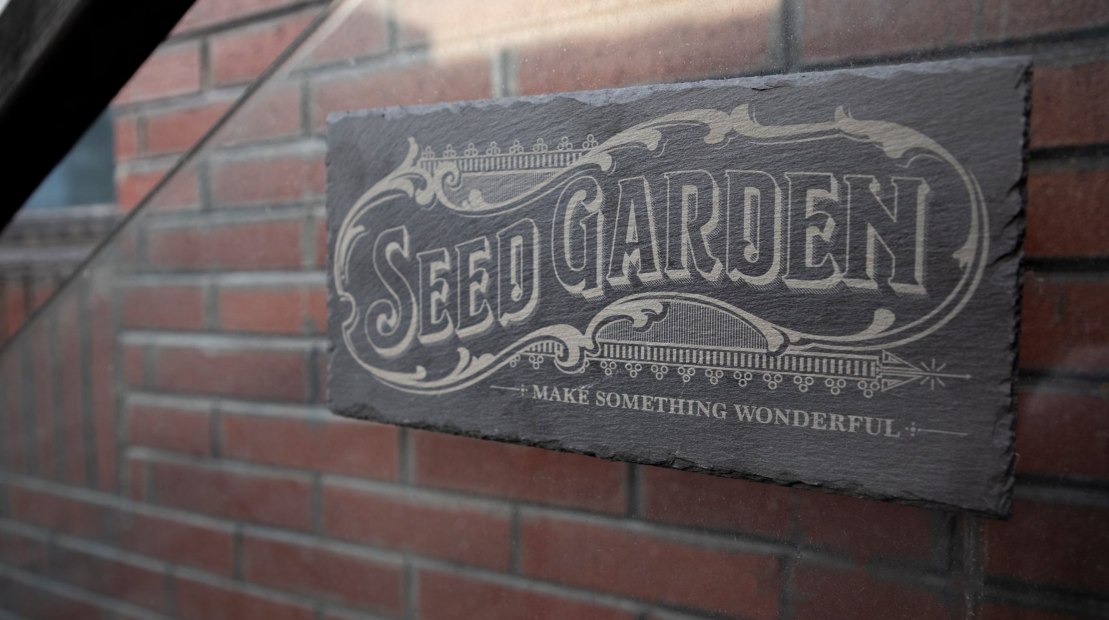
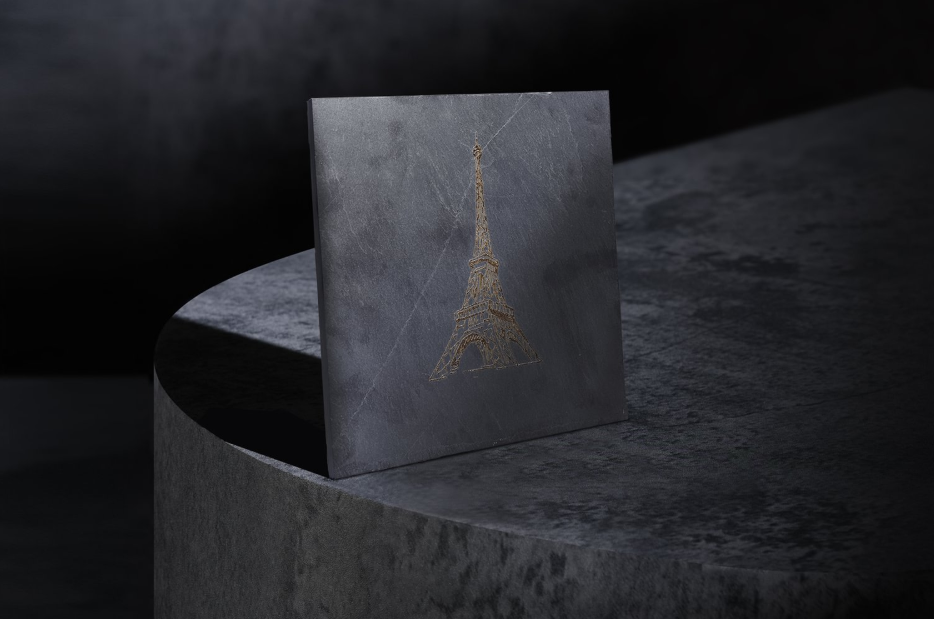
- Slate: The Maker’s Favorite. This fine-grained metamorphic rock is arguably the most forgiving and popular material for hobbyists and gift makers. Its layered structure allows the laser to easily ablate the dark top surface, revealing a lighter gray layer underneath. This creates fantastic natural contrast with relatively low laser power, making it perfect for coasters, plaques, and personalized signs.
What Makes a Stone “Good” for Engraving?
When selecting a stone, consider these three properties:
- Hardness & Density: How durable does the final product need to be? Harder stones like granite withstand weathering but require more laser energy. Softer stones like marble engrave easily but are best for indoor use.
- Grain & Homogeneity: How detailed is your design? Fine-grained, uniform stones like slate and high-quality marble will reproduce crisp lines and details. Coarse-grained stones can result in a more "pixelated" look.
- Color & Contrast: What is the desired visual impact? Dark stones will produce the highest natural contrast. Engraving on a light-colored stone will create a subtle, low-contrast mark.
Laser Options Explained: CO₂, Fiber, and Diode
Not all lasers are created equal. Their suitability for stone is primarily determined by their wavelength, which affects how their energy is absorbed by the material.
The Industry Standard: CO₂ Lasers
CO₂ lasers are the versatile workhorses of the engraving world. Their specific wavelength is very efficiently absorbed by stone and other organic materials, allowing for clean, predictable results across the widest range of stone types. They are the established industry standard for a reason.
The Niche Specialist: Fiber Lasers
Fiber lasers operate at a different wavelength that is optimized for marking metals. While their immense power can be used to fracture the surface of some dark stones, their mechanism is less efficient for this purpose. They are a specialized tool and less common for general stone engraving.
The Accessible Choice: High-Power Diode Lasers
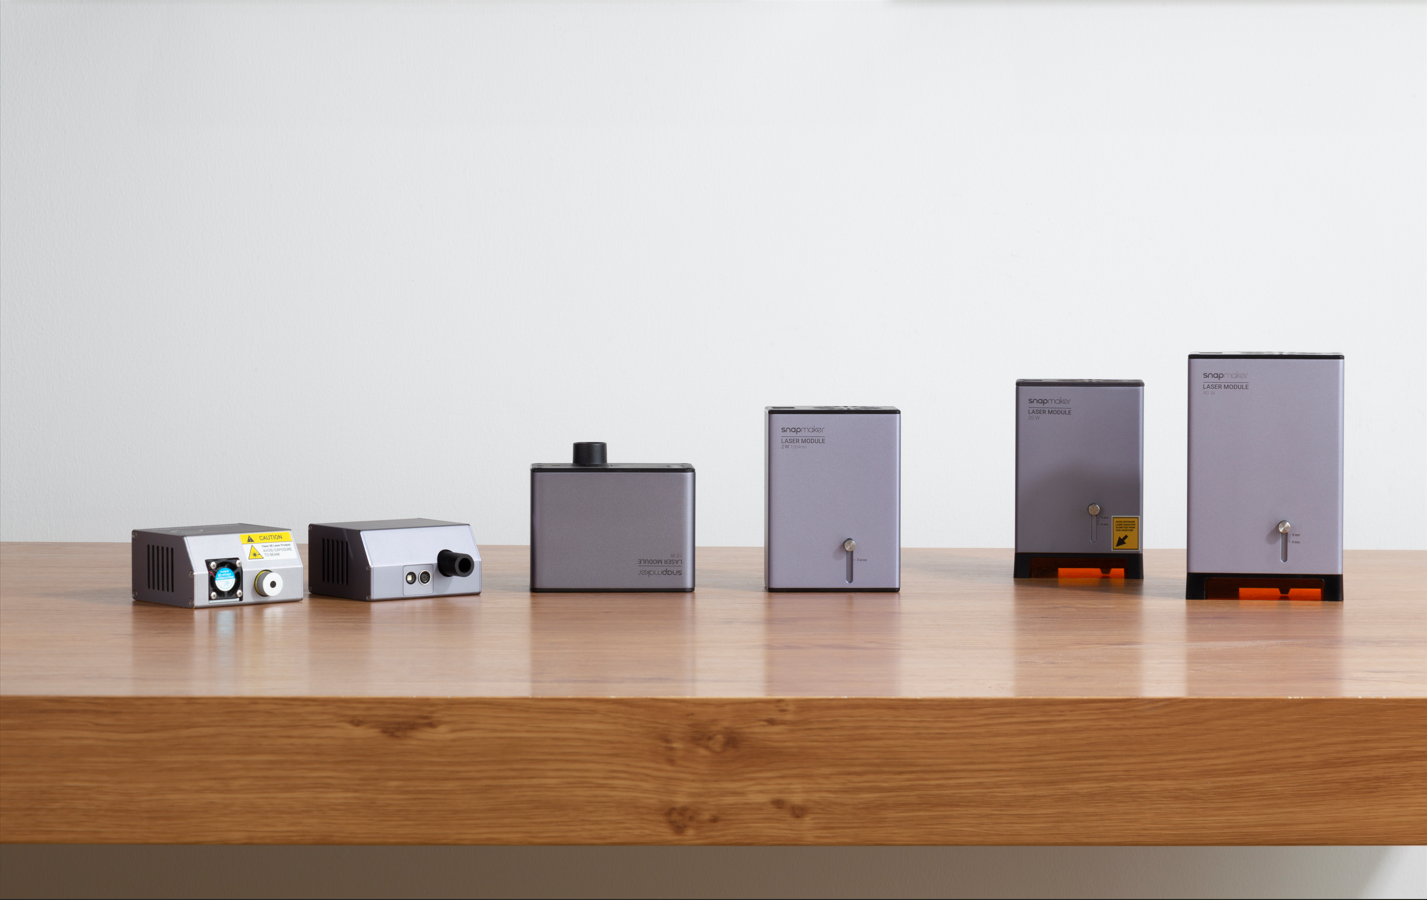
Representing the most accessible entry point for makers, diode laser technology has advanced significantly in recent years. Modern high-power diode laser modules are more than capable of producing beautiful, permanent engravings. While they may be slower than a CO₂ system on very hard materials like granite, they perform exceptionally well on maker-friendly stones like slate, making them an ideal and cost-effective choice for hobbyists and small businesses.
Complete Workflow: From Digital File to Finished Stone
Achieving a great result requires a systematic process. Following these steps will ensure consistency and quality in your work.
Step 1: Preparation is Everything
- Design: Start with a high-quality source file. For photos, a resolution between 250 and 333 DPI is often the sweet spot, providing great detail without over-processing the stone's natural texture.
- Cleaning: This is the most critical step. The stone surface must be perfectly clean. Wipe it down thoroughly with isopropyl alcohol and a microfiber cloth to remove all dust and oils, then let it dry completely. Any residue will interfere with the laser and lead to a blotchy result.
Step 2: Machine Setup and Calibration
- Leveling: Your stone must be stable and level in the machine. An uneven surface will cause the laser to go in and out of focus, resulting in an inconsistent engraving with both blurry and sharp spots. Use jigs or supports for irregular shapes if needed.
- Focusing: A crisp engraving requires a sharp focus. Use your machine’s autofocus feature or manual focusing tool to set the precise distance between the laser lens and the stone's surface.
Step 3: Execution and Safety
- Test First: This is the golden rule of laser engraving. Always run a small test of your settings on a scrap piece of the same material or an inconspicuous spot on the back of your workpiece. This allows you to verify your power and speed settings without risking your final piece.
- Ventilation: The engraving process generates fine mineral dust. A robust ventilation system that exhausts to the outside or uses a proper filter is mandatory. This protects both your health and the sensitive optics of your laser machine.
Step 4: Finishing Touches for a Professional Look
- Cleaning: After the engraving is complete, gently clean the surface with a damp cloth or soft brush to remove all the dust from the engraved crevices.
- Sealing: For a truly professional finish, apply a clear acrylic sealer. This is especially effective on slate, as it darkens the stone and makes the light-gray engraving "pop" with incredible contrast. It also protects the piece from moisture and oils.
- Color Filling: On low-contrast stones like light marble, you can make the engraving stand out by filling it with acrylic paint. Engraving through a layer of masking tape first provides a perfect stencil for clean results.
Laser vs. CNC: Two Paths to Engraving Stone
While a laser is a fantastic tool for marking stone, it’s not the only digital fabrication method. Understanding how it compares to CNC carving can help you choose the right process for your project.
When to Use a Laser: Speed and Fine Detail
A laser excels at creating intricate, high-resolution surface marks. It is the superior tool for reproducing photorealistic images, complex patterns, and fine text. Because it’s a non-contact process, it is extremely fast for large area fills and carries no risk of mechanically chipping the material.
When to Use a CNC: Depth and Dimensionality
CNC carving uses a physical, rotating bit to carve away material. This is the method of choice when you need to achieve true physical depth. It is ideal for creating V-carve lettering with beveled edges, inlay pockets, and 3D relief carvings with contoured surfaces.
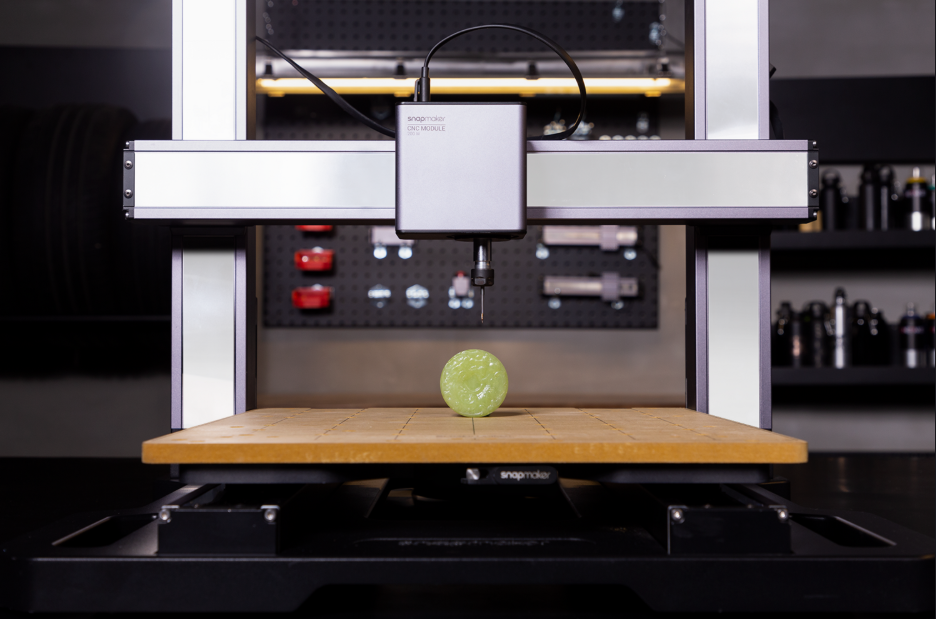
The Modular Advantage: Why You Don’t Have to Choose
A modular system like the Snapmaker Artisan provides the ultimate creative flexibility, giving you the ability to use both methods. You can use the laser module for its speed and fine detail when engraving a family portrait onto a slate plaque. Then, for a different project, you can switch to the CNC module to achieve a beautiful, deep carving on a harder material like jade—an officially supported material for the Snapmaker CNC module. This ability to use the right tool for the job within a single ecosystem unlocks a much wider range of creative possibilities.
Your Creative Journey Awaits
Mastering the art of laser engraving stone isn't about finding a secret setting; it's about understanding the material, following a systematic process, and embracing experimentation. The difference between an amateur and a professional result lies in careful preparation and a willingness to run a simple test grid to find the perfect settings for each unique piece of stone.
With today's accessible technology, this timeless and beautiful craft is truly open to everyone. Armed with this knowledge, you are ready to start your first project and turn a simple piece of stone into a permanent work of art.