Guide to 3D Printer Upgrades: Boost Print Quality, Capability, and Reliability
Targeted 3D printer hardware & software upgrades—hardened steel nozzles, PEI plates, enclosures, filament dryers and optimized slicer settings—greatly boost print quality, reliability, material compatibility, while modular laser & CNC modules expand machine functionality without buying a new unit.
It can be incredibly frustrating when a 30-hour print fails at the last minute due to a warped edge, or when a brand-new spool of filament results in a stringy, messy blob. If you are tired of constantly tinkering with bed leveling knobs or feeling limited to basic PLA plastics, you are not alone.
The good news is that you don't necessarily need to buy a whole new machine to get professional-grade results. Whether your goal is to print faster, experiment with engineering-grade materials, or simply make your machine quieter and more reliable, the right upgrades can transform a standard 3D printer into a true multi-tool workshop.
Here is a comprehensive guide to the hardware and software upgrades that offer the best return on investment for your print quality and peace of mind.
Why Upgrade Your 3D Printer?
Before diving into specific parts, it helps to understand exactly what you are trying to achieve. Upgrading your printer generally solves three main categories of problems:
- Consistency and Reliability: Reducing the manual labor required before every print (like manual bed leveling) and ensuring parts stick to the bed every single time.
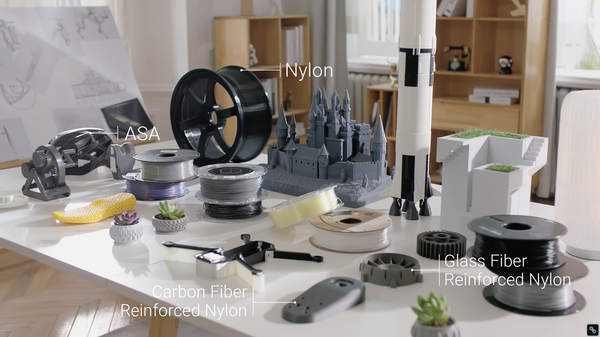
- Material Expansion: Moving beyond standard PLA and PETG to print with high-temperature, flexible, or abrasive materials like Nylon, TPU, and Carbon Fiber.
- Expanded Functionality: Turning a single-purpose plastic melter into a versatile manufacturing station.
Best 3D Printer Upgrades for Perfect Prints
Hardware additions are often the most impactful way to solve daily printing pain points. Here are the top upgrades to consider for immediate improvements.
Hardened Steel Hot Ends for Advanced Materials
Standard brass nozzles are excellent for basic plastics, but they wear down rapidly when introduced to abrasive materials like carbon fiber, wood-fill, or glow-in-the-dark filaments. As the nozzle degrades, your extrusion becomes inconsistent, leading to failed prints.
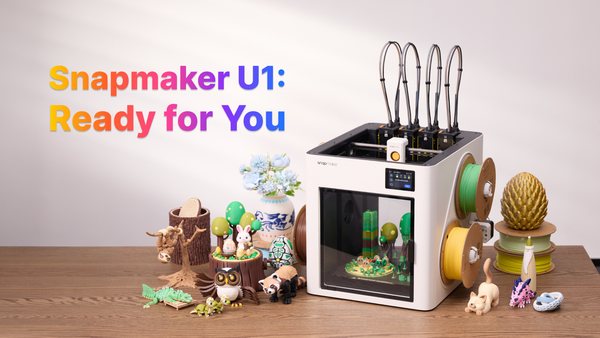
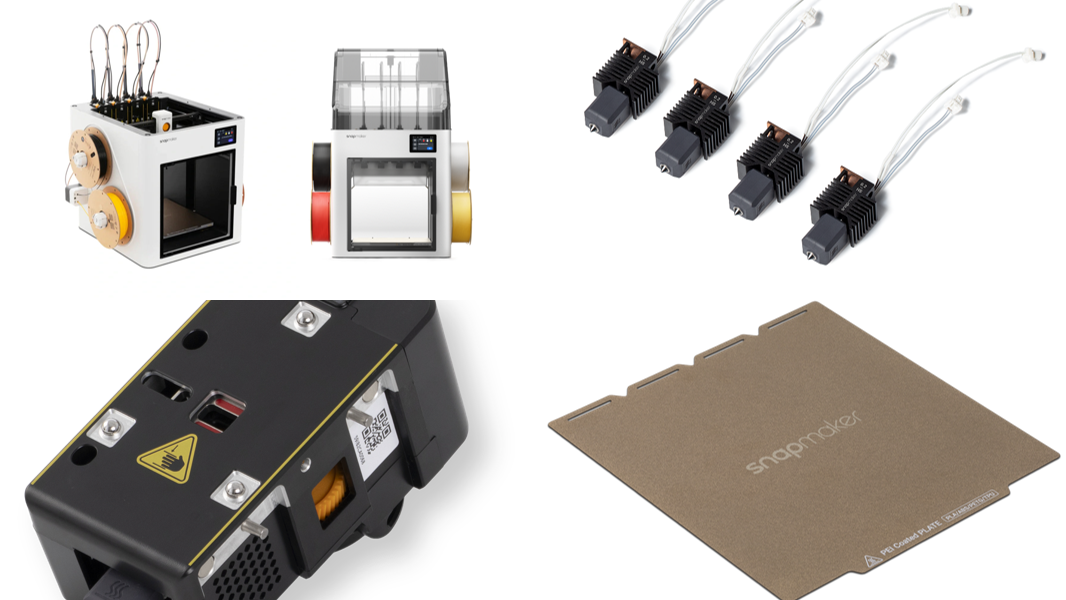
Swapping to a hardened steel nozzle setup solves this issue. For instance, installing a Hardened Steel Bundle, like those available for the Snapmaker U1, allows you to print highly detailed, abrasive materials continuously without sacrificing the precision or longevity of your print head.
Upgraded Build Plates for Flawless Adhesion
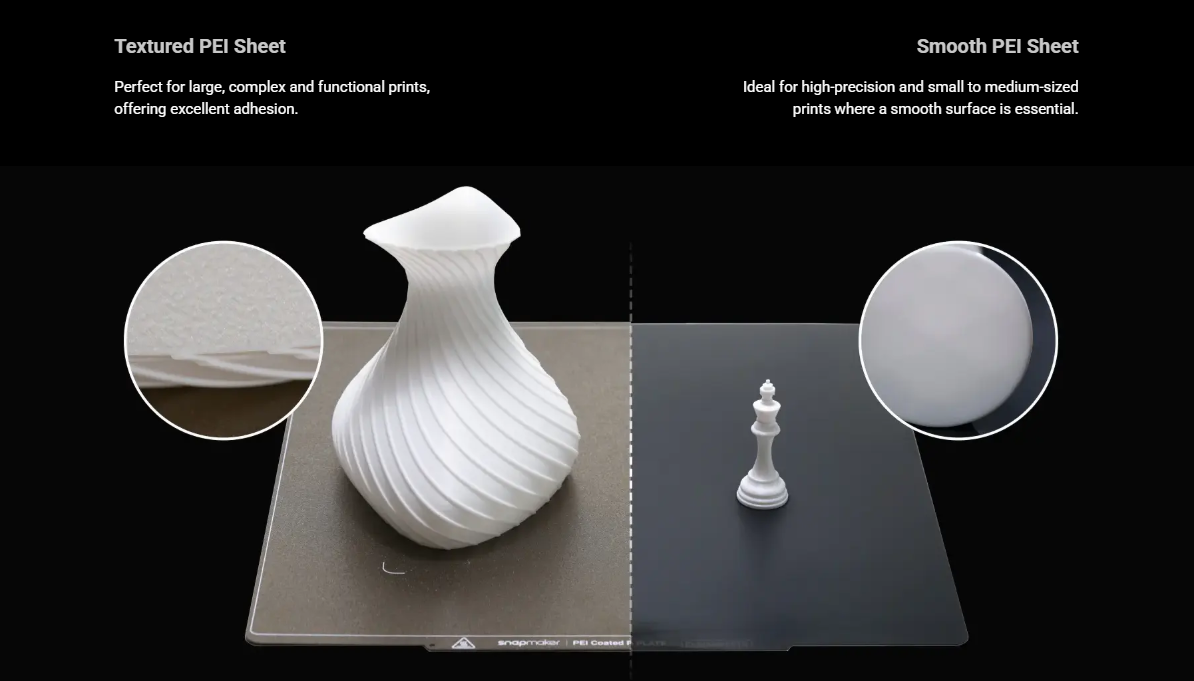
Struggling to get the first layer to stick—or conversely, struggling to pry a finished part off the glass—is a universal 3D printing headache.
Upgrading your build surface is one of the quickest quality-of-life improvements you can make. Transitioning to a PEI Steel Sheet provides excellent thermal transfer and adhesion when hot, but easily flexes to release the part once cooled. For makers looking to add a unique finish to their parts, a Graphic Effect Steel Plate can leave a beautiful, textured, or holographic pattern on the bottom layer of the print, eliminating the need for post-processing the base.
Top Covers and Enclosures
If you are attempting to print temperature-sensitive materials like ABS or ASA, you have likely experienced warping or layer splitting. These materials shrink rapidly if exposed to cool room air or drafts.
An enclosure is mandatory for advanced materials. A dedicated solution, such as the Top Cover for the Snapmaker U1, traps the ambient heat generated by the heated bed, ensuring stable temperatures throughout the print cycle while simultaneously reducing operating noise and keeping dust off your internal mechanics.
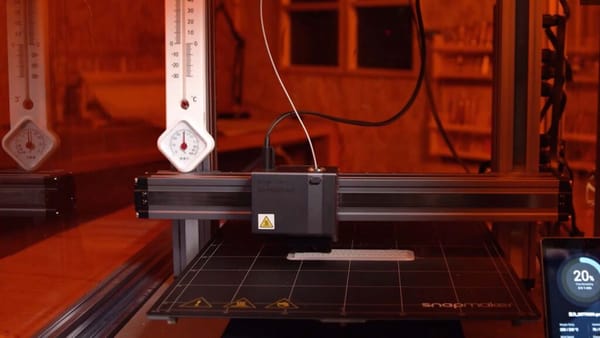
Filament Drying and Storage
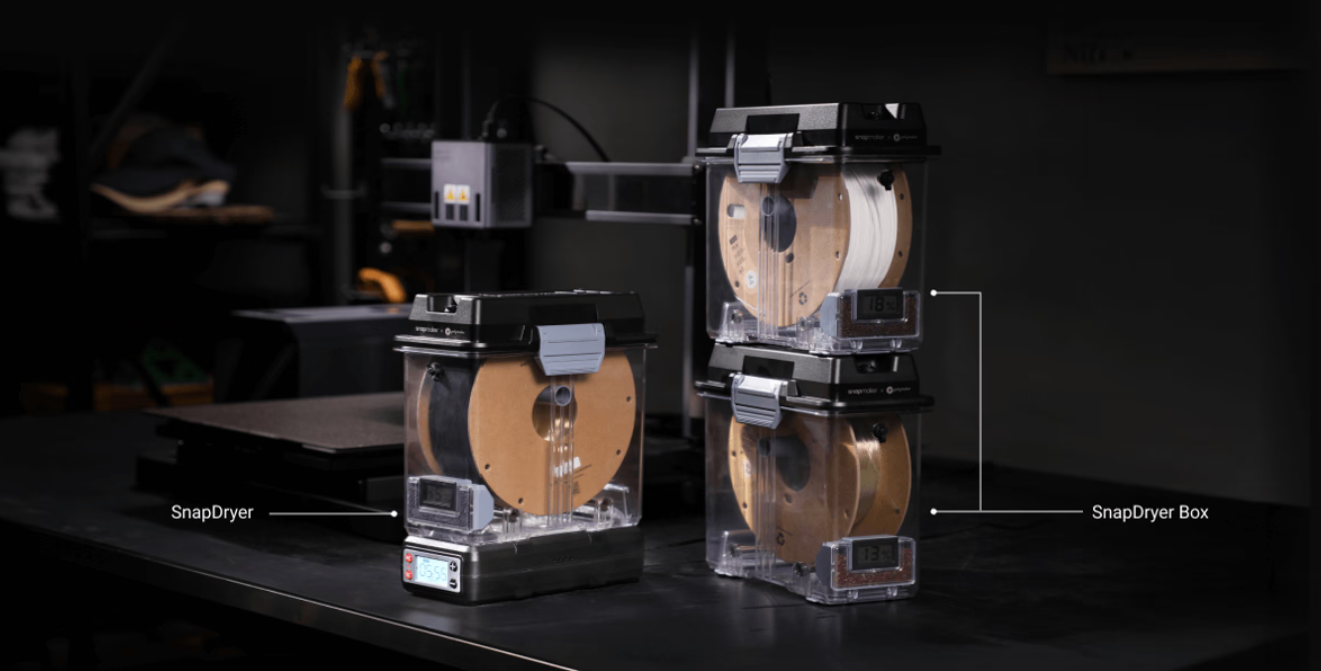
Often, print quality issues like stringing, blobbing, or audible "popping" noises from the nozzle aren't caused by the printer at all—they are caused by wet filament. Hydroscopic materials (like PETG, Nylon, and TPU) actively absorb moisture from the air.
Using an active drying system, such as a SnapDryer, ensures your filament is perfectly dehydrated before and during the print process. This results in stronger layer adhesion, smoother surface finishes, and zero moisture-related clogs.
Expanding Your Capabilities: Modular Upgrades
If you want to get more out of a single machine footprint, leaning into modular ecosystems is the ultimate upgrade path.Quick-Swap Toolheads and Dual Extrusion
Printing complex geometries often requires support structures that are incredibly difficult to remove cleanly. Ecosystems that support quick-swap toolheads or dual extrusion allow you to print with soluble support materials (like PVA). You can simply dissolve the supports in water, leaving a flawless, complex part behind without hours of tedious sanding and clipping.
Multi-Material Printing Without the Waste
Printing complex geometries often requires soluble support structures (like PVA), and printing vibrant models requires multiple colors. However, traditional multi-color systems rely on a single nozzle that must constantly cut, retract, and swap filaments. This forces the printer to build massive "purge towers" to clear the old color, often wasting three to four times more material than what ends up in the actual model!
The most advanced upgrade path is moving to a system that swaps the entire toolhead rather than just the filament line.
Moving Beyond Plastic: Laser and CNC Modules
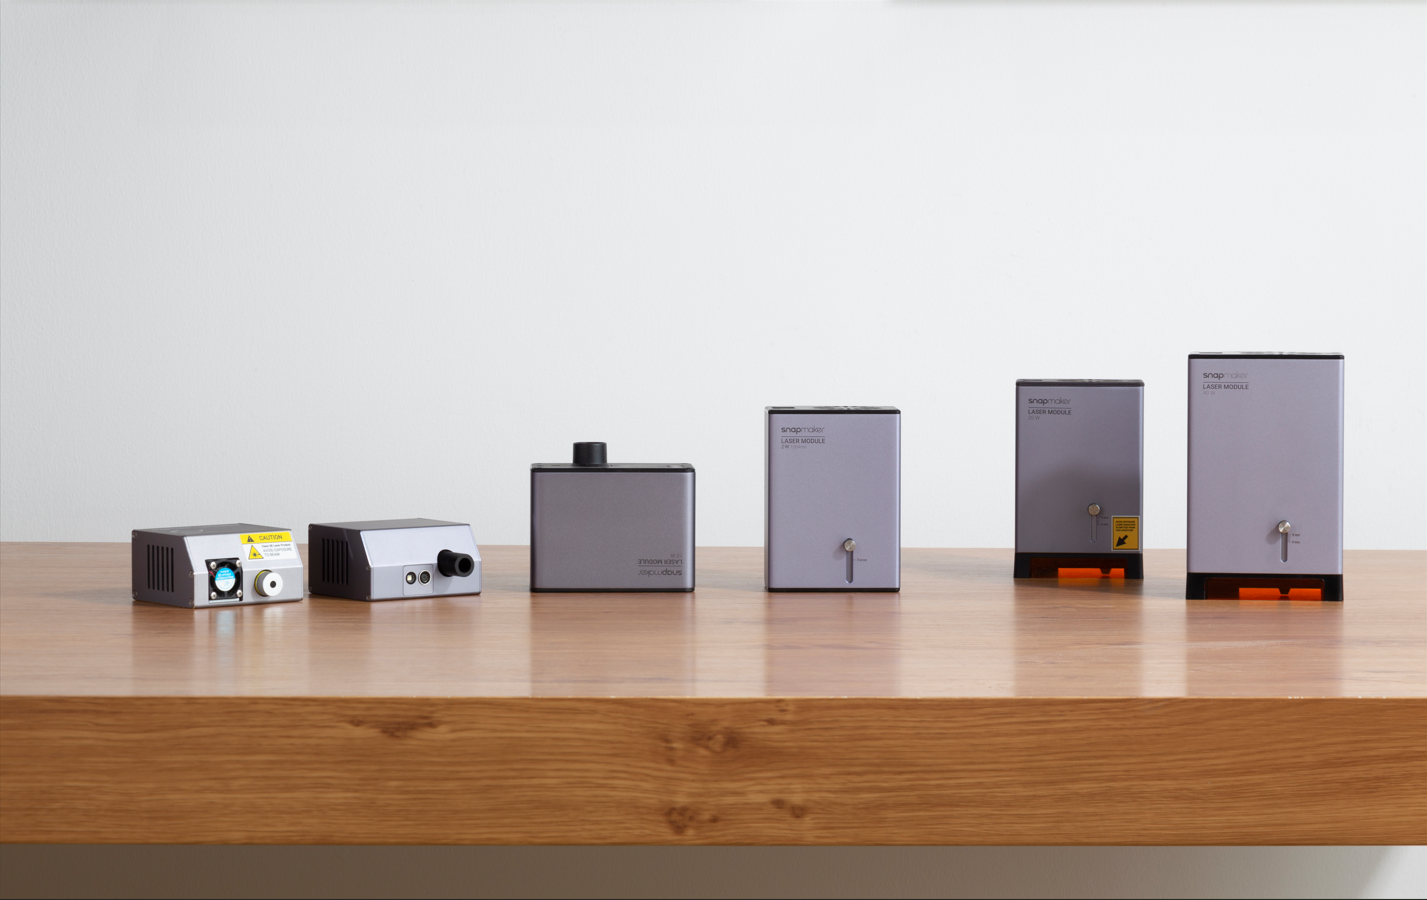
A sturdy 3D printer frame with high-quality stepper motors is capable of much more than just 3D printing. Machines designed from the ground up for modularity, like the Snapmaker Artisan, let you completely swap your manufacturing method. By replacing the print head with a 10W or 40W Laser Module, or even a 200W CNC Module, you can seamlessly transition from 3D printing a custom enclosure to CNC carving a wooden base or laser-engraving a metal plaque—all on the same machine.
Top 3D Printer Upgrades You Can Print Yourself
One of the best parts about owning a 3D printer is using it to improve itself. Here are a few practical DIY upgrades:
- Tool Organizers and Modular Storage: Print custom, perfectly sized trays to hold your spare nozzles, Allen wrenches, and flush cutters so your workspace stays tidy.
- Cable Management Solutions: Dragging cables can catch on prints or wear out over time. Printing your own cable chains or filament guides reduces strain on your electronics and keeps the moving parts safe.
Software Upgrades: Don't Forget Your Slicer
Hardware is only half the battle; the software you use dictates how well that hardware performs.
Maximizing Hardware with Snapmaker Orca
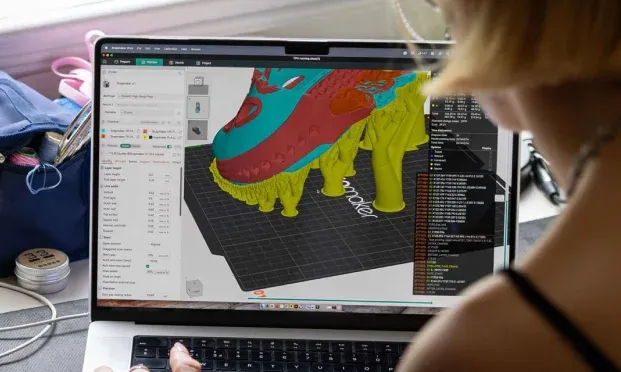
A high-end hot end won't perform well if your retraction and cooling settings are wrong. Using an advanced, regularly updated slicer like Snapmaker Orca provides the exact cooling, bridging, and speed profiles needed to make your new hardware run perfectly right out of the box, reducing the time you spend calibrating.
Remote Monitoring via the Snapmaker App
Leaving a 40-hour print unattended can be nerve-wracking. Connecting your machine to a dedicated platform like the Snapmaker App allows you to monitor your print via a built-in camera, check temperatures, and pause or stop the print remotely if an error occurs, giving you total peace of mind.
Where to Find Reliable 3D Printer Accessories
When upgrading electrical components like hot ends, heated beds, or power supplies, safety and compatibility are paramount. Using cheap, knock-off parts can lead to severe issues, including motherboard failures or even thermal runaway.
Always prioritize genuine, first-party parts designed specifically for your machine's ecosystem. Purchasing directly from official manufacturer storefronts—like the Snapmaker Store—guarantees that the modules, electronics, and hardware will integrate safely and flawlessly with your current setup.
The Bottom Line
You don't need to buy every module or upgrade at once. Identify your biggest bottleneck—whether it's bed adhesion, wet filament, or the desire to try laser engraving—and start there.
Frequently Asked Questions About 3D Printer Upgrades
What is the most important 3D printer upgrade?
For most users, the most important 3D printer upgrade is a high-quality build plate (like a PEI steel sheet) or an automatic bed leveling system. These two upgrades immediately solve the most common causes of failed prints: poor first-layer adhesion and unlevel print beds.
Are 3D printer upgrades worth it?
Yes, targeted 3D printer upgrades are highly cost-effective. Adding a hardened steel nozzle, an enclosure, or a filament dryer allows you to print with advanced, durable materials (like Carbon Fiber or ASA) without needing to purchase an entirely new, more expensive 3D printer.
Can I upgrade a standard 3D printer to a laser engraver?
It depends on your machine's ecosystem. Modular 3D printers, like the Snapmaker Artisan, are designed with interchangeable toolheads, allowing you to easily swap the 3D printing module for a high-powered laser engraver or CNC router module using the same frame and motion system.
Does an enclosure improve 3D print quality?
Yes, an enclosure significantly improves print quality for temperature-sensitive materials like ABS, ASA, and Nylon. It prevents warping and layer splitting by trapping the heat generated by the print bed, keeping the ambient air temperature stable and blocking cool drafts.