StarMaker | Custom Wedding Invitation Stamp
My eyes fell upon an invitation card left by my friend for their wedding. That’s when it occurred to me why not make customized wedding stamps?
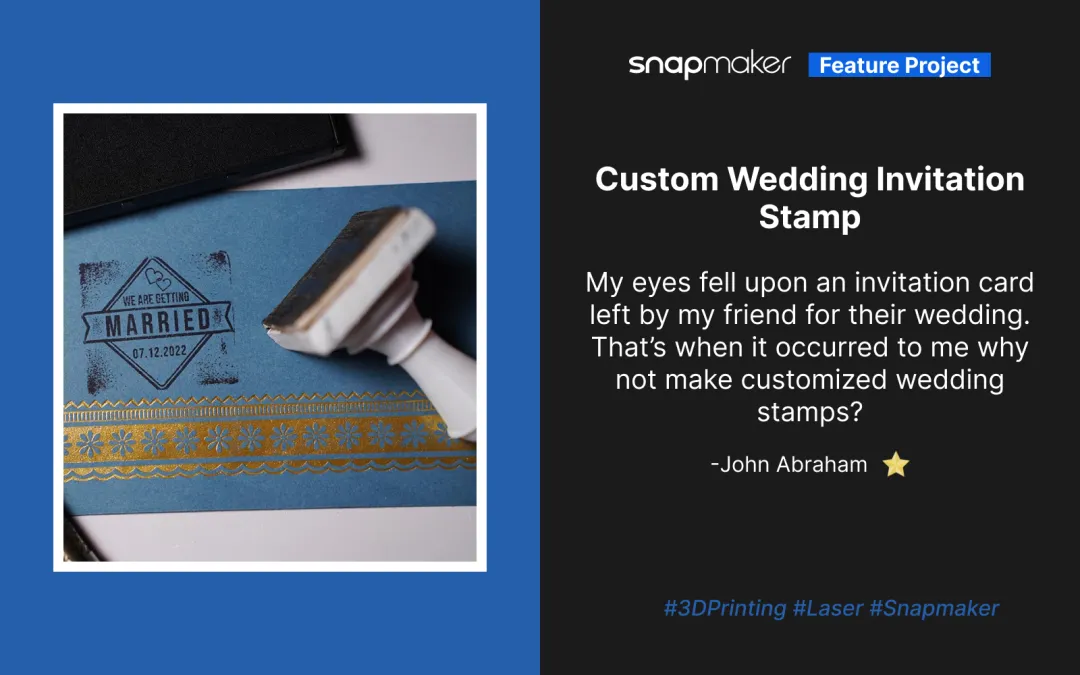

Project: Custom Wedding Invitation Stamp
Designed and Created By: John Abraham
John’s Platform: Mellowpine CNC and Lasers
John’s YouTube Channel: Mellowpine Lasers
3D Printer: Snapmaker 2.0
Software used:
Adobe Illustrator (Rubber Stamp Design)
SketchUp (Handle 3D Model)
Snapmaker Luban
Materials:
Rubber Sheet
Pine
White PLA Filament
Glue
Acrylic Paint
Envelopes
Laser Engraving Settings:
100% Power
75 mm/min Speed
Line Filled Engraving
Line Spacing 0.1 mm
3D Printer Settings:
Normal Quality Preset
Layer Resolution 0.16 mm
Hi makers,
I recently got my hands on the Snapmaker 2.0 3-in-1 machine, and I was wondering about making something that can be used as a business idea.
My eyes fell upon an invitation card left by my friend for their wedding. That’s when it occurred to me why not make customized wedding stamps? They make your invitations look better, and it is a good project for the Snapmaker machine.
I decided I’ll 3D print the handle, use a piece of wood as the base, and laser engrave a rubber sheet for the actual stamp.
For my first try, I thought it would be better to make a plain base. You can also use the CNC module to carve some design onto the base.
After a few tests and tweaks, I finally had a good product. I will explain each step in detail to show you how I made it.
The design files are linked at the end of this article.
We play around with lasers and CNC at Mellowpine.
3D Printing the Handle
I made a simple handle design using SketchUp software and saved it as an STL file. Once the STL file was ready, I imported it onto Snapmaker Luban software for 3D printing.
You can use wood PLA or any other PLA based on what kind of look you prefer. I had some white PLA left over from a previous project, so I chose a black-and-white color scheme.

The normal quality preset on the Snapmaker Luban software gives you a good-quality finish. It has a layer height of 0.16 mm. You can try the high-quality preset if you want a smoother finish.
It took about an hour to 3D print the handle, and I printed out several of these while working on the rubber stamp design.
Preparing the Design
I used LightBurn for running the operations and Illustrator for making the designs. While making the designs for rubber stamps, you should keep a few things in mind. The size of all parts of the design should be thick enough to provide good structural stability. If any portion of the design is too thin, it will tear or burn up when engraving. Another thing you need to do is to invert the image so that the parts you need on your stamp are white and everything else is black. You should also make sure the area around the design is black.

You should also flip the image horizontally to ensure it looks right when stamping it. I wasted a couple of pieces because I forgot to flip the design.
Laser Engraving the Rubber Stamp Heads
I used a plain rubber sheet I found in a local store for the stamp head. You can get these rubber sheets from Amazon or local stores.
Rubber is a soft material and burns when laser engraved, so you should engrave it at low power and high speeds with multiple passes if you need more depth.
Laser engraving rubber produces smoke, and you should make sure to arrange good ventilation when laser engraving rubber.
Before engraving the rubber sheet, clean it with a wet rag or use alcohol.
On the 1.6 W laser module on Snapmaker 2.0, which is the one you get with the machine, I engraved the sheet at 100% power and 75 mm/min speed. It took me around 3 hours to engrave a 40 x 40 mm design. The depth was sufficient even at 1 pass. If you need more depth or if the edges are not perfect, you can try increasing the speed and number of passes.

If you get the 10W module, you can engrave at around 1200 mm/min, which means you can do the same job in about 15 minutes. If the edges you get are burnt, you can reduce the power and increase the speed.

After the engraving, you will have to remove the burnt rubber from the sheet. I used a stiff brush to do it. You can also use an old toothbrush if you do not have one. Make sure you’ve cleaned it well and cut out the design from the sheet using a scissor or blade.
Making the Base
As I did, you can include the base in your 3D print design or make one out of wood. I had a 6mm thick pine board, so I made the base out of pine and painted it in the color I liked.

Putting it all together
Once everything was ready, I used some glue to put them all together.


Overall, the project turned out to be really good and easy. It is a good idea to make a side income without much effort if you have a machine like the 3-in-1 3D printer.


