Let’s laser engrave a guitar shaped decoration! Arts in school can be another way of fun
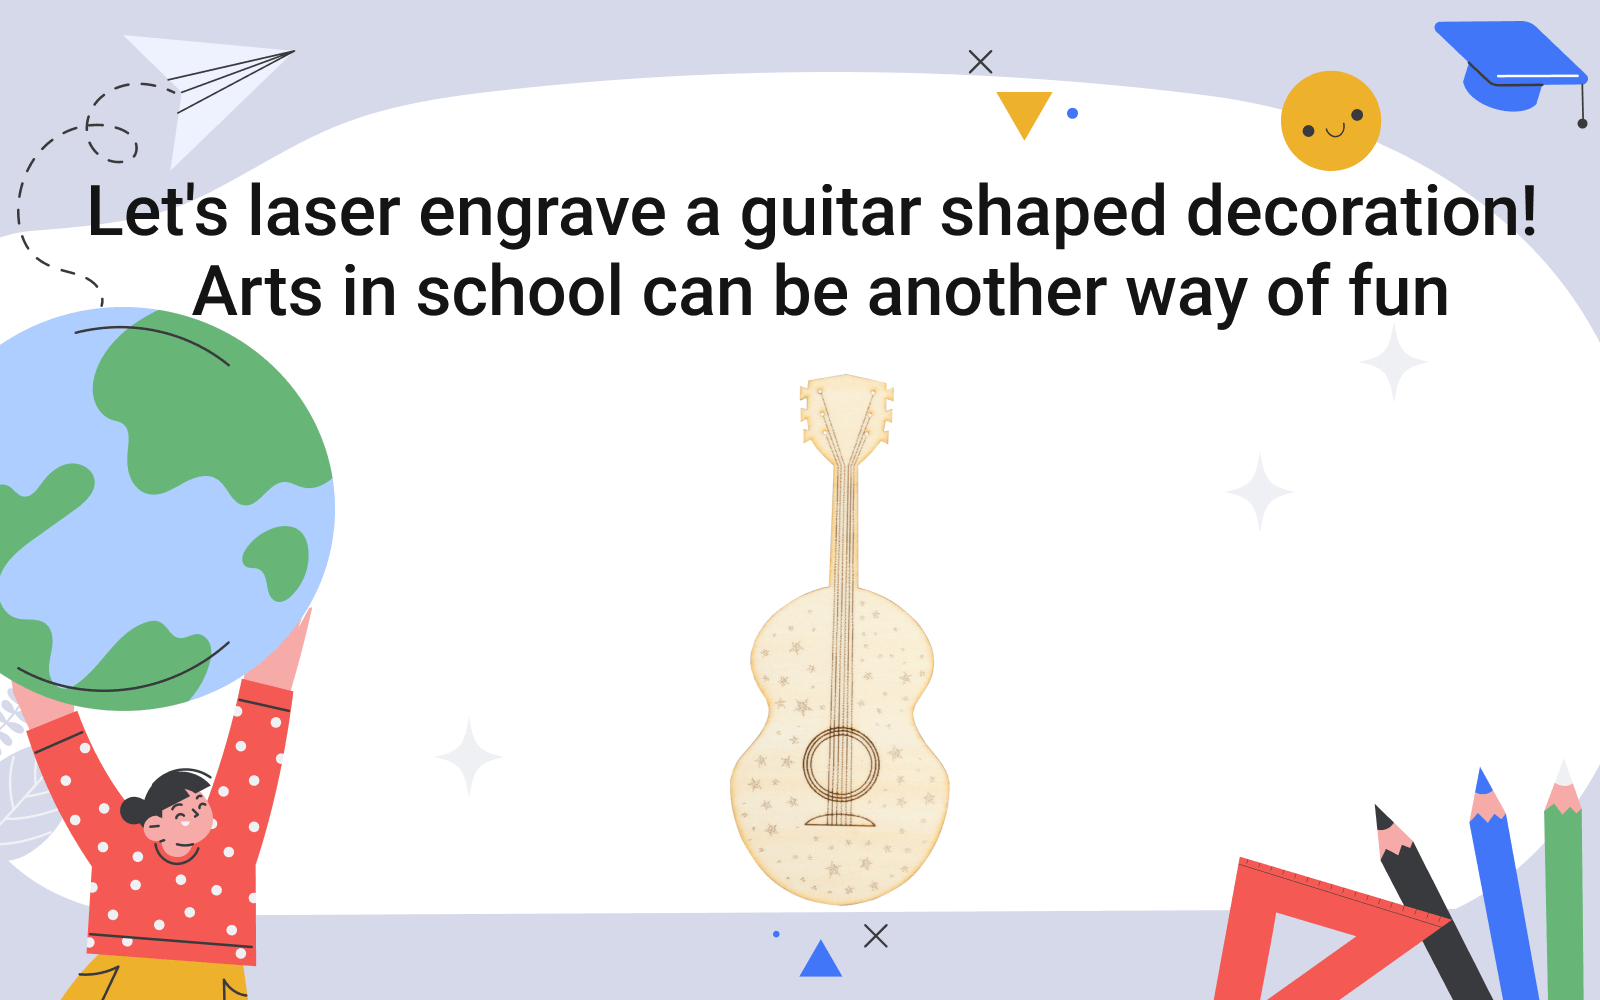
Here comes the second course! In the first course, we showed you how to use Snapmaker’s 3D printing function for educational purposes. If you haven’t got a chance to read about it, check it now. Today, let’s start a new journey with the laser function. Traditional 3D printers can only do 3D printing while Snapmaker can do more! The Snapmaker 3-in-1 3D printer has the capability of laser engraving and cutting, which is a highly advanced technology used in many industries. The ability to achieve high levels of precision has made laser engraving a popular method of customizing a variety of objects. All the work we showed below was realized by using 1.6W Laser Module on Snapmaker 2.0 – making a guitar decoration from laser engraving and thus turning your imagination into reality.
With the interchangeable modules, Snapmaker allows you switch between different functions quickly. Now, let’s move on to laser engraving. Today’s task is to make a wooden guitar decoration. Before entering the actual making process, let’s get to know the structure of guitar together. The picture below shows a wooden guitar placed vertically, which can be roughly divided into three parts: the head, the neck, and the body. The head is equipped with tuning pegs for adjusting the tightness of the strings; the body includes a sound hole that amplifies the sound of picked or strummed strings, and a bridge that holds the strings. Between head and sound board, there is one long and thin neck.
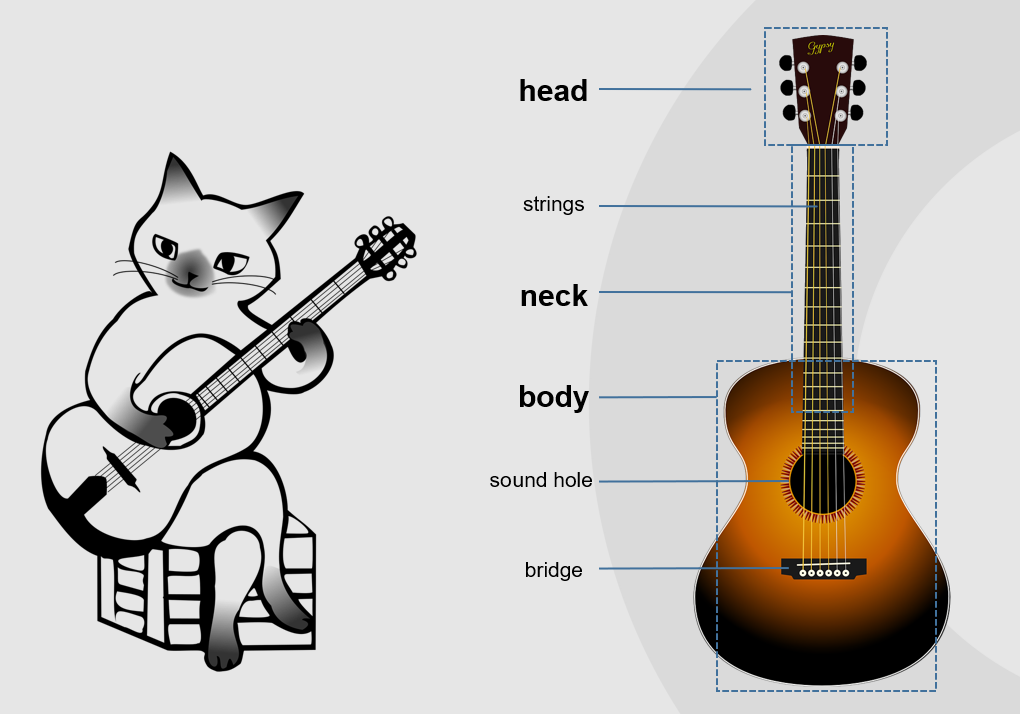
To better help students make a guitar, it’s recommended to drop a question to guide students to consider before designing.
Question: What are the features of the overall shape of the guitar?
Answer: The outline of the guitar body is streamlined and irregular, wide at both ends, and narrow in the middle, which is axisymmetric. The shape of the head and neck can also be roughly seen as quadrilateral. Since the guitar has an obvious axisymmetric shape, we can draw half of the outline of each part, then flip it to get the outline of the other half. In this way, we can not only save time for the drawing process but also ensure the regularity of the structure of the work.

In this blog, we will use Inkscape as the design tool. You can also use more professional software if needed.
If you are new to laser engraving and planning to try STEAM education in your classes or at home, we highly recommend you to follow this course.
First, open Inkscape and create a new file. Then draw the body part of the guitar by using the basic graphics tools to create an ellipse object and convert this object to a path. Divide the ellipse into two parts with a straight line along the central axis of the ellipse, and use the clipping path tool to get the “half outline” mentioned earlier. Through node editing, we make this path streamlined, then make a copy and flip it horizontally to get the “other half of the outline”. Merge the two paths to get a complete guitar body path. Similar to the process of drawing the outline of the guitar body, we use the method of cutting paths and combining paths to draw the shield-shaped head. The neck profile is an elongated trapezoidal shape, created by using the rectangle tool and node editing. Finally, we merge the outlines of the head, neck, and body together to have a complete guitar outline.
How about painting some patterns on the surface of the guitar to make it more attractive and customized? Using the spray copies provided by Inkscape, we randomly spread stars on the sound board. Once all graphics are ready to go, we export the picture in PNG format for subsequent laser cutting and engraving in Luban.
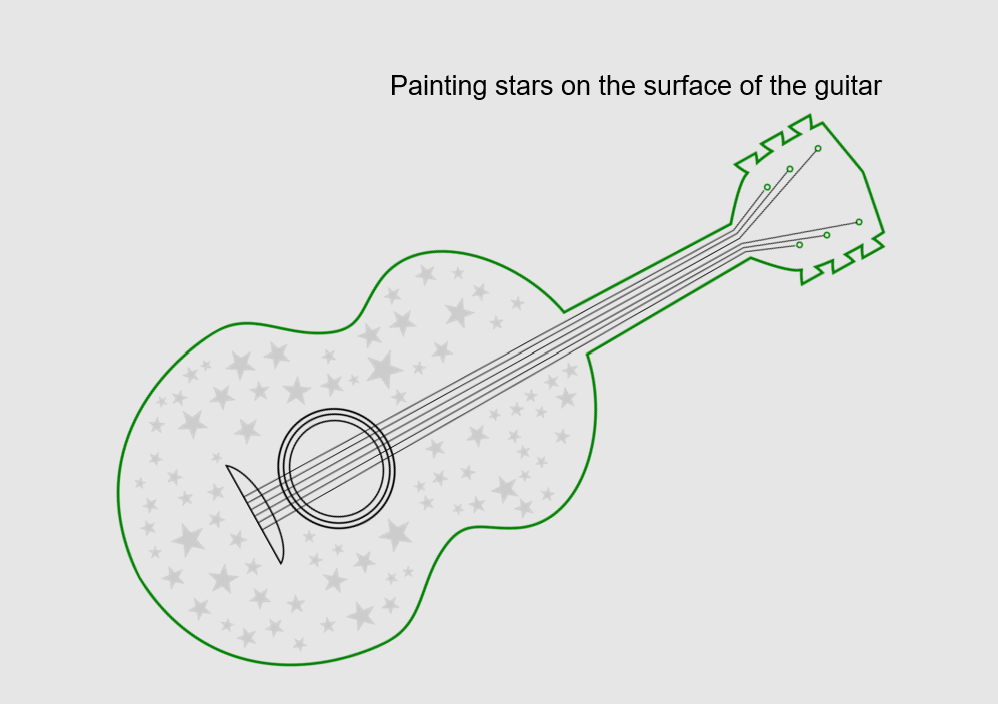
Here are some important tips in Luban that may help you obtain a successful project:
- Since we need to cut out a clear outline, we should choose the “VECTOR” in the “Processing Mode” and raise the threshold appropriately so that the previewed outline can be more visible.
- When you import patterns to Luban, it’s recommended to select “GREYSCALE” for laser engraving in the “Processing Mode”.
- The speed and power parameters can be set based on the material you choose.
If you follow the guides above, the only thing left to do is wait for your delicate little guitar!
In the next blog, we will share the instructions of using CNC carving and cutting. We hope you enjoy the courses and can be inspired to laser engrave your first piece.
Meanwhile, there is a question we would like to know what you think about it – would you appreciate it if STEAM course is the standard course during your school time? Why?
Please feel free to comment below and let us know your thoughts.
Don’t forget our Back-to-school sale is on! Get the most versatile 3-in-1 3D printer to embrace all-round development! See you next week!
