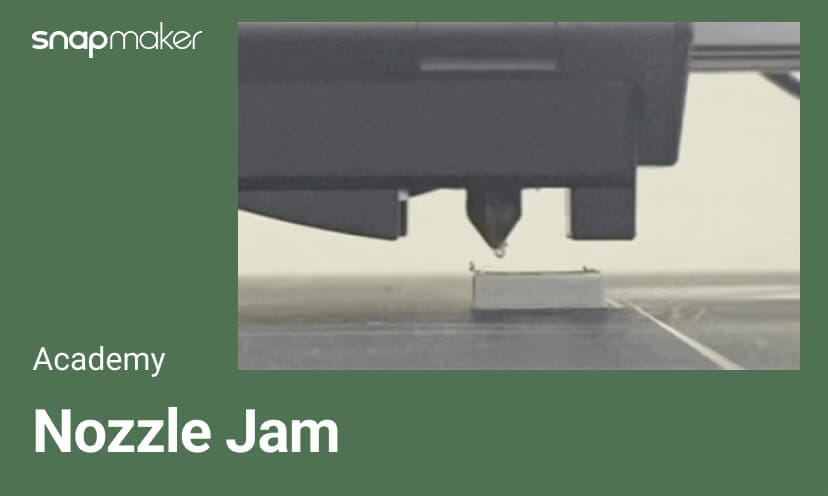
3D Printer Nozzle Jam: Main Causes and Cleaning Methods
Learn the main causes of 3D printer nozzle jams and effective cleaning methods in this Snapmaker guide. Keep your printer running smoothly with expert tips!
Hello, Maker!
Did the nozzle jam ever happen to your 3D printer?
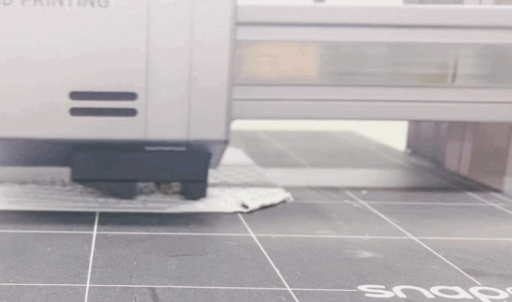
I printed a model a few days ago and walked away for a while during the printing. When I came back, I just found my 3D Printing Module was moving back and forth while no filament was not extruded out, and the module was happily going farther and farther away from the model under my eyes...
It turned out that the nozzle was clogged!
After going through relevant information and asking for help from our Engineers, I finally made the nozzle work again and completed my printing. In this article, I will share the method with you in case you are bothered with the same problem someday.
Why It Happens
There are actually many reasons for nozzle clogging, but they are mainly related to the following three factors:
- Filament degradation
- Improper operation
- Component malfunction
Filament Degradation
The nozzle is the only way out for the filament during printing. Therefore, if your nozzle is clogged, it has something to do with the filament you use in most cases.
The filament quality is the first thing to consider. As 3D printing becomes ubiquitous, the filament market is booming with a dazzling of different brands, features, and colors. But their quality varies. Poor-quality filaments often contain impurities beyond standard limits, which accumulate over time and are likely to clog the nozzle. Moreover, such filaments usually have inconsistent diameters, which can also lead to nozzle jam. Therefore, have second thoughts on cheap filaments since they might result in a lot of maintenance costs in the future.
But will good filaments solve the problem once for all? The answer is negative.
The storage of filaments also matters in that moisture and dust that accumulate on the filament are also common causes of nozzle jam. After wetted (due to poor storage), the filament will gradually become harder and more brittle. It may easily break in the module and hence cannot be extruded smoothly out of the nozzle. In addition, wetted filaments have a higher melting point, which can also lead to nozzle jam. When the filament is extruded out from the nozzle, the dust with it will not be melted and extruded together. On the contrary, they will accumulate at the nozzle outlet, and clog the nozzle over time. For more information about filament storage and drying, see 3D Printing Filament Storage and Drying: Why and How.
Improper Operation
Many of your habitual operations will unknowingly cause nozzle jams. A few typical ones are listed as follows.
- The filament is not changed or unloaded according to regular procedures. If you directly cut it off or even roughly pull it off, you may find that the new filament cannot be extruded properly the next time you print.
- Too much retraction or too much tension in the feeding gears will also increase the risk of nozzle jam.
- Different types of filaments are switched frequently. If you first use the filament with a high melting temperature and then switch to use another filament with a much lower melting temperature, the residues of the first filament are likely to accumulate inside the nozzle to accelerate jams.
When the nozzle moves to the warped edge, it is likely to be topped by the raised part, and the filament that would have been normally extruded will also be temporarily blocked in the nozzle at that moment. If this happens more times, the nozzle may become clogged.
The print speed is too fast, and the filament cannot be melted adequately before extrusion. Over time, the nozzle will inevitably get clogged.
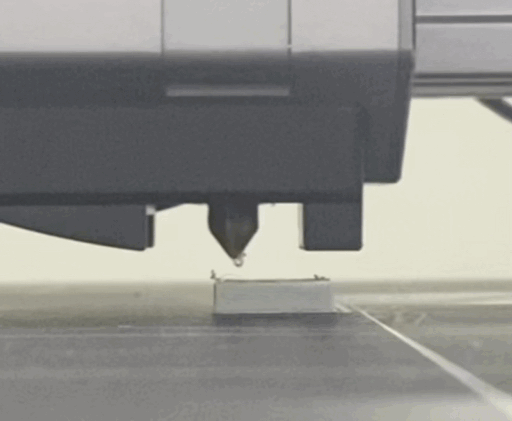
If the nozzle is set too close to the heated bed during leveling, the filament will not be extruded out smoothly and will accumulate inside the nozzle, causing jams after cooling. This is generally due to the inaccurate manual leveling of the Heated Bed, or the failure to calibrate the distance between the nozzle tip and the heated bed in the last step of Auto Leveling. If the filament is not extruded when the initial layer is first printed, this is likely to be the case.
The printing temperature is not set correctly. The temperature is too low for the filament to be fully melted, which will lead to nozzle jam over time. Here is a tip: When the machine’s working temperature is low in winter, you can increase the printing temperature by 5-10℃. But remember, don’t set the temperature too high, either. Otherwise the filament will soften before it should. In this case, the gear will not be able to push forward the filament through the nozzle but chew a spot in the filament, which is known as “Heat Creep”. Furthermore, at an excessively high temperature, the filament may liquefy and stick to the outer surface of the nozzle more easily.
The most direct improper operation is actually not having the habit of cleaning the nozzle. If you want to reduce the chance of nozzle clogging, you must first remember to clean the nozzle to remove the residues left inside or outside after each printing (the specific methods will be introduced later). If not removed, the residues inside the nozzle will inevitably cause nozzle jam over time, and those left outside may prevent the nozzle from being heated up to the specified temperature. As a result, the filament cannot be fully melted and thus clogs the nozzle.
Component Malfunction
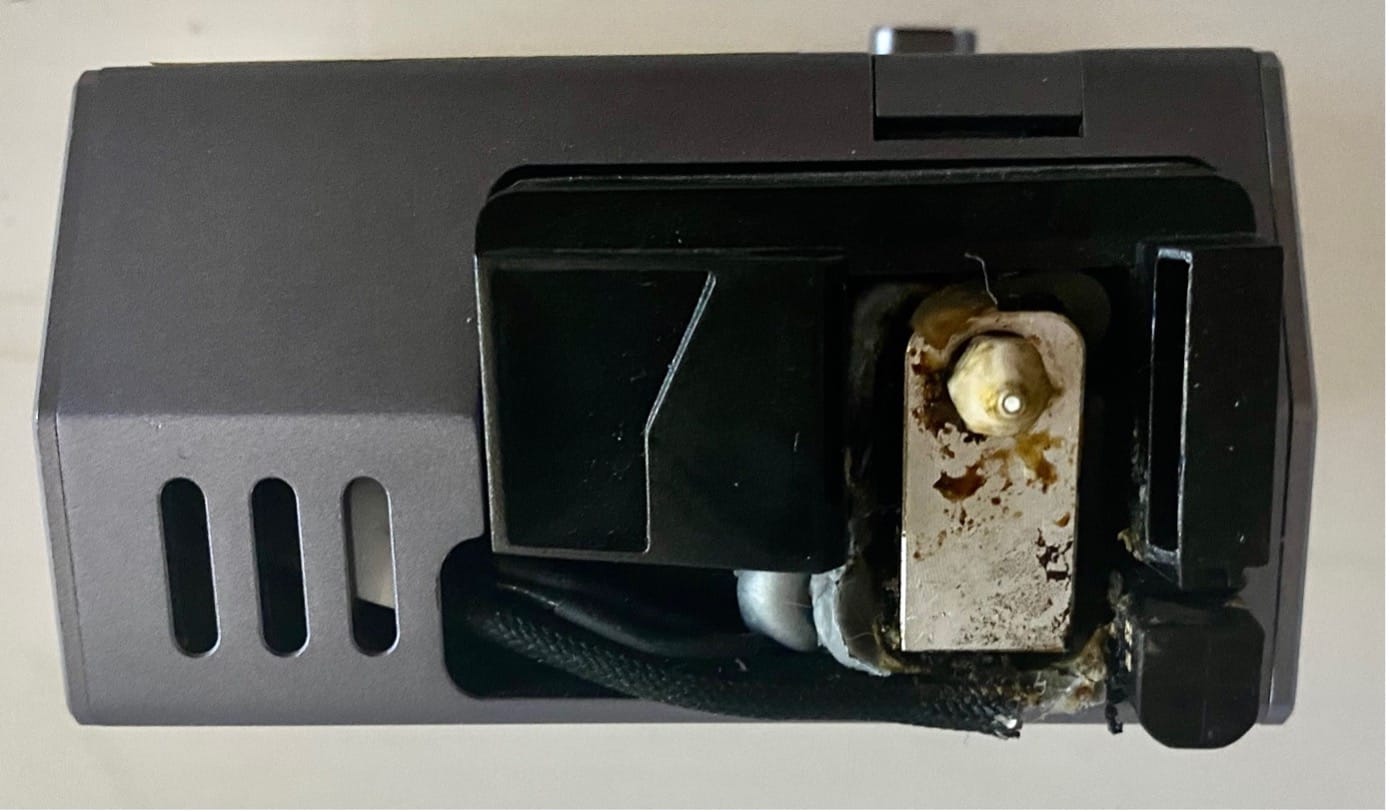
As we mentioned above, an excessively high or low printing temperature can result in nozzle jams. But sometimes, at a proper printing temperature, the nozzle still gets clogged. The reason might be that the heating component of the 3D Printing Module has failed to heat the nozzle to the specified temperature, or the cooling fan inside the Module has malfunctioned, leading to early softening of the filament.
How to Identify
A nozzle can be partially or entirely clogged.
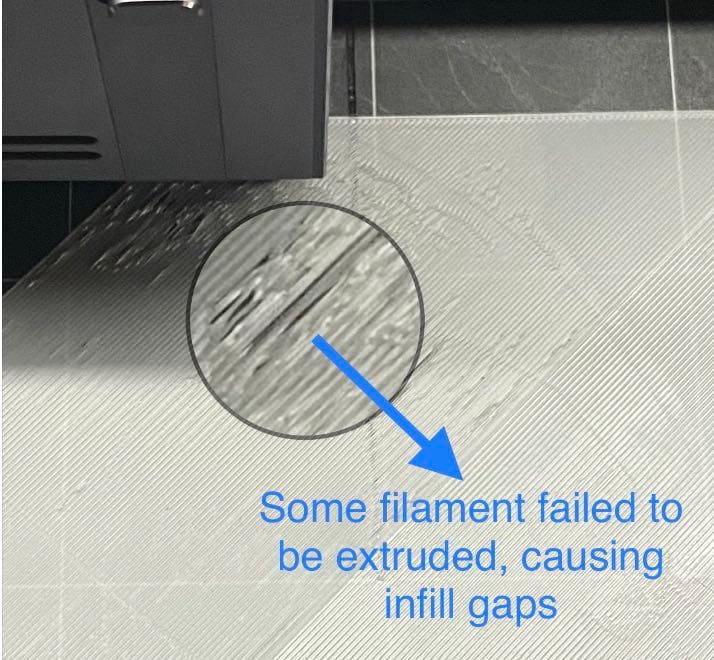
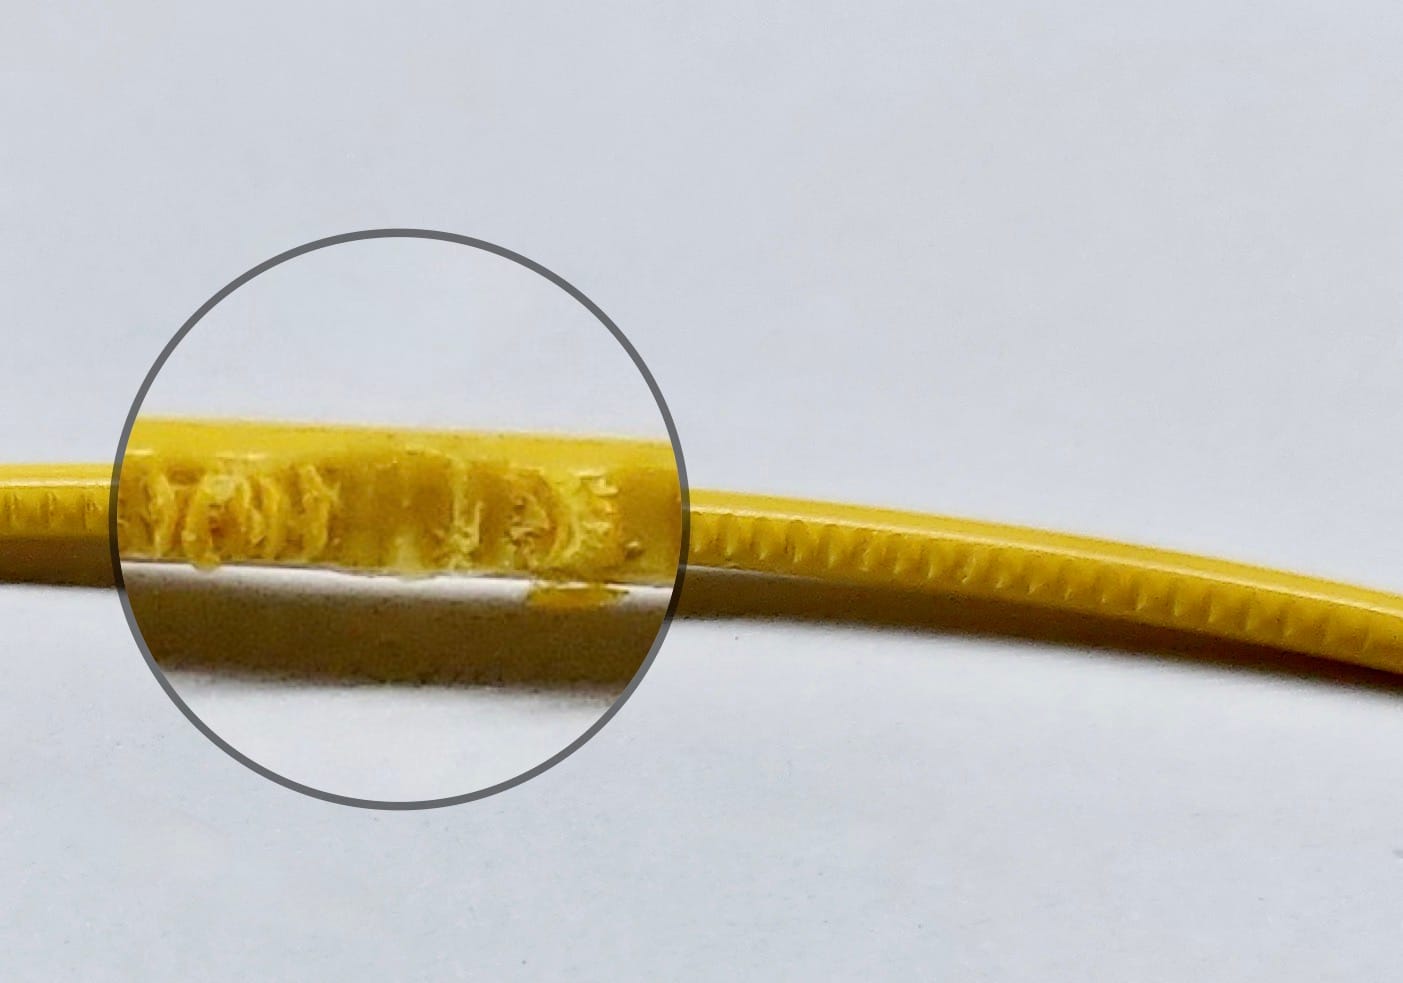
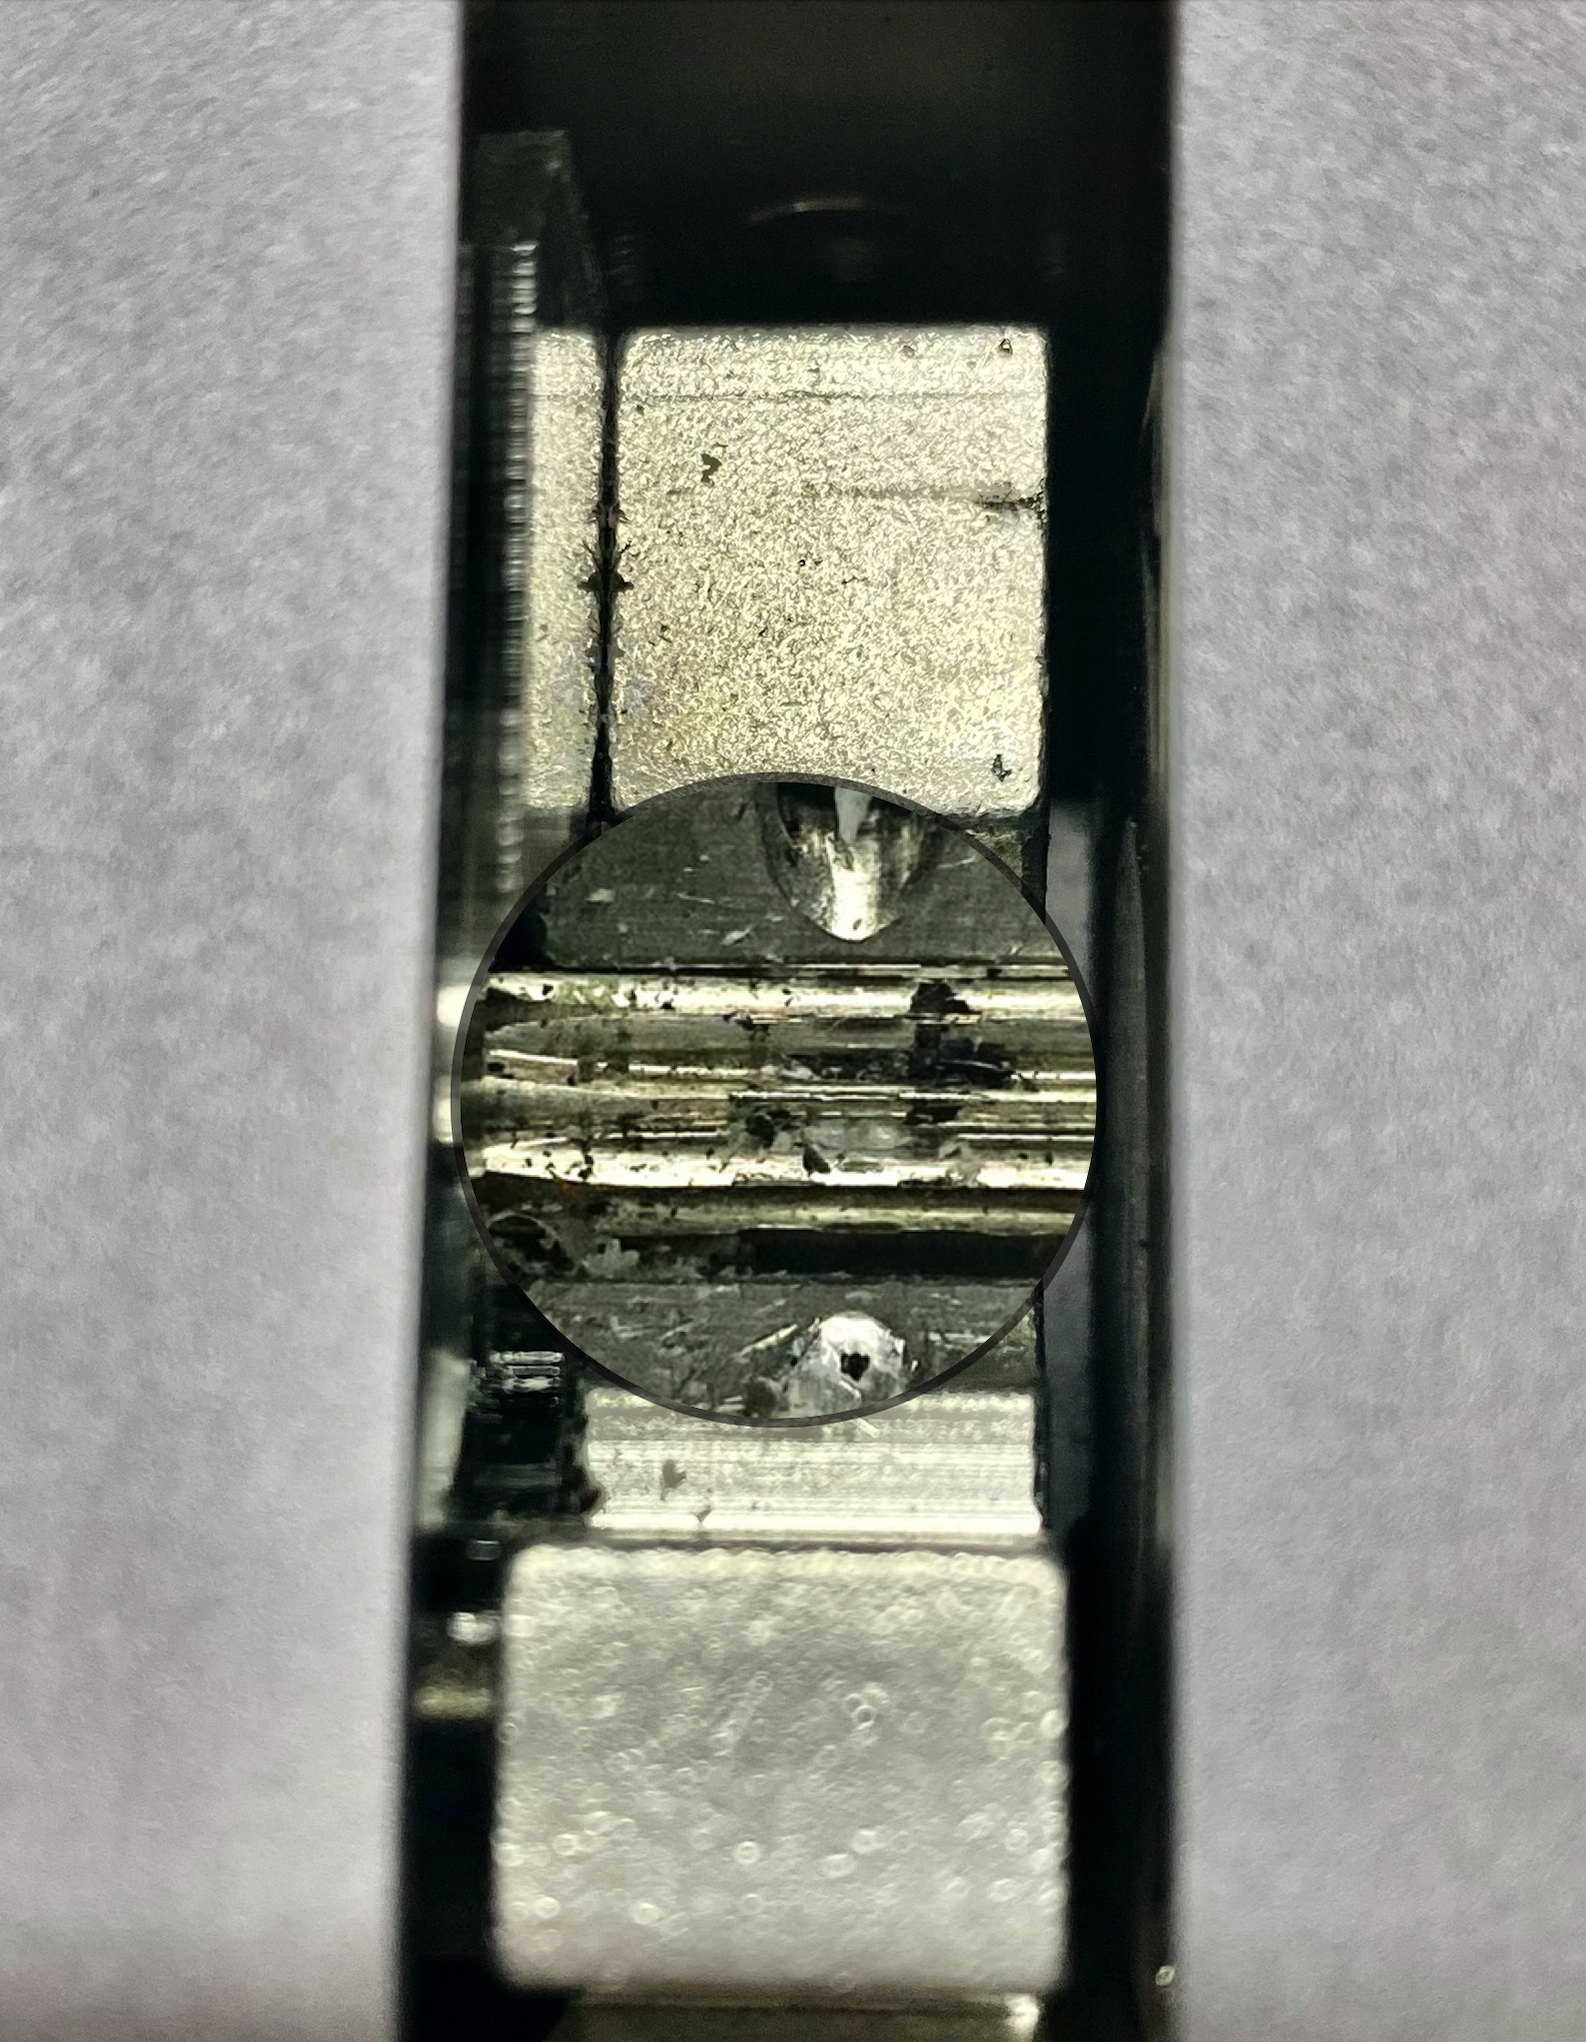
In the former case, the filament can be extruded from the nozzle, but it will show some unusual signs. For example, you find debris in the gears if opening the front cover of the 3D Printing Module; the nozzle extrudes much thinner filaments than usual; or the extruded filament has a rough surface.
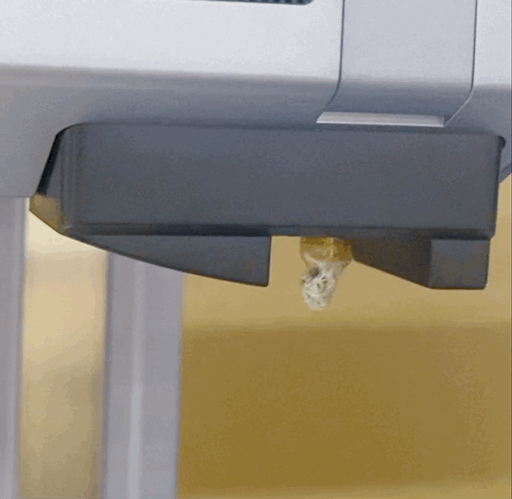
For the latter, it is much easier to tell if the nozzle is clogged. For example, as we described at the beginning of this article, the module idles and no filament is extruded out; or the filament has been inserted into the module, but no filament is extruded when you load the filaments after the nozzle is heated.
How to Avoid
You are lucky if your 3D printing module is free from the above abnormalities. But, you still need to prepare for a rainy day. The easiest way is to go against the causes:
- Buy filaments produced by qualified manufacturers;
- Protect your filaments from dust and moisture;
- Check if the filament will break easily before printing;
- Set a proper printing temperature for different types of filaments;
- Empty and clean the nozzle as soon as possible after printing;
- Remove the filaments and store them properly if the 3D printer will be left unused for a long time;
- Always turn on the printer and heat up the nozzle before unloading, changing, or loading the filament.
How to Clean
Here are some methods of cleaning your nozzle in printing routines and after clogging.
Routine Cleaning
- Turn off the printer and wait for the nozzle to cool down, then disassemble the nozzle and clean its outer surface with a cotton swab dipped in anhydrous ethanol. Please take protective measures beforehand, such as putting on gloves.
- If you do not want to turn on the printer, you can detach the nozzle and then heat it with a heat gun before performing the cleaning. But you need to be careful to prevent burns.
Start the printer and heat the nozzle, then clean it with tweezers after the filament on the outside of the nozzle is melted.
Clogged Nozzle Rescue
- If the nozzle has been clogged already, first check if the nozzle tip is sealed by residues against its outer surface. If yes, follow the daily cleaning steps to remove the residues and see if the filament can be extruded smoothly.
- If the type of filament that clogs the nozzle is known for sure, heat the nozzle and insert a harder filament with a higher melting point into the 3D Printing Module to unclog the nozzle.
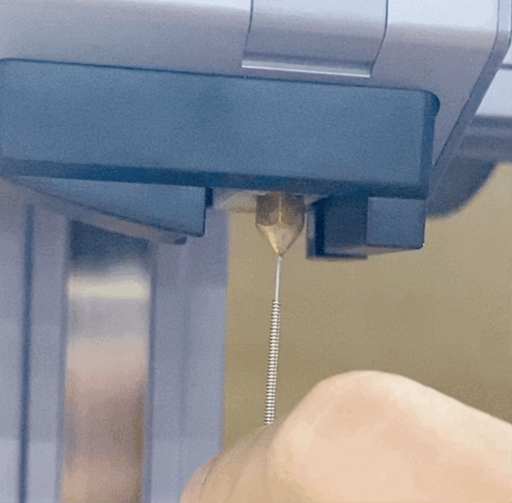
If the nozzle is clogged inside, first heat up the nozzle, unload the filament and then insert a needle slightly thinner than the nozzle inside to unclog it. You can also use a wire or guitar string as an alternative, as long as it can be inserted inside.
We hope this article could be useful for you.
In the future, Snapmaker Academy will bring you more exciting topics, so STAY TUNED!
If you are interested in other topics of 3D printing, feel free to contact us at support@snapmaker.com, or leave your message in the community.
Disclaimer
All the methods in this article are for reference only.
Snapmaker does not assume responsibility for loss, injuries, damage, or expense arising from or in any way connected with the methods in this article.